1. Terms & Conds
  2. Contact Us
  3. Search
  4. Your One-Stop Craft Shop

My Basket

Items:  items
Value: 


Charmed Cards & Crafts - UK Card Making and Scrapbooking Supplies

How To - Shaker Cards

Shaker Cards

Shaker cards are fun and easy to make. The box gives a great focal point on your card and will delight any recipient. We have given easy to follow step-by-step instructions below, plus provided a couple of examples with instructions on how to complete.
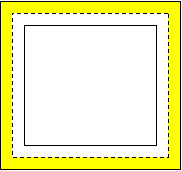
Step 1

Step 1

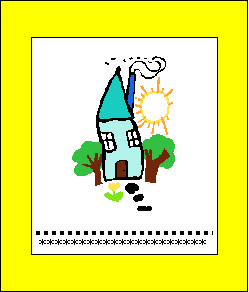
Attach a piece of clear acetate to the back of your chosen frame. The acetate is shown as a dotted line on the picture laying on a yellow frame. This will be the "window" on your box.

TIP - To prevent finger prints and glitter sticking to the acetate wipe the acetate with an anti-static cloth.
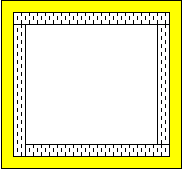
Step 2

Step 2

Attach strips of foam tape to form a square on top of the edges of the acetate, inside the frame. Do not remove the top tape yet. Make sure that there are no gaps as your chosen filler can escape. If you wish to have a higher void you can build the layers of the foam tape up to the desired height.
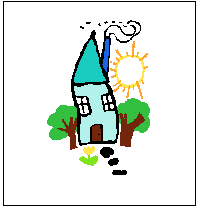

Step 3

Step 3


On a piece of card, or directly onto your card if you so wish, either stamp an image, or add an embellishment of your choice.
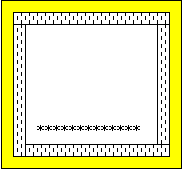
Step 4

Step 4

Remove the strips from the foam tape. This is best done BEFORE adding the filler. Add you chosen filler. In the examples below I have filled one with tiny heart buttons and the other with pink Caviar beads. Don't overfill, you really don't need a lot. Add to the centre to avoid sticking to the tape.


Final Step

Final Step

Carefully place your stamped image onto the foamtape and press to seal.

Shaker Card - Example 1. See instructions below.

Shaker Card - Example 1. See instructions below.

Example 1 Instructions.

This card uses a sheet of Bazzill Bling heavyweight cardstock.

  • Measure the size of card you want on the Bazzill Bling cardstock. For an A5 card cut a rectangle measuring 29.5cm x 20.75cm. Fold and score. This is your card ready. Do not dispose of the strip of cardstock you have left, you will need this for the shaker box.
  • Cut a rectangle of plain pink vellum and emboss the edge. Put aside. This will fit underneath the shakerbox on one side. You also need to emboss the age of the recipient on the vellum, this is best done when all components are ready and you can lay everything onto your card to ensure the correct layout.
  • Draw a frame on the strip of leftover Bazzill Bling cardstock. Measure carefully to ensure you have the right size. Make it so that when in place there will be a little gap at the top and the bottom of the card. Cut out the frame using a craft knife. Ink the edges, both the inner and the outer edge, then draw flowers all around the frame with glossy Glaze pens.
  • On a piece of Baby Pink Pearlescent card stamp a "Happy Birthday" greeting (I used a Heidi Swapp Clear Stamp). Emboss with Black Super Sparkle embossing powder. Make sure all excess powder is off before making up the shaker box. Blowing gently should remove it. Make up the shaker box as described above. I built up the foam tape so that the heart buttons moved freely.
  • Print and cut out four button flowers from the Wings & Flowers CD. The CD is available to buy in our shop, we also have a free demo which you can download from the Competition page. For best effect print on photo paper.
  • Position all the components on your card and work out where you want the name of the recipient. Remove everything again then emboss the name. Draw directly onto the embossed letters with a white or clear Sakura Glaze pen, then immediately sprinkle with ultra fine glitter.
  • Position the pink vellum onto the card (do not stick it down) to find out where you want the age of the recipient. Emboss the number, draw onto it with a Glaze pen and again sprinkle immediatly with ultra fine glitter. Lightly spray the back of the pink vellum with Spray Adhesive and position onto card below the name.
  • Glue on the flowers in a row leaving the petals free to give a more realistic look. You do not need to glue below the shaker box so make sure you know where that will be. Stick the shaker box onto the card using Glue lines.
  • Finish the card with a suitable embellishment. Here I used a 3D Bear and balloons.


  • Click here to see a larger version of the finished card.


    Shaker Card - Example 2. See instructions below.

    Shaker Card - Example 2. See instructions below.

    Example 2 Instructions

  • Wrap a large A5 card in Karen Foster Birthday Doodles paper..
  • The shaker box on this card uses a large ready-made yellow frame (available from our online shop). Cut a piece of coordinating cardstock and emboss the background - in the example I used the Quickutz Swirl Embossing die on a piece of green scrap Bazzill Bling cardstock. Make up the shaker box as per instructions above. The focal point here is from the DCWV "Party" Chipboard Sticker Stack. The filler is Fuchia Caviar beads.
  • Emboss the name of the recipient and cut each letter out individually. Trace each letter with a Sakura Gelly Roll Glaze pen then immediately sprinkle with glitter. Leave to dry then shake off all excess glitter. Ink edges of each piece of card then place on black bazzill to contrast as shown. Place onto card, with some of the letters elevated using foam pads.
  • Cut out a round tag (I used a Quickutz die). This will be the balloon. Place a K&Co SK Round Tags Alphabet Embossed Sticker depicting the age of the recipient onto the balloon. Tie a length of silver cord to the balloon and stick into place leaving the cord free for the time being.
  • Arrange where you want to position the shaker box then run the silver cord from the balloon behind the shaker box. Tie a bow on the end of the cord, stick the shaker box down using Glue Lines, then stick the cord bow to the middle of the frame .


  • Click here to see a larger version of the finished card.

    Recently Viewed