- Terms & Conds
- Contact Us
- Search Your One-Stop Craft Shop


How To - Eyelets
Step 1....
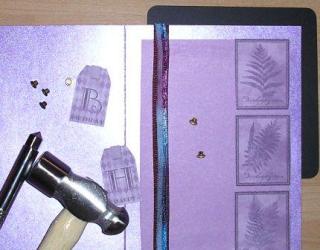
You will need the following tools: a hammer (the dinky hammers are great for the job as they allow you to put just the right amount of pressure on the eyelet), an eyelet setter, a hole punch to match the size of your eyelet, and of course your chosen eyelet. A self-healing mat protects your surfaces from getting damaged, but you could of course use an old chopping board or similar.
An important point to note is that you should not attempt to attach your eyelets if you have delicate embellishments on your card, instead choose an appropriate stage - for example in this case it was appropriate after embellishing with items beneath the tag, but before finishing with final embellishemtns that may have been damaged by the process of attaching the eyelets.
Step 2...
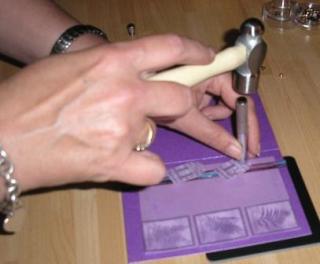
Now you need to make a hole in your card the same size as the eyelet you're using, Common sizes are 1/8" and 3/16". The hole is made using the hole punch, which you place exactly where you want the eyelet to be fixed. This punch has a round, hollow tip at one end that cuts a hole through the paper. Place the sharp edge of the punch where you want the hole to be and then give it a tap with your hammer. You could also use a long reach punch the size you require.
Step 3...
Step 4...
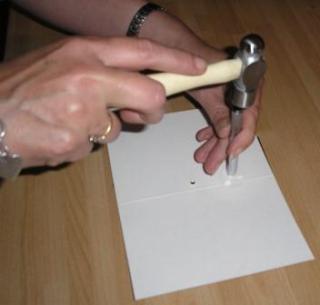
Turn your card over and place the eyelet setting tool against the straight end of the eyelet. Tap the end of the tool with a hammer which will make the tube flare out. You could leave it as it is, but if the edge is a bit rough you can finish setting the eyelet with the finishing tool. This gives a smoother finish to the back of the eyelet. The tool has a concave end that you place over the backside of the set eyelet. You tap it with the hammer just like you did with the setting tool.


Note
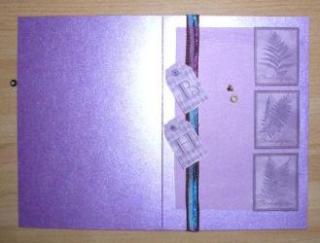
Note - The sharp eye may have detected that I placed the "H" and "B" (Happy Birthday) Tags (from the Hot Off The Press Cardmaker's Jewel Creative Pack) in incorrect order. Let's just say that I did that to illustrate the importance of ensuring the correct layout before making irreversible changes 
Recently Viewed
Some of our Favourite Brands:
What's New?

Mailing List
Enter your email address in the box below to join our mailing list: |

| Site Map |
Go Shopping
Shop Securely

Independently Verified:
Best Sellers


")
")
New Products


")

")
")
")


")
")
")
")
Socialise With Us


[Home][Products][Search Our Site][Terms & Conditions][Site Map]
| Free Online Classes | Card Making & Scrapbooking Ideas |
What we do: Charmed Cards & Crafts are main stockists of popular craft and scrapbooking brands such as Stamperia, Graphic 45 and Kaisercraft and Basic Grey , Bo Bunny and Prima Marketing - collections comprising flowers, scrapbook paper, paper pads for making cards, tons of embellishments, findings, stencils, stamps, mixed media and lots more - PLUS we also stock numerous other amazing crafting brands. Our product ranges have increased over the years, and encompasses most things. Apart from our main brands previously linked, here is a list of other main departments: Digital Downloads (as featured in all leading craft magazines, perfect for card making) -Dies, Stencils, Templates and Embossing Folders (includes craft dies and embossing folders from Find It Trading, Marianne Design, Kaisercraft, Spellbinders, Crafts Too, CottageCutz, Cuttlebug, Quickutz, Leane Creatif and Stencils/Templates from Hot Of The Press, Tim Holtz, Prima Marketing, Lasting Impressions) Craft Paper & Cardstock (includes 12x12 scrapbook paper, 6x6, 8x8 and 12x12 papers pads, vellum and specialist paper) -Craft Embellishment s (massive department that also houses our popular Flower Department , these flowers are superb whether making cards or scrapping) - Craft Stickers and Rub Ons - Inks and Rubber Stamps (we have a huge selection of both cute and eclectic rubber stamps and clear polymer stamps, plus all your essential stamping accessories) Altered Art Supplies - Scrapbook Albums & Journals - Paper Crafting Kits -Crafting Tools (includes We R Memory Keepers Sew Easy range)-Artist Trading Cards -Rangers Melt Art - Sticky Stuff (Adhesives, Modge Podge, Stickles, Perfect Pearls etc) - Blank Cards & Accessories - Pens, Paints and Mediums (includes PrismaColor pencils, Dylusions, Gelatos, Marker pens, paints) Ribbon, Fibre, Lace -Martha Stewart & Punches -Embossing | |