|
|
|
|
|
|
Charmed Cards & Crafts May '18 Kit Project Instructions
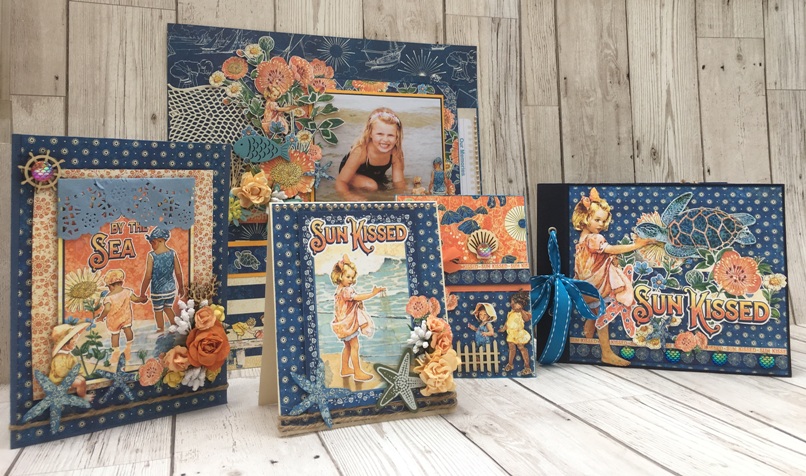
Here are project examples using our May'18 Kit, which is based on Graphic 45's beautiful "Sun Kissed" collection.
All projects were created by Karen Mortensen using one of the kits. You can see lots of projects using the kit via the pictures below.
|
|
||
|
|
s.JPG) |
 |
|
|
||
.JPG)
This album measures 8" x 6.25". I am using ribbon to bind the album together, you can use book rings instead if you wish. If using book rings you could omit scoring 1" on all the pages.
I am using eyelets for extra strength, please note these are not part of your kit, but they are highly recommended.
I am only creating four pages here, but you can include as many as wish. That is the beauty of this album, it can grow just by loosening the ribbon that binds it.
Print out your journaling cards. Print out two of each for the pages we are doing here.
.JPG)
The Covers
In your kit is a thin piece of cardboard. Cut two pieces measuring 8" x 6.25". Score 1" in on the long side. Punch through two holes for the eyelets. Mine are 1/2" in (so the middle of the 1" scored side) and 1.7" in top and bottom.
.JPG)
Cover the outside of the front and back cover in "Navy" cardstock - score one inch down first as on the covers.
Cover the inside of both front and back cover in "Blue Jeans" cardstock. Punch the holes through again
Make two pockets from "Floating Floral" . I did the two pockets in one go, and the piece below measures 12" across and 4.25" in height. You can see the reverse side of the paper here for additional guidance.
.JPG)
Cut a strip from the Navy cardstock and add on the reverse side as a top border.
.JPG)
.JPG)
The inside front measures 6.5" x 4.25". The leftover piece is slightly smaller and I used more of the navy cardstock to extend it as you can see below.
Attach with double-sided tape on three sides, leaving the top unstuck to form a pocket.
Do the same on the inside back pocket. Here I used the smaller piece of "Floating Floral" measuring 5.6" x 4.3" and added Navy cardstock around the edges for contrast. Again attach with double-sided tape on three sides to form a pocket.
.JPG)
.JPG)
.JPG)
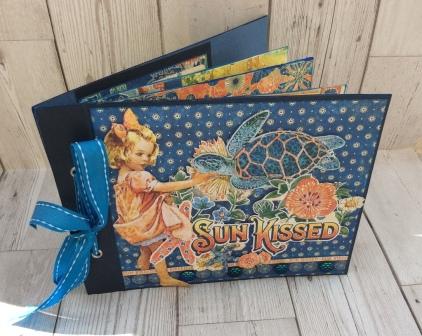
Cover the front of the album with the reverse side of "Sand dollar" Add images cut from the signature page (Sun Kissed) with mounted on foam tape for a 3-D effect. Add a border from "Kids at Play" and four blue Mermaid resin.
.JPG)
.JPG)
.JPG)
The Pages
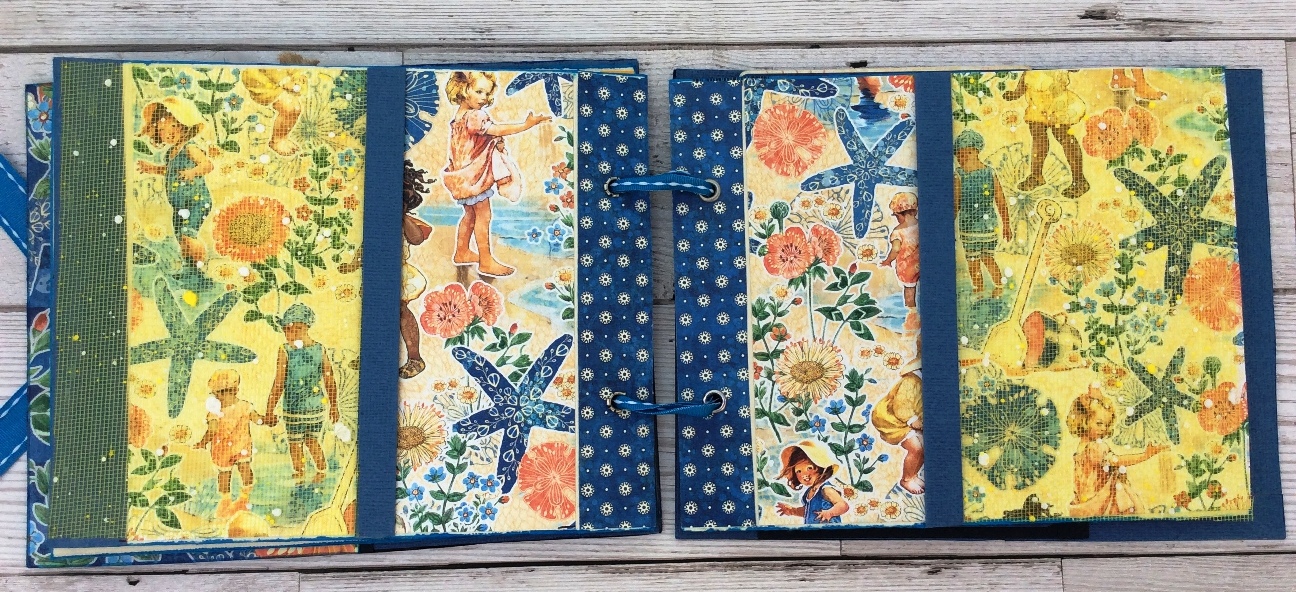
Using "Vanilla" plain cardstock, cut four pages measuring 7.5" (w) x 6" (h). You will have two pieces left over, keep those for the cards (see here). Ink edges with blue ink (optional).
Punch holes to match the covers.
.JPG)
Decorate the pages as follows:
Page 1 - Front:
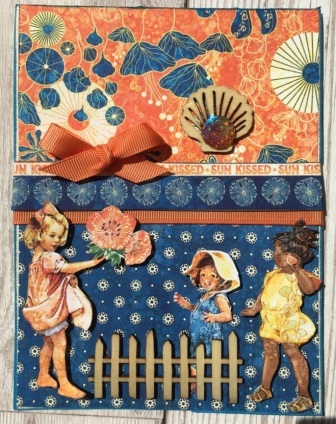
Make a pocket with a piece of "Floating Floral" measuring 6.3" x 3.25". Attach on three sides as before to form a pocket. Attach a girl from the signature page (Sun Kissed) on foam pads, and a blue starfish from "Splish Splash". Add a border on the side from "Kids at PLay". Re-punch holes.
.JPG)
This is now what you have when you bind with ribbon:
.JPG)
EXAMPLE USE: Using ephemera cards with own photographs on the back (Ephemera cards sold separately HERE)
.JPG)
Page 1 - Back:
If you haven't already print the journaling pages and mount one of the larger one on the orange cardstock. Attach to the page. Add a yellow strip as a border, re-punch holes.
.JPG)
Page 2 - Front.
Here I am making a little flip album. Use the sheet of "Pebble" for this. Cut it into size 5" across, leaving the longest length as it is (Kaisercraft cardstock is always a little longer on one side with the log etc on the back this is the lng side you want to keep).
.JPG)
On the long side score at points as below:
.JPG)
The size of the finished mini album here is 5.75" (h) x 5" (w). Once the base is folded it has two mini pockets to hold tags etc. So fold in top and then the bottom so they slightly overlap and attach with doubleside tape on the left-hand side to close the pockets and in the middle to stick together.
.JPG)
.JPG)
Create three identical pages:
cut three pieces of the "Pebble" cardstock into size 4.2" x 5".
Cut three strip of Melon cardstock into size 1" x 5". Score at 1/2"
.JPG)
Fold and put double-sided tape on the inside, one side ONLY
.JPG)
.JPG)
Attach each anchoring strip to the three pieces of Pebble cardstock, adhering the double-sided tape to the FRONT, not the back.
.JPG)
Add the reverse side of "Turtle Time" to the front of the three mini pages:
.JPG)
Attach them to your base with double-sided tape, starting at the top. See pictures below for guidance.
.JPG)
.JPG)
Add borders from "Kids at Play" in between the pages as depicted below.
.JPG)
At the bottom of your flip album make a little page with a pocket as below. I added a strip of Navy cardstock at the top of the pocket.
.JPG)
.JPG)
Attach securely to the page and add borders from "Kids at Play" either side. Add a blue band on the left-hand side (not shown here), BEFORE adding eyelets:
.JPG)
You can see tags inserted in the base pockets.
.JPG)
Decorate the front with borders from "Kids at Play", a tag from "Kids at Play", a child cut out from "Splish Splash" and a wooden anchor. I mounted the tag and child on foam tape.
.JPG)
This is now what you have when you bind with ribbon:
.JPG)
Page 2 - Back
Exactly the same as the back of page 1
Page 3 - Front:
Cover page up to fold with "Under the Sea". Make a pocket from the blue cardstock into size 6" x 3.2". Attach with double-sided tape on three sides before.
Decorate front with a piece of the blue jute ribbon and the fish border from "Kids at play". Add the fish border to the middle of the edge also. Re-punch holes.
.JPG)
This is now what you have when you bind with ribbon:
.JPG)
EXAMPLE USE: Using ephemera cards with own photographs on the back(Ephemera cards sold separately HERE)
.JPG)
Page 3 back and page 4 front
These two pages are almost identical.
Cover the front up to the fold in "kids at play. I didn't have quite enough so substituted the missing bit with a piece of blue cardstock.
.JPG)
Cut your yellow mesh into two pieces, just fold the long side and cut, it is the right size.
Cut two 6" x 1" strips from the blue cardstock. Score and fold at 1/2".
.JPG)
Attach double-sided tape to both sides:
.JPG)
Then fold over the top edge of the mesh:
.JPG)
and attach to page on three sides as before to form a pocket. Repeat on both sides.
.JPG)
Add the reverse of "San Dollar" to both the scored edges. Re-punch holes.
This is now what you have when you bind with ribbon:
EXAMPLE USE: Using ephemera cards with own photographs on the back (Ephemera cards sold separately HERE)
.JPG)
Page 4 - Back
Add a strip of "Under The Sea" (reverse side) to the scored edge:
.JPG)
then cover the remaining page with it too. Re-punch holes.
Make a pocket out of a piece of blue cardstock measuring5.75" x 3.5" (tape on three sides as before). Adhere the "Life's a Beach" image from "Kids at Play" to the top of the pocket. Pop one of the small journaling pages in the pocket (the smallest is used here).
.JPG)
This is now what you have when you bind with ribbon:
.JPG)
EXAMPLE USE: Using ephemera cards with own photographs on the back (Ephemera cards sold separately HERE):
.JPG)
.JPG)
.JPG)
![]()
All projects copyright ® Charmed Cards & Crafts. All rights reserved.
.JPG)
.JPG)