|
|
|
|
|
Charmed Cards & Crafts June17 Kit Project Instructions
These are the instructions for using our July 17 Kit. The kit is based on the Master Detective collection by Graphic 45. There are two sets of projects by two designers: Karen Mortensen and Cal Summers. Both used the kit and you can see below what they each made from one kit. © Charmed Cards & Crafts 2017
|
|
Karen Mortensen: |
|||
s.JPG) |
 |
s.JPG) |
s.JPG) |
|
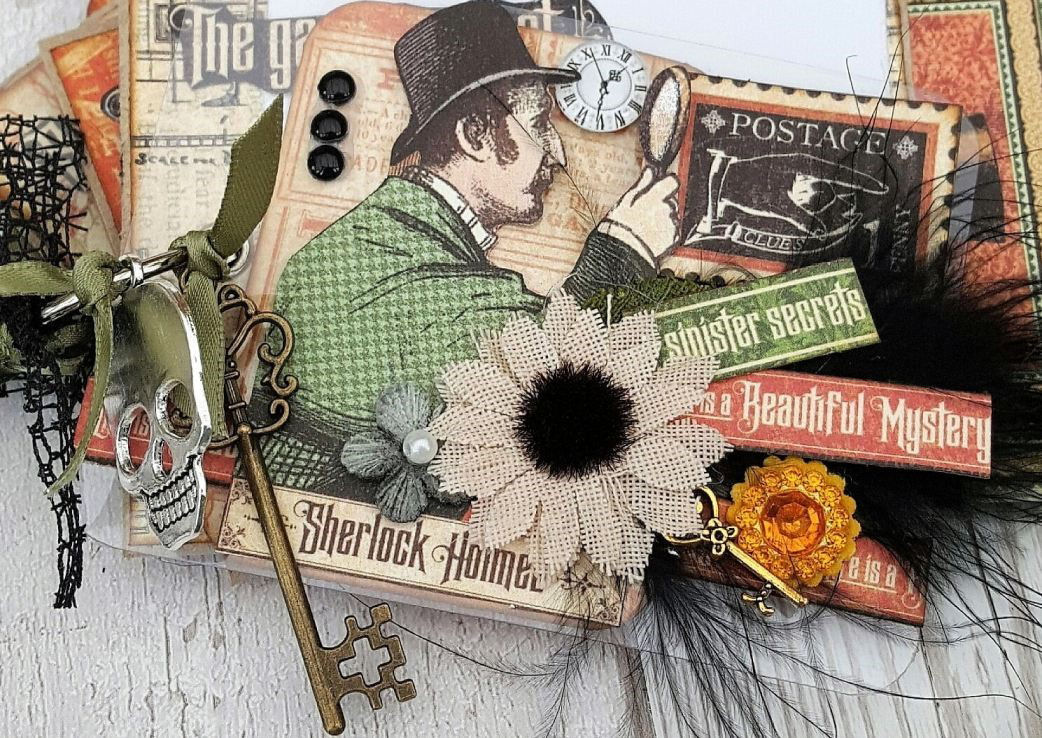
Box and Album Class |
Twist & Pop Card Class
|
||
s.JPG) |
s.JPG) |
-.JPG) |
.JPG) |
|
Waterfall Card Class |
|||
|
Cal Summers: |
|||
|
|
|||
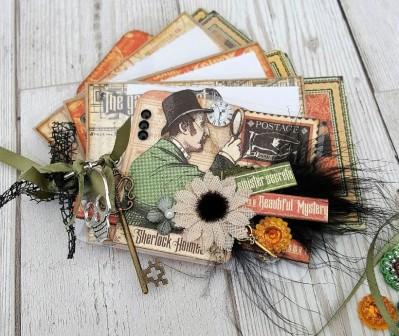
"It's Elementary" Birthday Card
by Karen Mortensen
A fun and easy to make card for a birthday celebration.
.JPG)
Fold a piece of 8.25" x 12" black cardstock Raven into a card size 8.25" x 6".
Cut a border from the signature paper "Master Detective" and glue to two of the sides.
Make panels of the reverse sides of papers Dastardly Deeds and It's Elementary. Ink edges with black in and stick in place. As you are using a large picture on the bottom you need not cover beneath that.
Cut out the figures and "Collected evidence" sign. Cut out the "It's Elementary Skeleton" piece. Take a piece of the orange web die-cut and the spider from your kit, and arrange everything as per pictures.
Add the large skeleton charm from the kit and top with a black pearl from the kit. I put a little black cardstock behind the eyes and nose.
Add the epoxy clock, three Prima flowers, metal key and make a bow of the black web ribbon - all in the kit.
Add glossy accents to the spider, flames and skeletons hat (optional).
Add the word "Birthday" using the velvet alphabet sheet in your kit.
CU3.JPG)
CU2.JPG)
CU.JPG)
.JPG)
Inside the card:
Cover the background with the Lime Crush cardstock. Add panels of the reverse sides of papers Dastardly Deeds and It's Elementary edged with black ink.
Cut out birthday sentiment from your sentiment sheets and put four black pearls in each corner.
Add a border as the front and black web ribbon at the bottom.
.JPG)
.JPG)
.JPG)
.JPG)
A super quick five minute card.
.JPG)
Cut a 12" x 4.6" piece of Vanilla Cardstock from the kit and fold it into a card 6" x 4.6".
Cut a piece of 6" x 3.75" Raven cardstock and stick it on the front.
Cut a piece of 5.5" x 3.5" "Beautiful Mystery" paper and stick it to the front (see pictures for guidance).
Cut out three postage stamps from "whodunnit?" and mat on raven cardstock. Stick to front.
Stick a piece of Apricot ribbon onto raven cardstock. Adhere below the postage stamps and randomly embellish with Prima jewels from your kit.
Attach the following from the kit: Kaisercraft large bloom - Metal clock face charm - black pearls made into a swirl - feather - black metal corner - black pearls forming a border on top.
Use Glossy Accents in the flames (Optional)
Decorate the inside as you like.
-cu.JPG)
-CU.JPG)
.JPG)
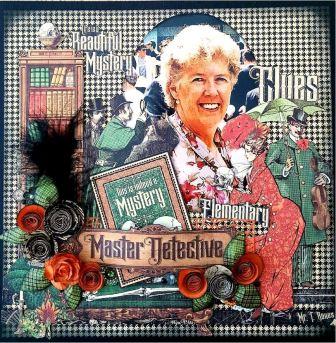
"My Mum the Master Detective" 12x12 Layout
by Cal Summers
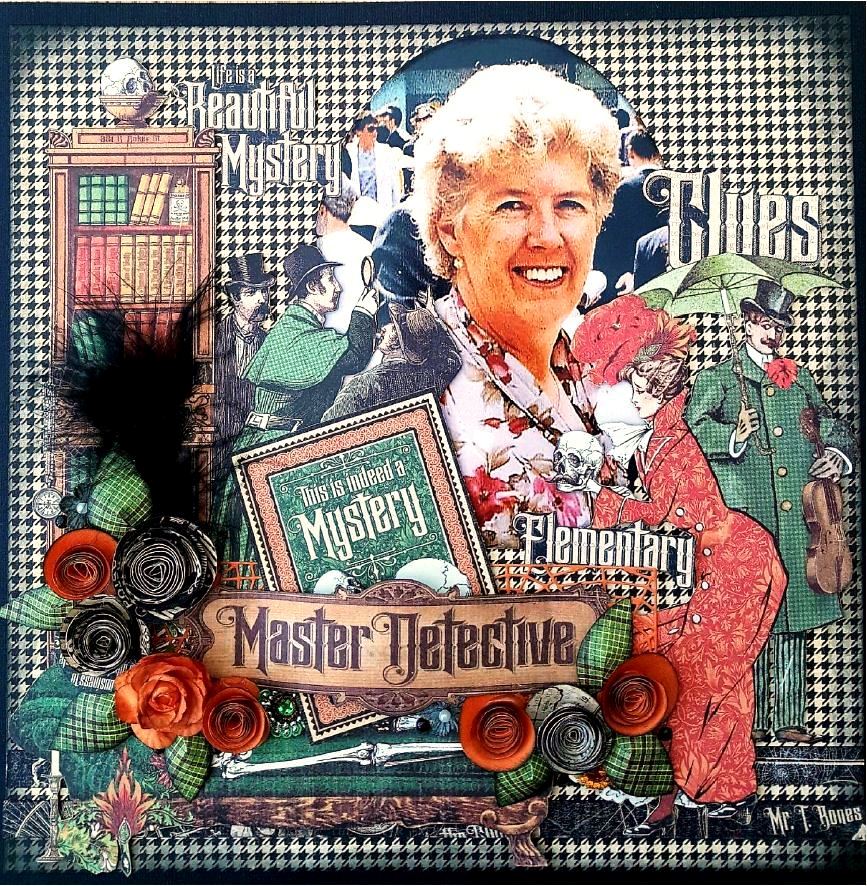
Papers Used: "Detective" - "Get a Clue" - "Dastardly Deeds" - "Its Elementary" – “Sinister Secrets” –. Plain cardstock “Apricot” “Raven”
All embellishments are from the kit.
I made this layout to celebrate all the hard detective work my mother put into tracing our family tree.
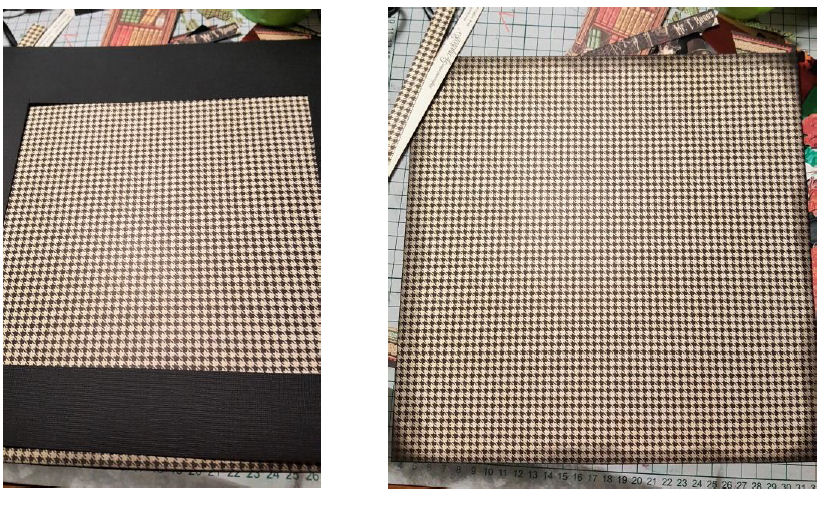
1. Take the back of the “Dastardly Deeds” paper and trim around half an inch from two sides to make a piece 11.5 x 11.5 inches. Ink the edges of this piece with black ink. Ink quite substantially. Adhere this to the 12x12 “Raven” cardstock. I cut a large square out of the centre of my cardstock to use on another project as it wouldn’t show when the patterned paper was stuck on top of it.
2. I fussy cut the largest images from the “Detective” paper. I stuck foam pads on the back to raise it slightly off the paper. I took my photo and adhered it to the page right in the middle of the piece I had fussy cut. I then laid the fussy cut image on top pf the photo.
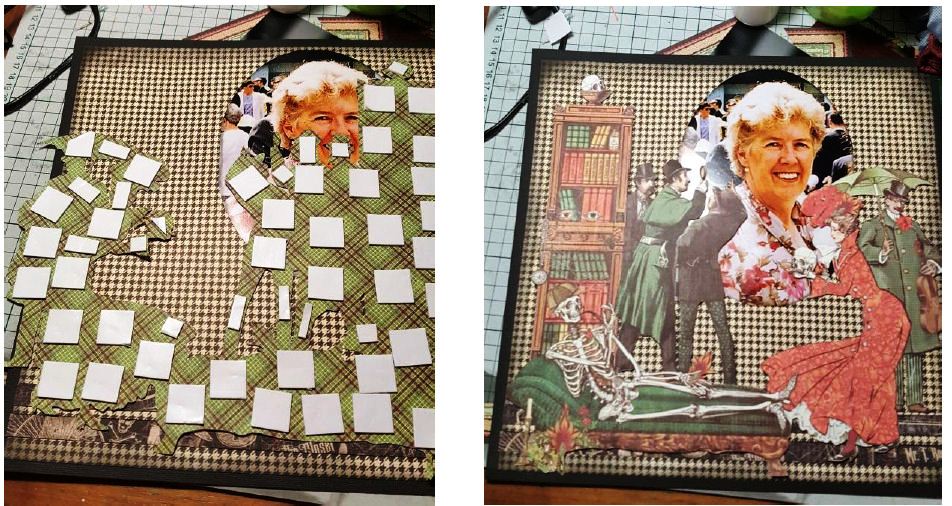
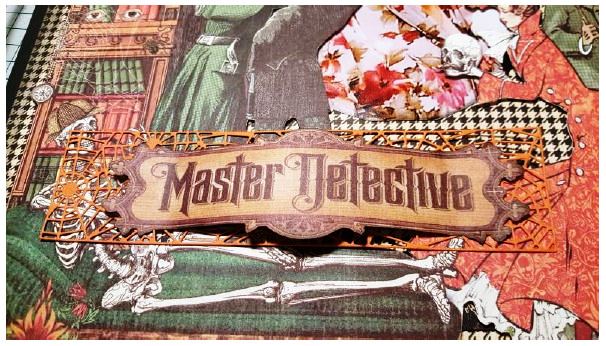
3. Take the orange cobweb die cut and adhere it over the reclining skeleton at the bottom of the page. Cut out the words “Master Detective” from the “Detective” paper and glue onto the die cut by its edges ensuring it is curved in such a way you would be able to slip something behind it.
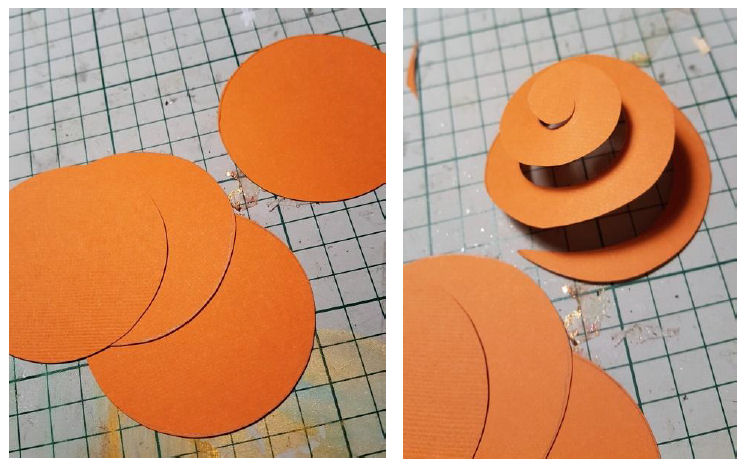
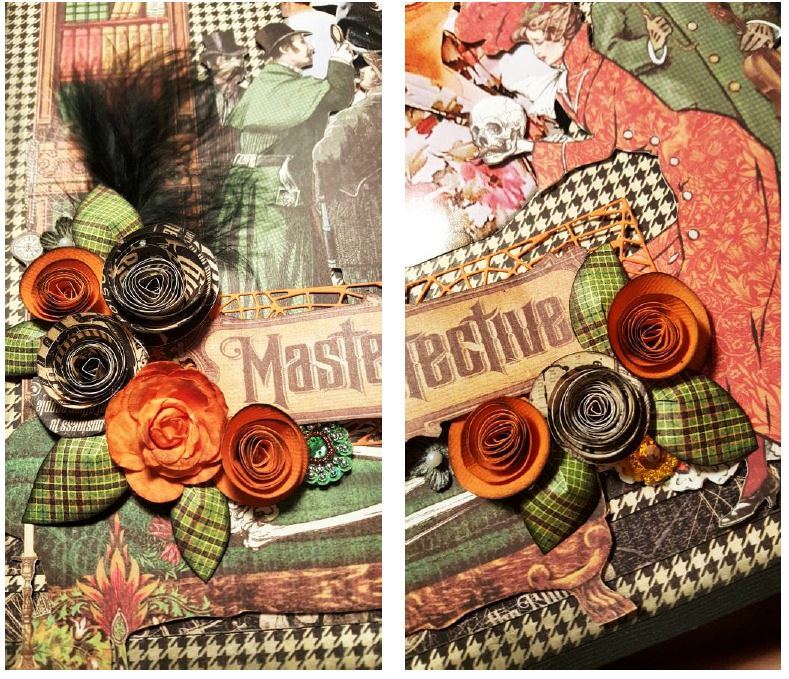
4. Make some rolled roses. Cut four circles from the “Apricot” cardstock and three from the “Get a clue” patterned paper – each circle approximately 2.5 niches in diameter. The cut each circle into a spiral. Working from the outside in, roll the spiral quite tightly until you reach the middle of the circle. Use a glue gun to glue the rolled rose to the middle of the circle . TIP: it’s a good idea to let the rose unwind a little between your fingers before you glue it. Ink the edges of the rose with black ink. Adhere these to the page along with the large orange Kaisercraft Bloom from your embellishment pack.
5. Make some leaves to go with the flowers on your layout. Cut a basic leaf shape from some of the back of the “Detective” paper you have left over and then cut a slit in the middle of the leaf to about half way up. Pop a spot of glue onto one side of the slit and take the paper from the opposite side and lift it onto the glue so you get a curved and shaped leaf. When the glue is dry trim to a leaf shape and edge in black ink. Glue to your layout.

6. Finally add half of the feather, some of the other flowers from the embellishment kit and some of the black pearls. Cut out some phrases from the “Get a Clue” paper and adhere to your layout. Finally use one of the cut aparts “This is indeed a mystery” and slip it behind the “Master Detective” title you curved earlier. You add your journalling to the back of this card.
by Cal Summers

Papers Used: "Get a Clue" - "Whodunnit?" - "Sinister Secrets". and Acetate sheet. All embellishments are from the kit.
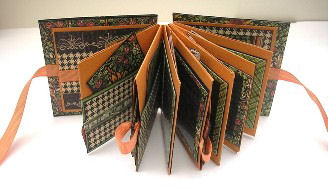
1. Collect the middles of three toilet rolls and flatten.
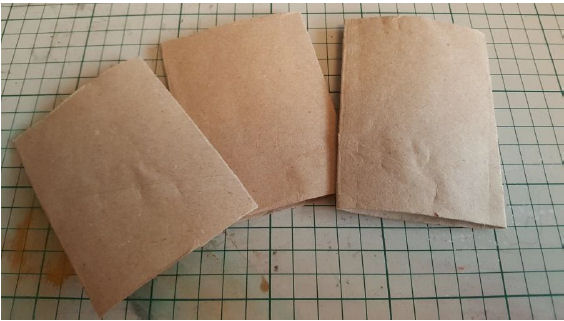
2. I measured the size of my toilet roll pages and cut six pieces of patterned paper (from “Get a Clue” and “Sinister Secrets” front and back of the page) to fit – only very slightly smaller than the toilet roll page. I then inked the edges.
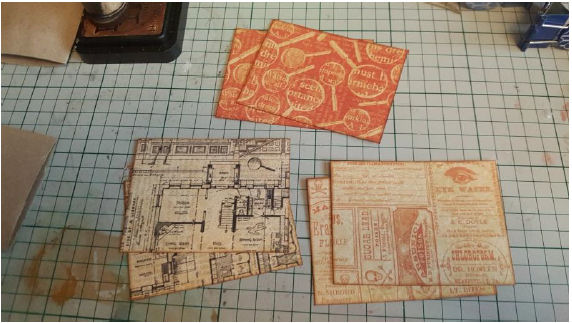
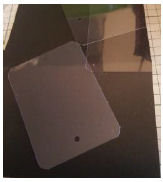
3. I then cut four pieces of the acetate the same size as the toilet roll pages and put a hole in the centre of each piece but about half an inch away from the edge.
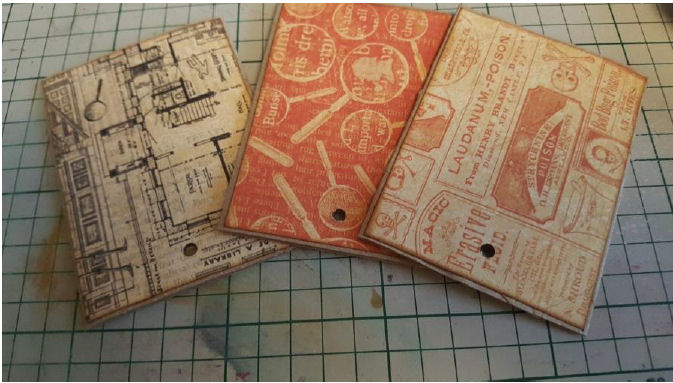
4. Stick your patterned paper to the front and back of your toilet rolls but do it in a way that when you open the book facing pages are the same patterned paper. So the front of one page is “Get a Clue” on the back of this page is the front part of “Sinister Secrets”. The next page has “Sinister Secrets” (front side) on the front and “Sinister Secrets” (back of page) on the back. The next toilet roll has the back of “Sinister Secrets” on the front and the other pieces of “Get a Clue” on the back. Punch holes in each of these pages at the same spot you have made a hole in the pieces of acetate so that they all line up. I put eyelets in my holes for extra strength but this is purely optional.
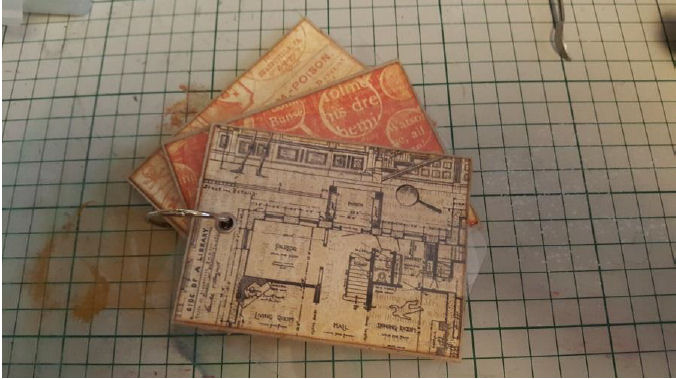
5. Now line up your mini book so there is an acetate page at the front, then the first toilet roll, then an acetate sheet, second toilet roll page, third acetate page, third toilet roll page, and lastly a final acetate page.
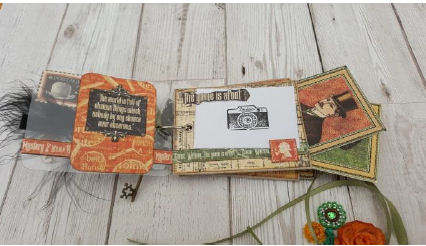
6. Now you can build the pages up using embellishments from the kit embellishment selection and cut outs from the “Whodunnit ?” sheet. Remember when adding decoration to the acetate sheets to line everything up as you may see through onto the back side. Use the photos below as a guide but remember that in between each toilet roll page is an acetate sheet that is also decorated.
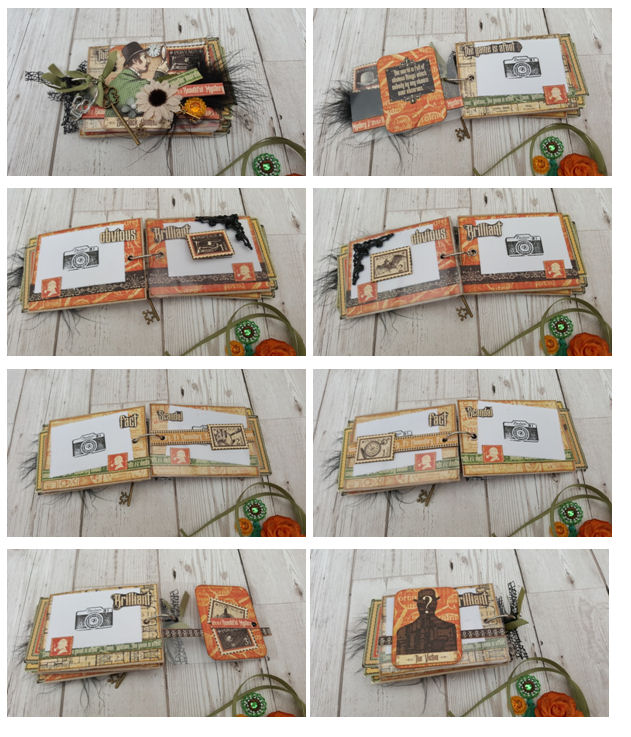
7. Cut the playing cards out of the “Whodunnit ?” paper and use as tags in the openings of each toilet roll page.
8. Embellish the front of the mini with ribbons tied to the book ring and some of the gems and the feather (cut the feather in half and just use one piece of it).
by Cal Summers
Here Cal used the kit to create a fun layout:
.jpg)
.jpg)
.jpg)
.jpg)
.jpg)
ALL PROJECTS © Charmed Cards & Crafts 2017.. All rights reserved.

s.jpg)