|
|
|
|
|
|
Charmed Cards & Crafts March '18 Kit Project Instructions
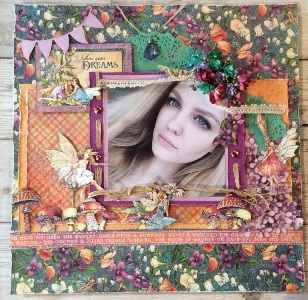
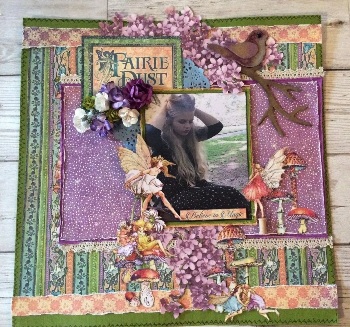
Here are card examples using our March'18 Kit, which is based on Graphic 45's beautiful "Fairie Dust" collection.
All projects were created by Karen Mortensen. You can see layouts using the kit via the pictures below.
|
|
|
|
|
|
 |
 |
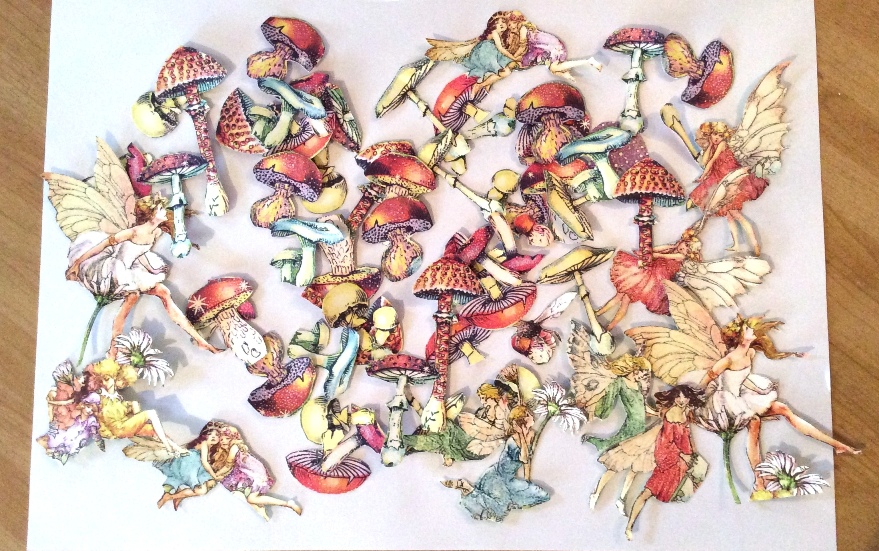
Start the projects by fussy cutting a heap of designs from Tiny Toadstools and Pixie Prance. Don't cut everything out as you need some of the paper for projects. I suggest you read through everything first:
-.JPG)
I created a twist and pop card for our July kit last year, and using this fun card here. To construct the card please see detailed instructions in our class HERE. I actually used the white card I created for that class, so the card and lime background cardstock is not part of the kit. The green in your kit is a far better substitute so use that here. You can see how it unfolds on our Instagram page HERE.
Decorate the inside first. Cover with the green cardstock in your kit. Add images and borders as depicted from "Dreamland" and "Magic Wishes" paper, toadstools are cut from "Tiny Toadstools".
.JPG)
For the pop out panels inside the card cut four pieces of "Grape" cardstock into size 2" (H) x 2.3" (W). Adhere to the top of each panel. I then sprayed with a ink mist but this is optional. Cut out four stamps from "Magic Wishes" and adhere as depicted, along with toadstools (from "Tiny Toadstools") and hydrangea (from Magic Wishes"). Cut out the "Believe in fairies..." border from "Magic Wishes" so it follows the story across (see pictures for guidance" and stick as depicted along with the appropriate borders as shown. I finished off with dots of Liquid Pearls (Optional)
.JPG)
.JPG)
.JPG)
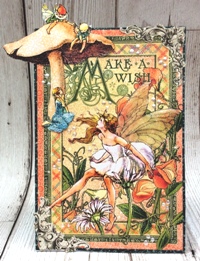
Cut out the Make a Wish panel from the "Dreamland"paper and adhere to the front of your card. Cut out the big toadstool from "Dreamland" with the fairies at the bottom and the two at the top and adhere as depicted.
I used Glossy Accents on the large fairy's wings, then sprinkled with glitter. It really gives a lovely 3-D effect.
.JPG)
I had a couple of corners that I added and dotted Liquid Pearls randomly on the front to finish.
.JPG)
![]()
.JPG)
A very easy card. to make.
Cut Blossom cardstock into a card sized ^6" x 6"
Cut a piece of "Violet Bouquet" into size 5.8" (W) x 5" (H), adhere to the top of the card. Add border from "Magic Wishes"
.JPG)
Mount the "Believe in Magic" panel from "Dreamland" on cardstock and adhere to the right-hand side of the card
.JPG)
.JPG)
Add a lace border as shown
Add cut out fairies from "Pixie Prance" leaving areas unstuck for a 3D effect, leave the wings on the big fairy largely unstuck
I added Glossy Accents and lots of glitter to the wings as shown here (OPTIONAL). Add Glossy Accent, sprinkled with lots of glitter, leave to dry then brush off excess.
.JPG)
.JPG)
When it dries it will become more opaque
Add your die-cut banner if you haven't already used it on the layout.
.JPG)
Add pearls if desired (OPTIONAL)
.JPG)
![]()
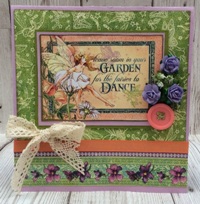
"Leave room in your garden" Card
.JPG)
Another very easy card to make. Again I am using the blossom cardstock as the base card, but any of the plain cardstock in your kit will look nice.
Cut plain cardstock into size 5.8"(W) x 6.5"(H)
Cut a piece of Pixie Prance into size 4.5"(H) x 5.7"(W). Ink edges (optional) then add to the top of the card showing the REVERSE side of the paper.
Mat "Leave room in your garden" from "Magic Wishes" paper on two different coloured cardstock then adhere to front of card
Add border from "Magic Wishes" and a piece of the coral ribbon from your kit.
.JPG)
Embellish with the smallest bouquet from your kit and the button. Add the lace ribbon.
.JPG)
.JPG)
You could embellish further, for example cut out the fairies from the background paper, as here when I added one to the button:
.JPG)
You can add Gold Stickles to the button in the shape of a stitch if you like.
.JPG)
.JPG)
![]()

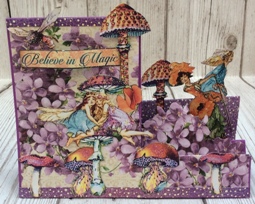
This is a small side-stepper card. If you want it larger increase sizes appropriately.
Cut the "Grape" cardstock into size 8.5" x 5.5"
Draw a faint pencil line (that you can rub out later) 2" in on the long side
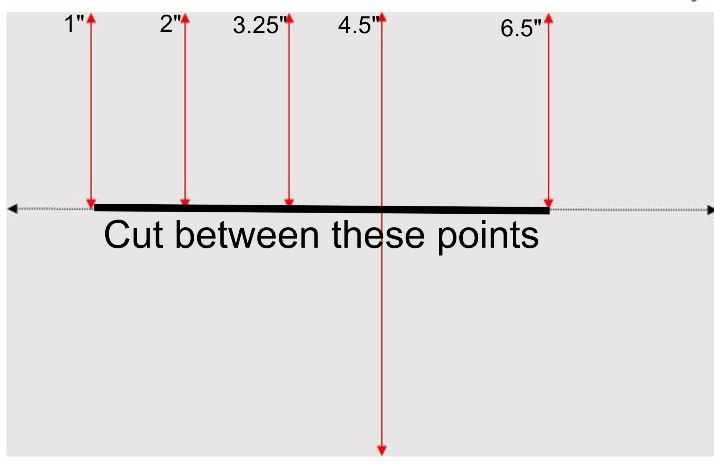
Score to the pencil line at point 1" - 2" - 3.5" - score all the way down at 4.5" - score again to the pencil line at point 6.5"
See diagram below
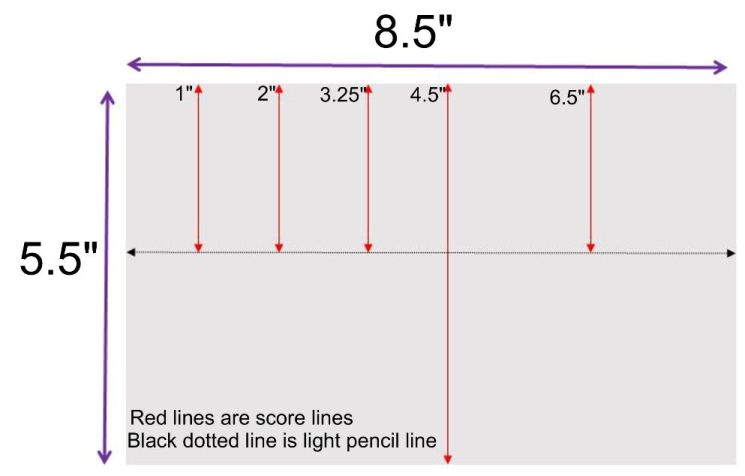
Cut on the pencil line from the first score to the last score
Now fold your scored lines in the following fashion: mountain fold - valley fold - mountain fold - valley fold - mountain fold
To stop it from opening too far I added a strip of Grape cardstock to the inside. Fold a little at each end of the strip and adhere. Make it as long as you want it to be able to open:
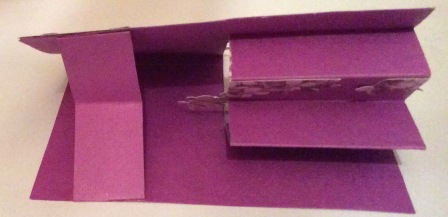
Cover your card with "Violet Bouquet", including some cut out hydrangea, and the reverse of "Tiny Toadstools" as shown:
.JPG)
Decorate with cut out elements from "Tiny Toadstool" and "Pixie Prance". Add "Believe in Magic" from the "Magic Wishes" paper, elevating it in the middle and only adhering the sides:
.JPG)
.JPG)
.JPG)
.JPG)
![]()
All projects copyright ® Charmed Cards & Crafts. All rights reserved.
-s.JPG)