|
|
|
|
|
|
Charmed Cards & Crafts March '18 Kit Project Instructions
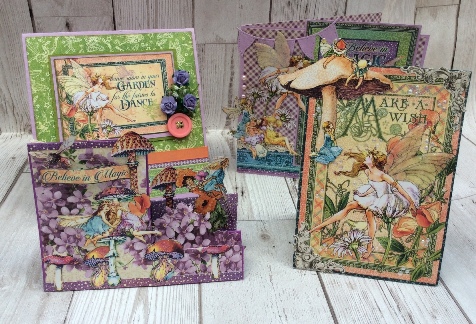
These are the instructions for using our March'18 Kit, which is based on Graphic 45's beautiful "Fairie Dust" collection.
All projects were created by Karen Mortensen.
|
|
 |
|
|
|
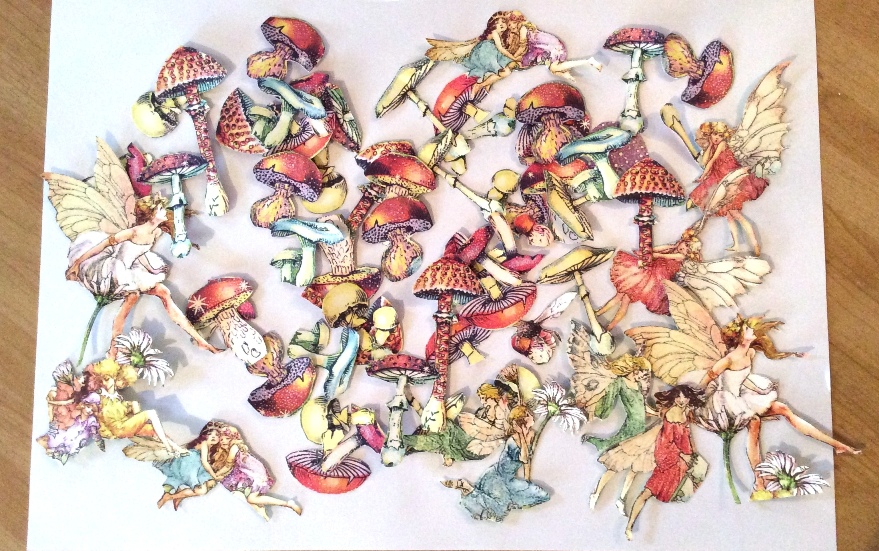
Start the projects by fussy cutting a heap of designs from Tiny Toadstools and Pixie Prance. Don't cut everything out as you need some of the paper for projects. I suggest you read through everything first:
by Karen Mortensen

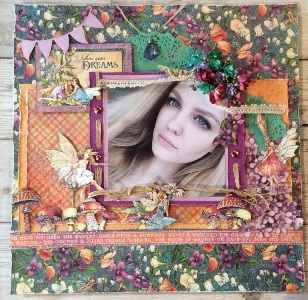
Materials Used:
Papers: Moonlit Blooms, Magic Wishes, Pixie Prance, Tiny Toadstools, Violet Bouquet, Plain cardstocks Melon, Blossom and Grape. Embellishments all from kit. Spray Ink Mist (Optional)
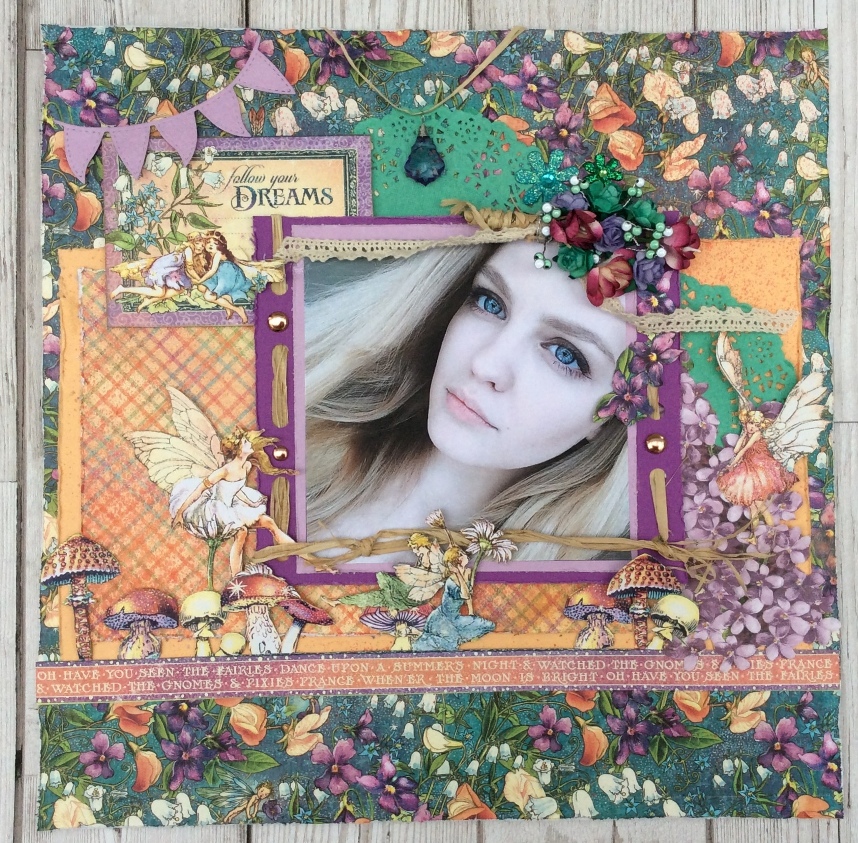
I am using "Moonlit Blooms" as my background paper. I want to use the reverse side too so cut out the middle that you won't see, I cut a piece measuring 27cm x 15cm:
.JPG)
Cut a slightly larger piece of the plain paper "Melon". Distress the edges using either a distresser or your finger nails to rough them up, curl them up slightly.
.JPG)
Cut a piece of the Moonlit Blooms you cut from the centre, measuring 21.5cm x 14cm. Distress edges:
.JPG)
and stick onto the Melon cardstock showing the reverse side of the paper:
.JPG)
Distress all the edges of the Moonlit Bloooms background paper.
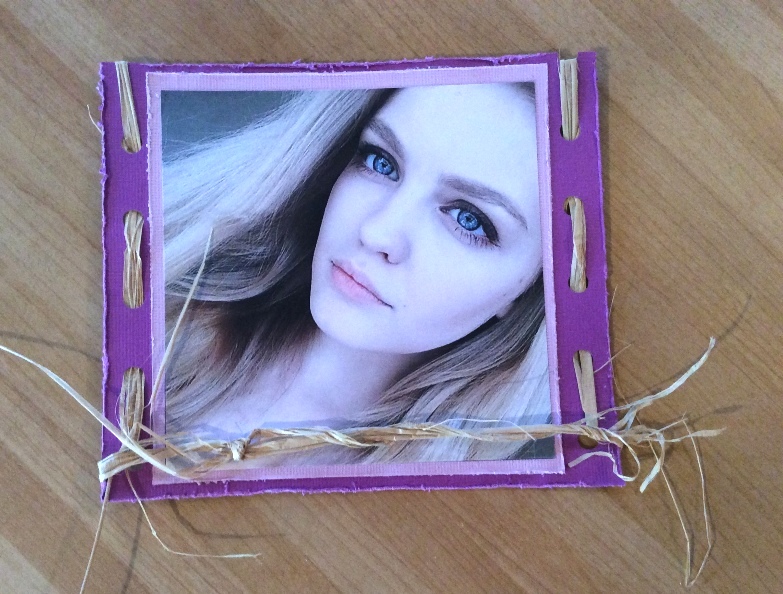
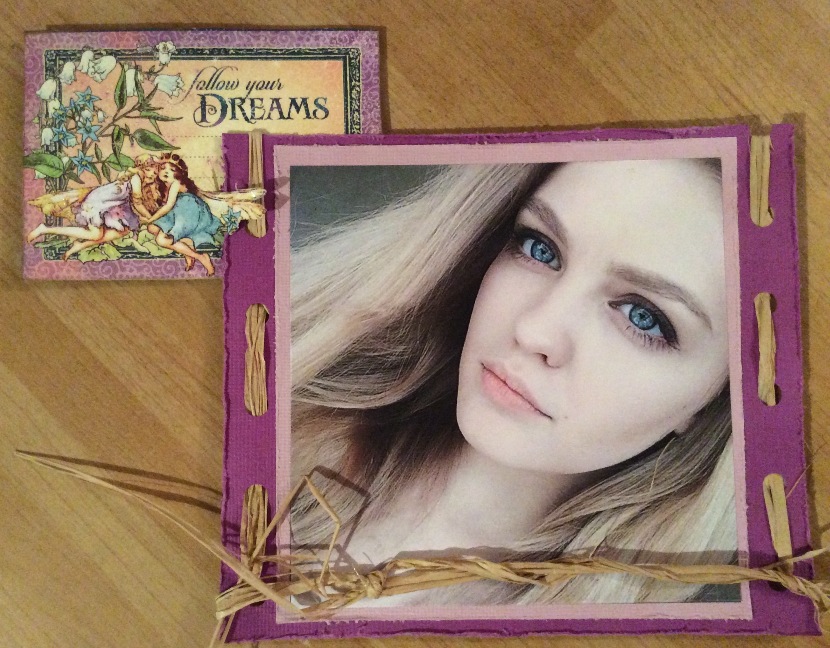
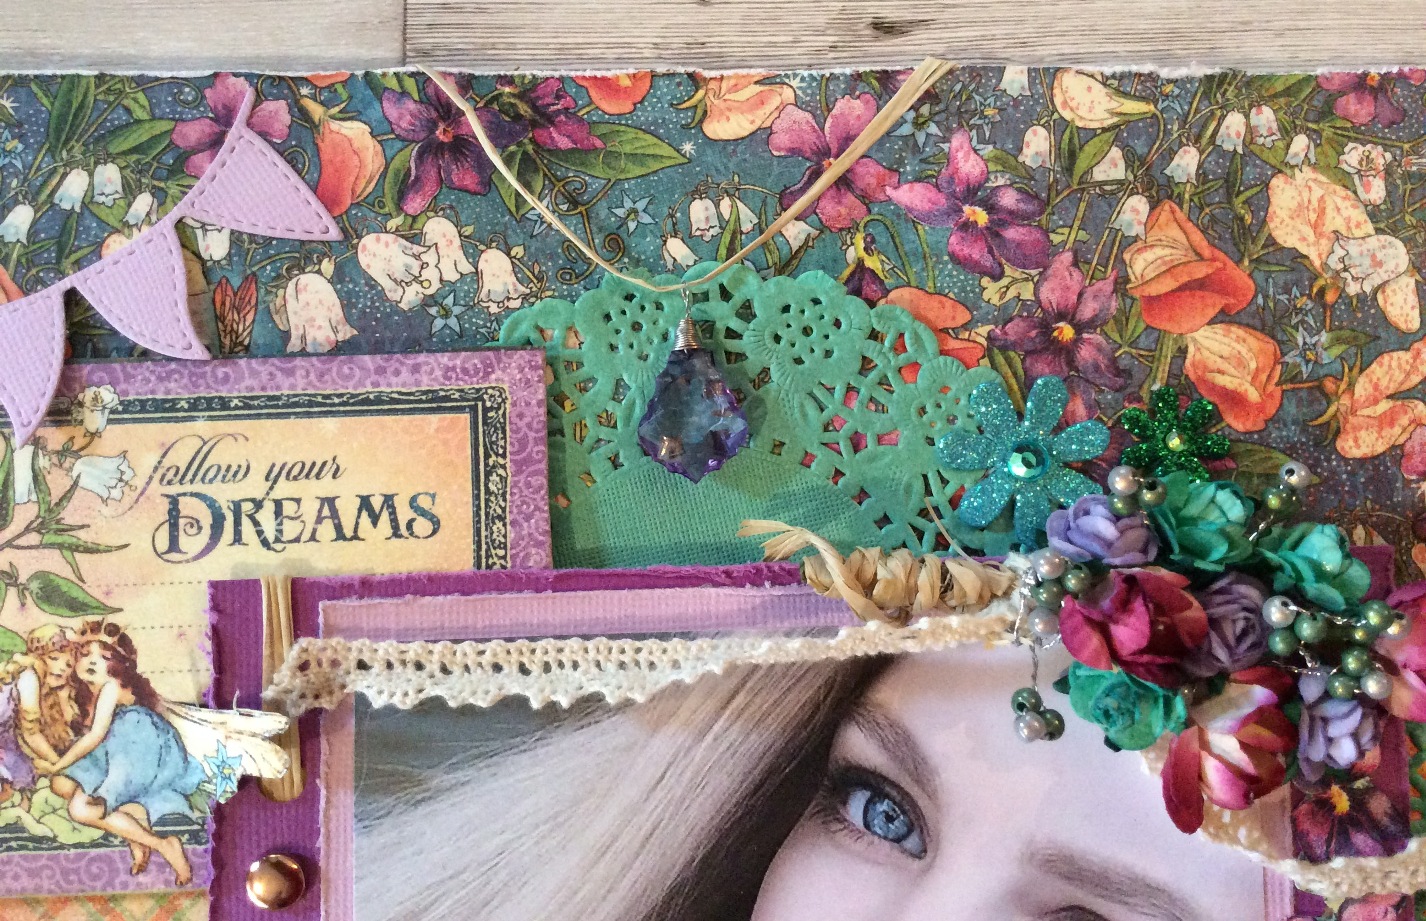
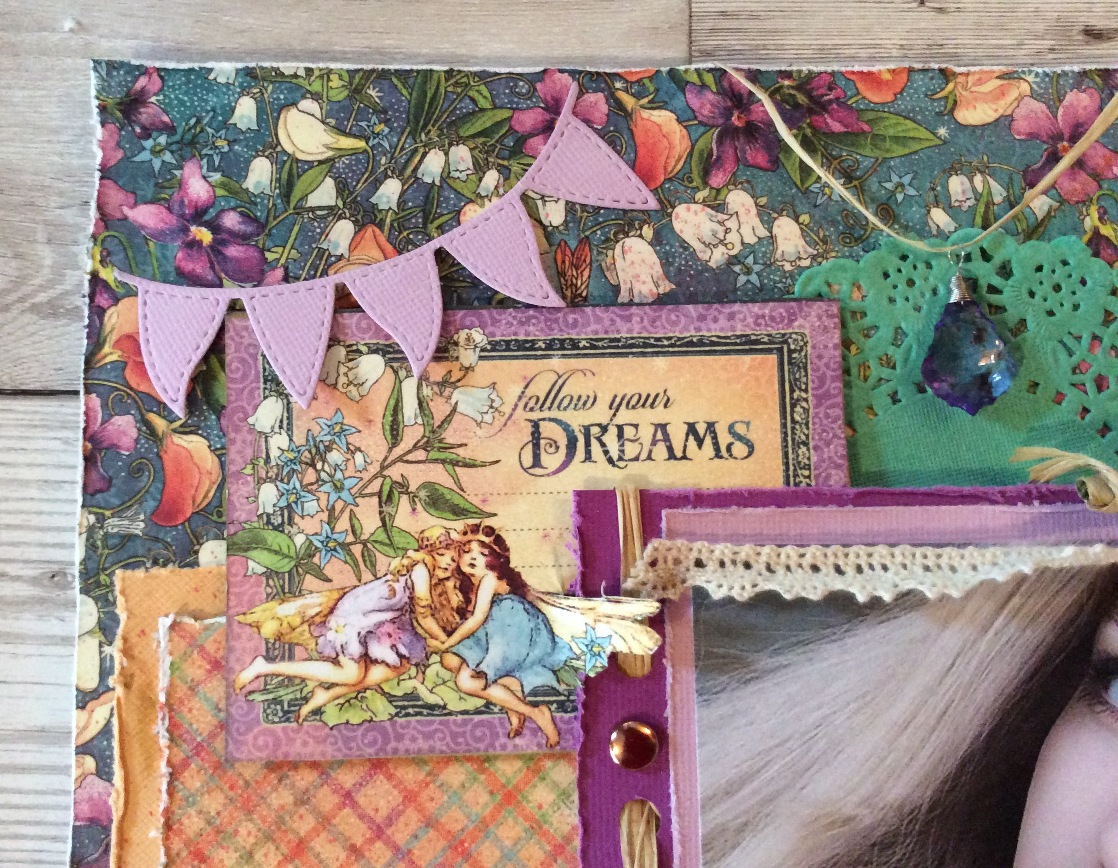
Prepare the picture. I am using a picture of my daughter measuring 12.3cm x 12.3cm. Mat picture on "Blossom" cardstock, then on a larger piece of Grape cardstock, measuring 16cm x 14cm.
Distress edges. Punch holes on the two sides and weave plain raffia thorough the holes. Tie more raffia around the bottom:
Cut out the appropriate picture and sentiments from the Magic Wishes paper. Cut around the wing so it will sit on top of the main picture. Attach the two together with foam tape:
.JPG)
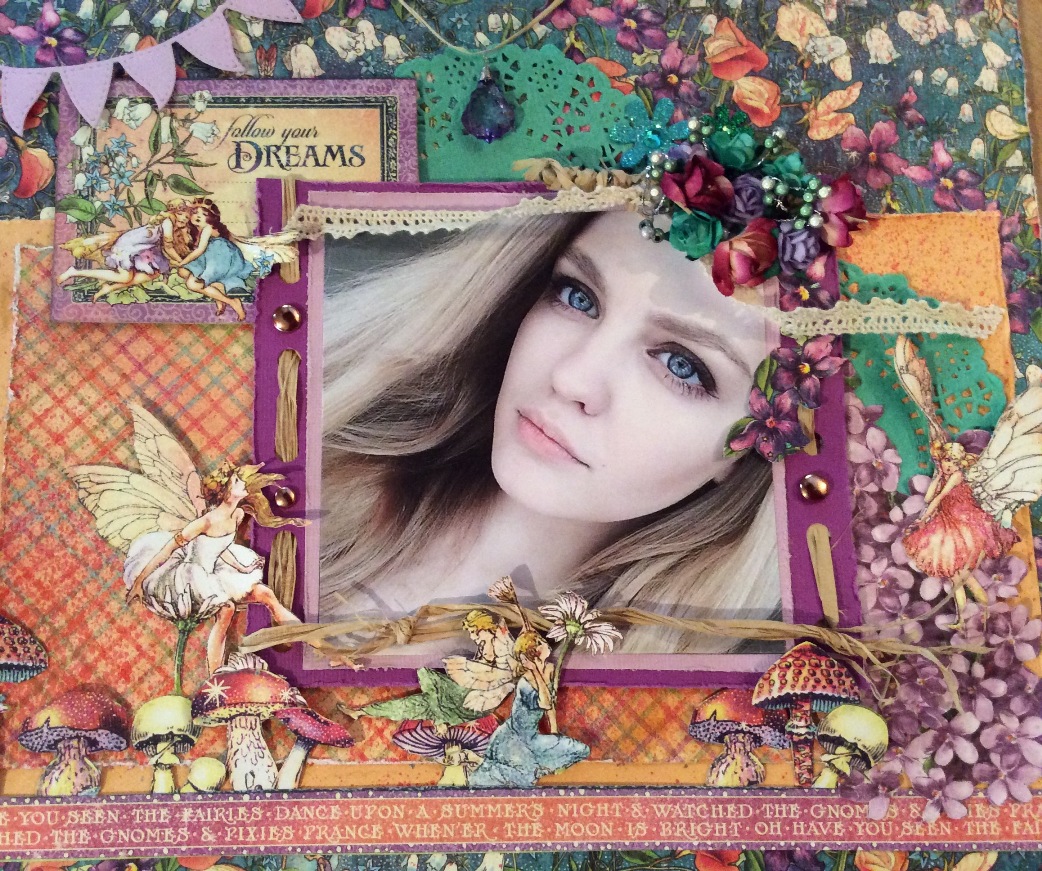
Cut your green doily in half and place them on the layout below the pictures as shown - note that I sprayed some mist on my background first but this is optional.
.JPG)
Cut a 12" wordstrip from the Magic Wishes paper and adhere just below the mats.
Now embellish your page:
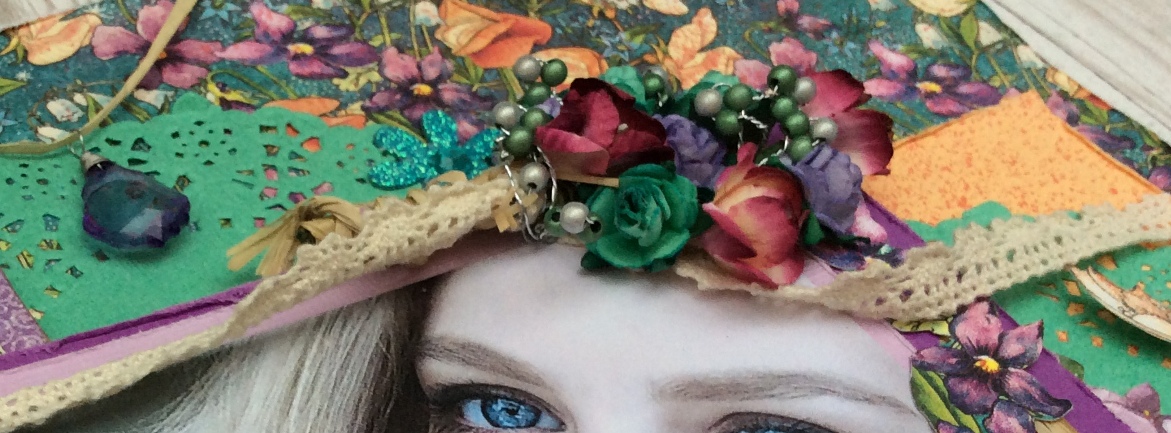
Cut out some of the hydrangea flowers from Violet Bouquet and place them left-hand size by the picture as depicted.
Take the Prima Wrap Genie Stone and thread a piece of raffia through it then over to the back of the layout
Add some fussy cut-out fairies and toadstools from Pixie Prance and Toadstools
Add the die-cut banner
Attach the brads in your kit around the picture frame (colours may vary)
Attach one of the bouquets from your kit to the top corner. I loosely wrapped a length of raffia around it then tied a piece of lace and took it out to the sides (see pictures)
Add the two Petaloo Dazzler flowers
.JPG)
Your layout is now complete.
By Karen Mortensen
.JPG)
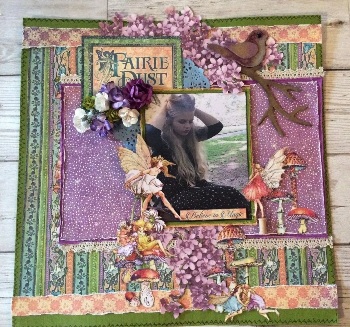
Materials Used:
Papers: Daisy Chain, Pixie Prance, Tiny Toadstools, Violet Bouquet, Magic Wishes. Plain cardstocks Leaf, Melon. Embellishments all from kit. Optional items: Glitter, Inks, Sprays
In your embellishment pack is a Maya Road branch and bird. Start by decorating that as you like. You could do as I did and use ink sprays and inks, or you could paper the pieces in paper from your kit. If you do that ink the edges of the chipboard pieces first then adhere paper on top, now cut around the pieces, the file the edges down. Very easy to do. I used metallic inks and ink sprays to colour my bird. The branch I coloured with brown distress ink. Assemble the bird - there is a black pearl in the embellishment pack for the eye - then leave to one side when you're done.
.JPG)
.JPG)
I am using the plain green cardstock as my background here. I don't want to waste any of my cardstock, and want to use it elsewhere so cut a big square from the middle of the back measuring 9.25" x 9.25".
.JPG)
Cut a sheet of Daisy Chain into size 11.5 (width) by 10"(height). Add to layout. Cut two strips from the remaining piece into sizes 0.75" x 12" and rough up the edges.
.JPG)
Adhere these two strips top and bottom showing the reverse side of the paper.
.JPG)
Cut a piece of Grape plain cardstock into size 10.25" x 6.25". Distress edges.
Cut a piece of "Tiny Toadstools" into size 10" x 6". Distress edges then mat onto the "Grape" cardstock.
.JPG)
Adhere to the layout as pictured
.JPG)
Add a piece of lace top and bottom of the large mat
.JPG)
Doodle a faux stitch around the edge of the green cardstock.
Add the blue doily then cut the "Fairie Dust" sentiment from "Magic Wishes" and add to the layout as shown.
.JPG)
Cut out some Hydrangea from "Violet Bouquet" and add as below, leave edges unstuck so we can insert the branch later:
.JPG)
Mat a picture on Leaf cardstock then melon, distressing the edges of both as you mat. I am using a picture of my daughter which measures 5" (H) x 4" (W). Add to layout on foam tape.
.JPG)
Cut more hydrangea from "Violet Bouquet" and add as shown. Glue only in the middle to get lift.
Cut out "Believe in Magic" from "Magic Wishes" and mount on foam pads to the bottom of your photograph.
.JPG)
Add one of the tied bouquets in your kit to the corner as shown
.JPG)
.JPG)
Add your branch and bird.
.JPG)
Adhere the Maya Road Skinny Spool to the right-hand-side of the picture. Pop a little fairy on top. Add more cut out Fairies from "Pixie Prance", and toadstools from "Toadstools". I glittered the wings of the fairies first.
.JPG)
Your layout is now complete.
All projects copyright ® Charmed Cards & Crafts. All rights reserved.