|
Go to the main Ideas section for lots more
projects and card making ideas.... |
|
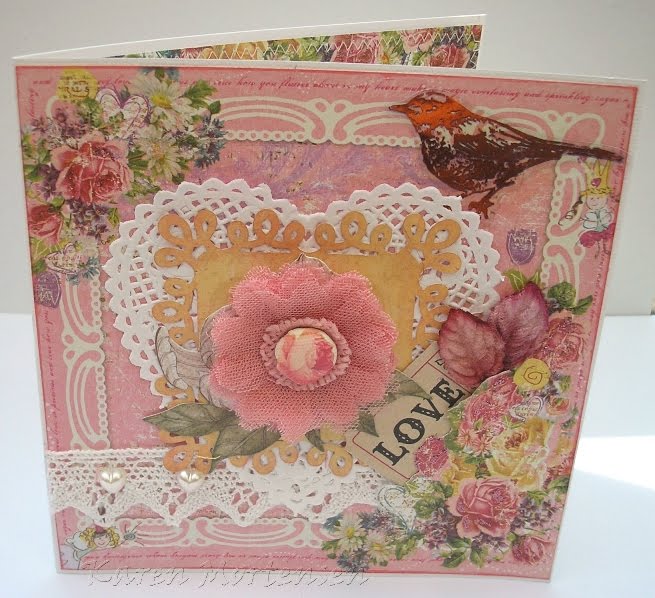
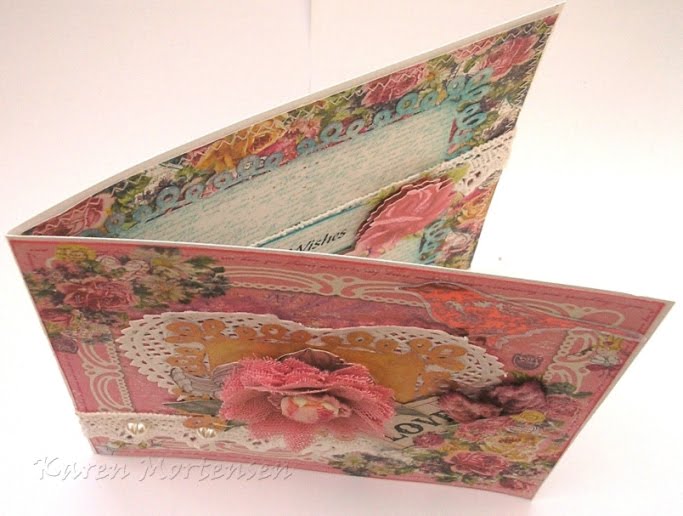
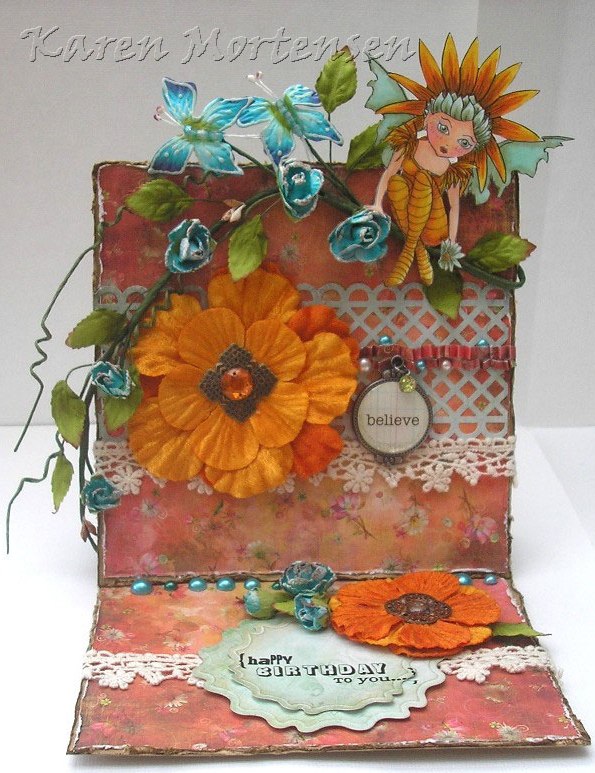
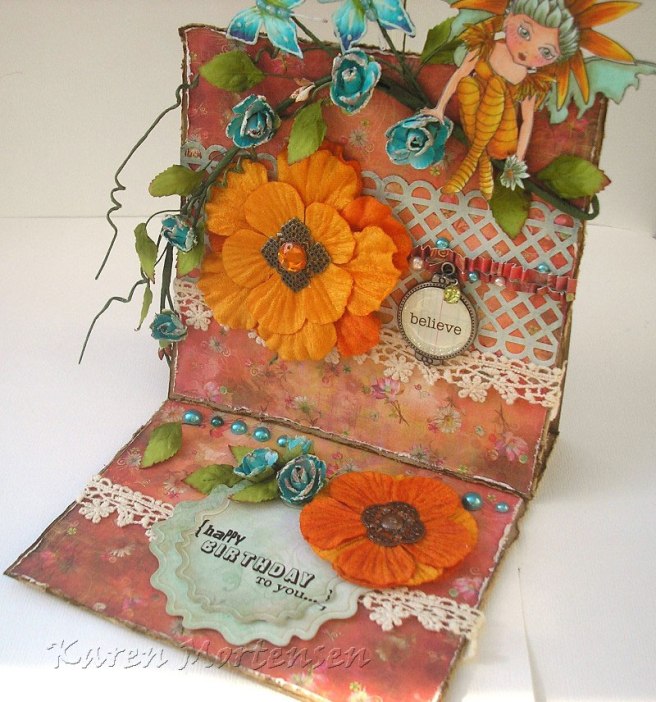
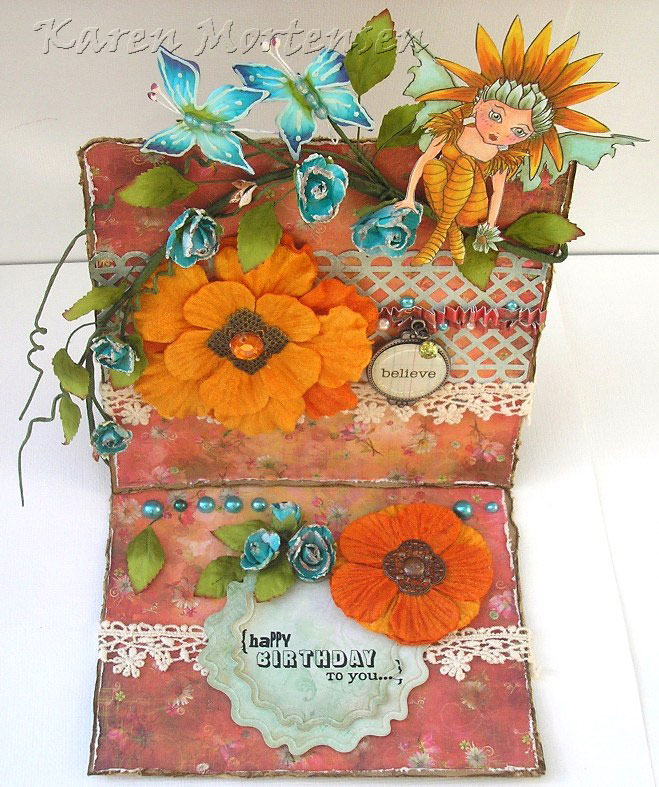
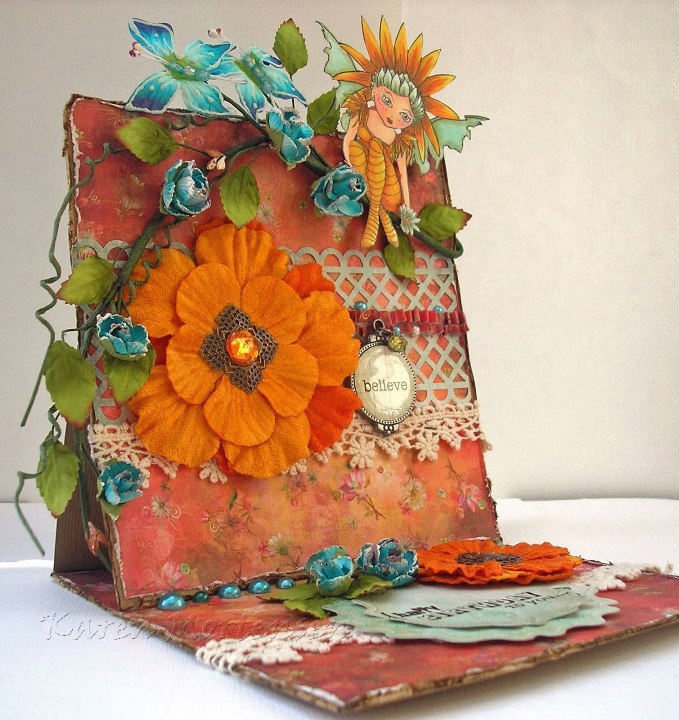
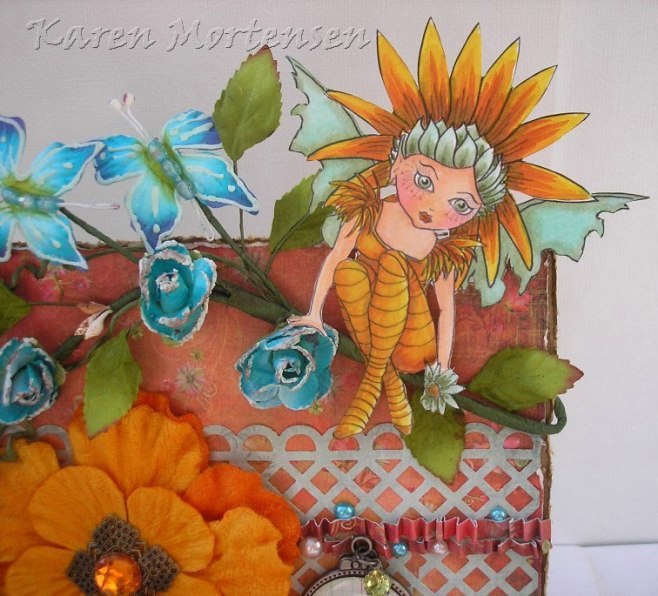
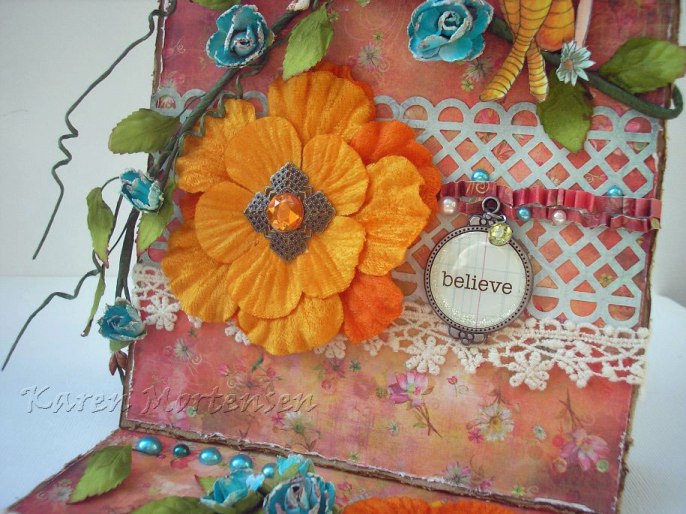
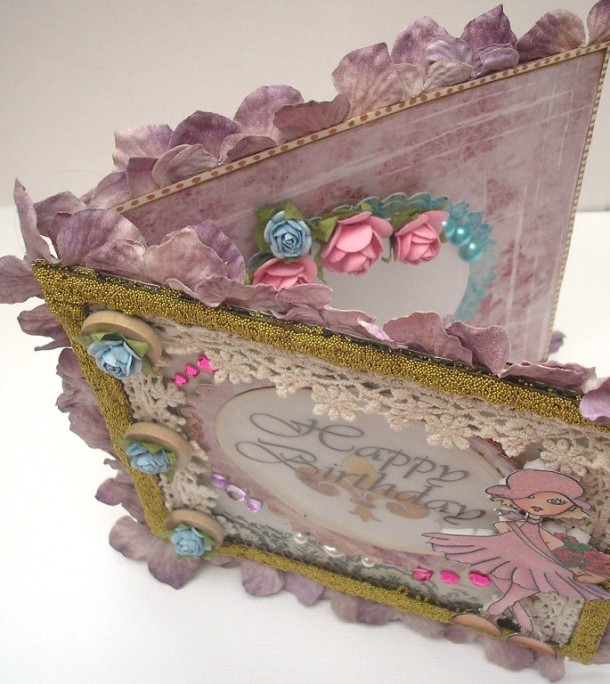
Most of us have gotten so used to using a
coloured image as the main focal point for our cards, that
we forget they can exist quite happily without one. A
Prima flower makes for a beautiful centerpiece.
As you can see I decorated the inside
too. I really think it makes the difference between a good
card and a quality card. If you are making the effort to
create a handmade card, then why not go that extra mile to
make it special.
 |
|
|
|
|
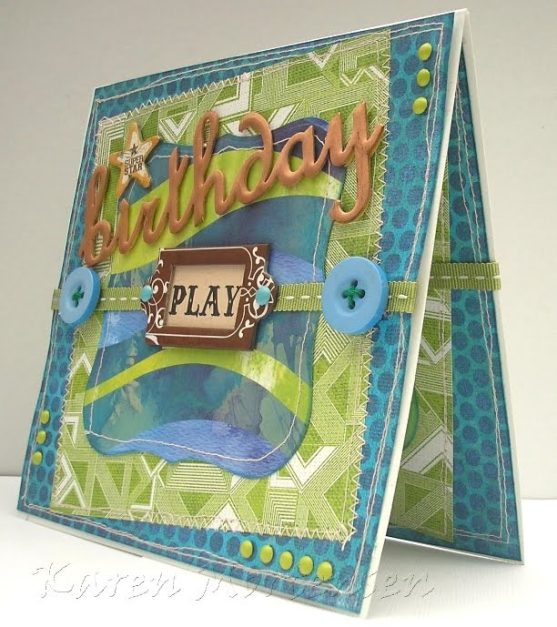
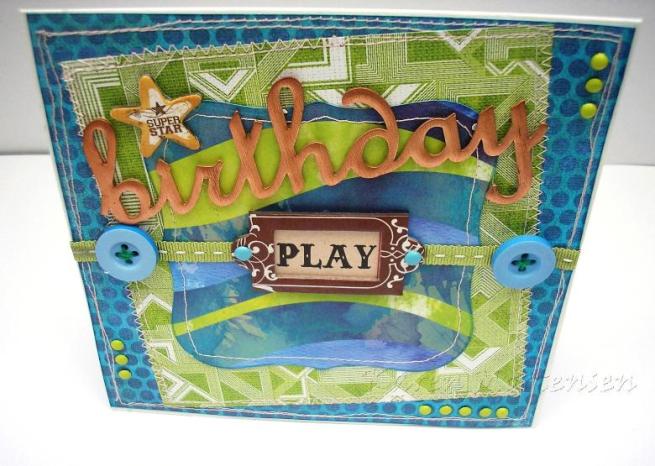
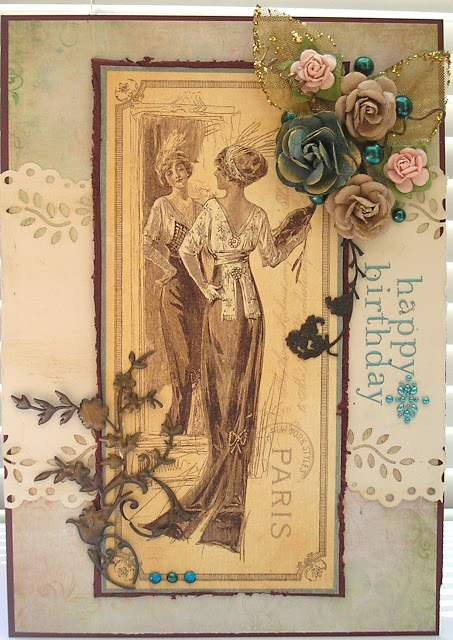
Men are notoriously difficult to create
for, but these days there are so many great papers you can
use. Don't just look for golf/fishing and the likes; bold,
striking colours and designs are fabulously suited for
masculine themed project. I used
Basic Grey Lauderdale 6x6 pad for my card here
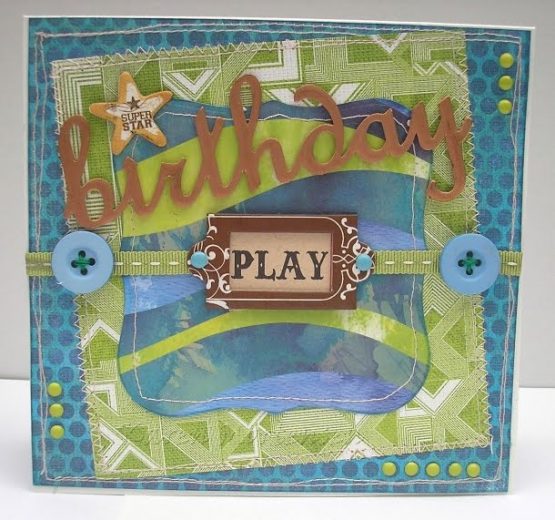
Don't be afraid to use sewing on your
project. A random overlapping stitch around the edge for
example is fun and quirky. I bought a little sewing machine
from John Lewis a while ago and leave it set up just for
paper crafting. It's a little gem really, so easy to use.
Just remember not to glue edges together before sewing as it
may gung up your machine. If you don't want to use a machine
you could try the
Sew Easy range from We R Memory Keepers. A variety of
heads are available enabling great designs.
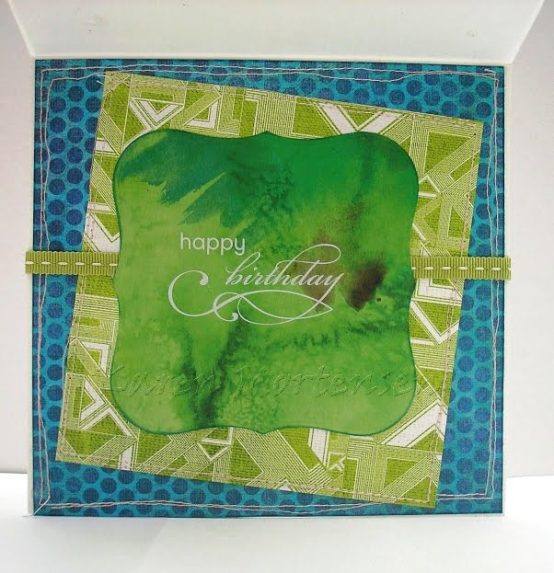
The inside has been decorated too. The
shape is cut from a
Spellbinders Nestabilities die.
Buttons and brads are
Basic Grey. That large Birthday metal sentiment is
available
HERE. Tim Holtz "play"
ticket.
|
|
|
|
|
Here are some birthday ideas that uses our
digital downloads. There are stacks more in the main
section:
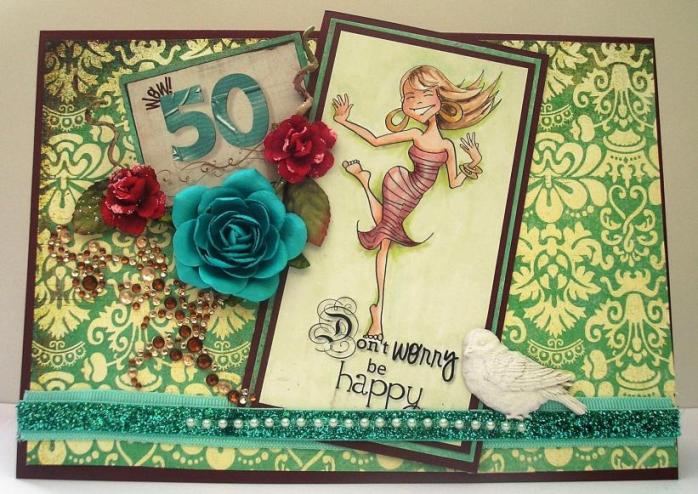

The cards above uses our
Let it Shine bundle.
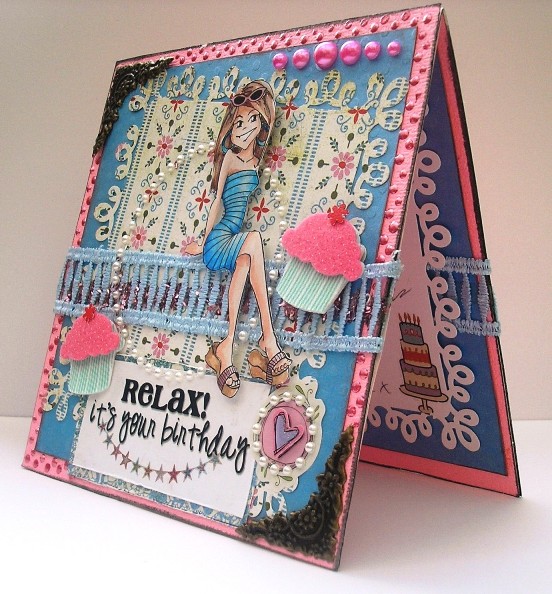
The following card
uses our
Pixie Chicks
Bundles
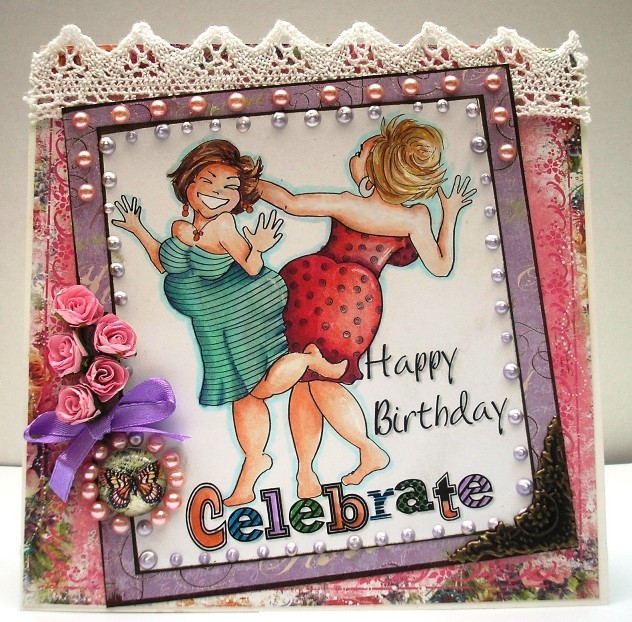
This is an easel Card. See instructions
HERE
The next card uses
an image from one of the Holly & Madison bundles:
by Karen Mortensen
Check the download
idea page for hundreds more ideas.
|
|
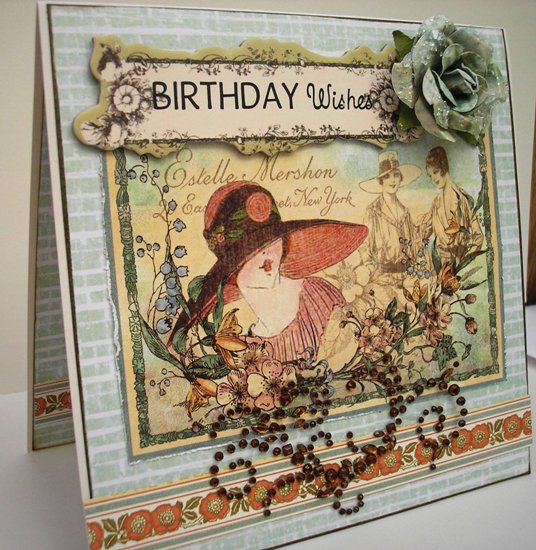
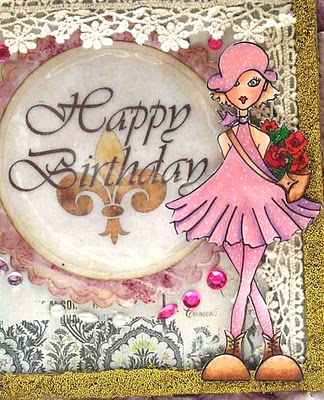
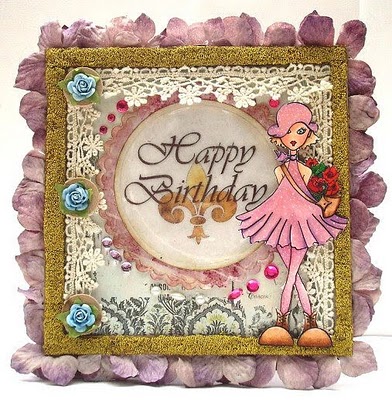
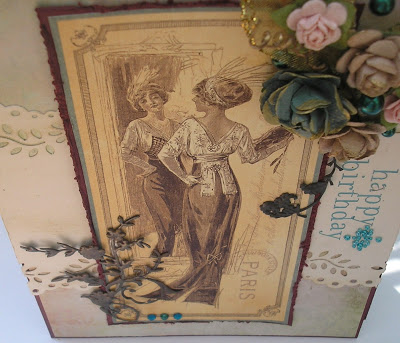
Card by Karen Mortensen using Graphic 45
A Ladies Diary. The backing paper is
Prima Zephyr (Paper pad), and the border strip is cut
out from the reverse of the G45 Ageless Beauty sheet-
Large Prima Rose -
Prima Tea Thyme Chipboard - Kaisercraft Rub-On -
Prima Crystal |
|
|
|
|
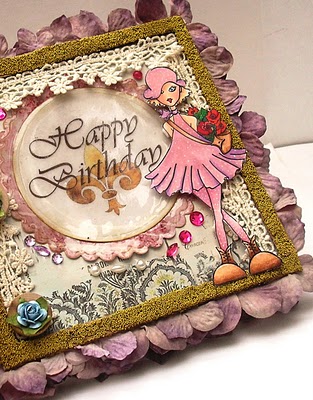
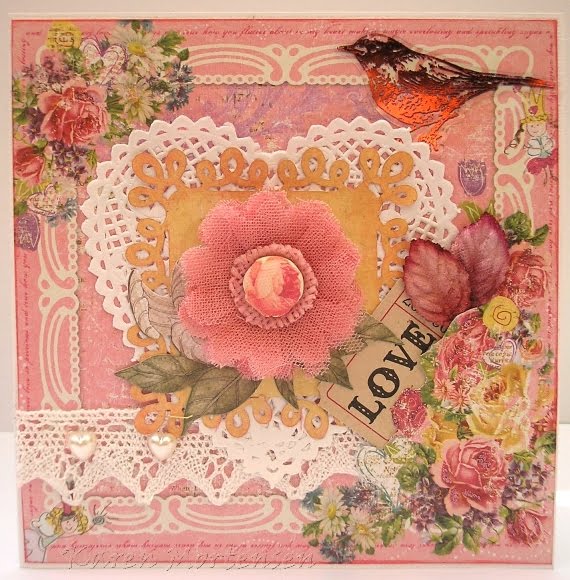
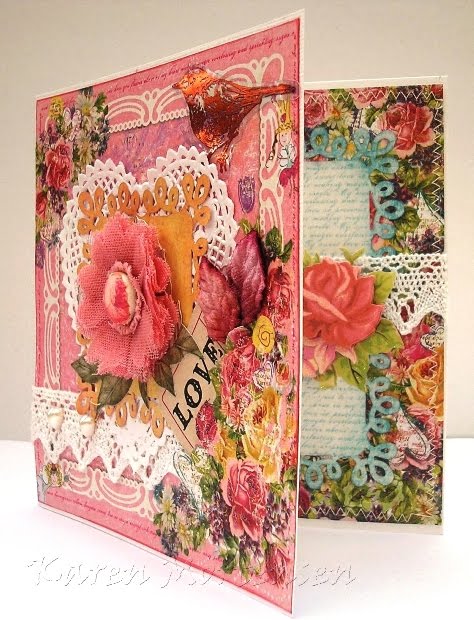
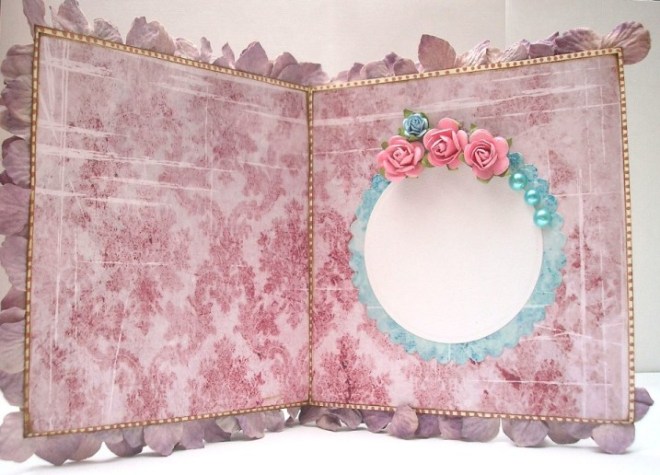
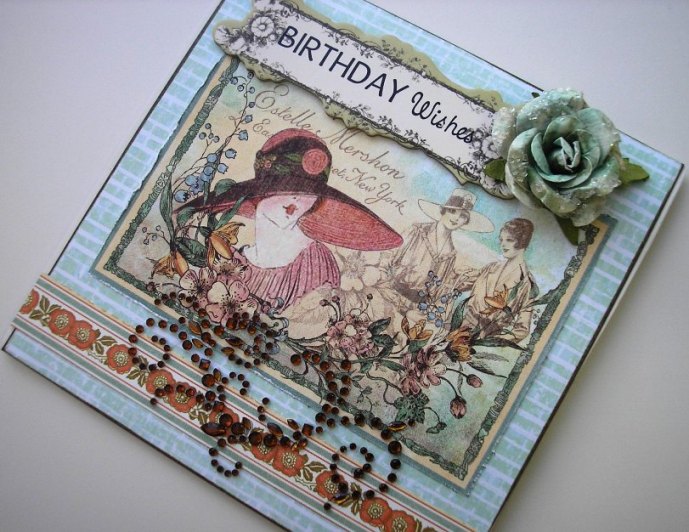
Card by Karen Mortensen using Graphic 45
A Ladies Diary. Also uses:
Prima Backing paper -
Martha Stewart Deep Edge Punch -
Prima Flowers and Pearls -
Prima Vintage Trinkets
|
|
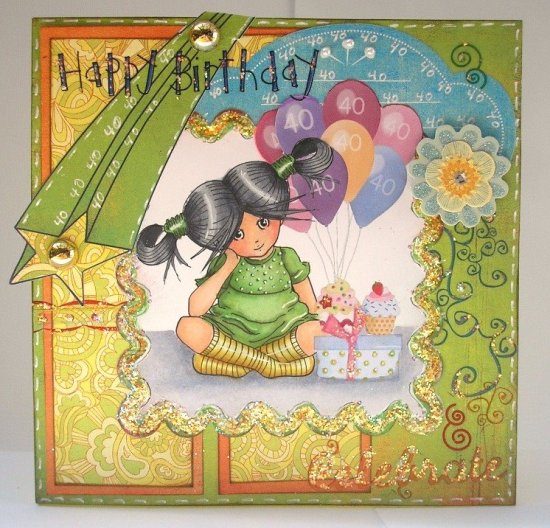
I modified Charmed Delectable Purrfect Annie and Kitty
Stamp by removing the kitten and replacing with balloons,
cakes and a present.
CLICK HERE for a masking technique showing how to
combine several images if you are unsure how to do this.
|
|
 |
Click here for instructions and more images... |
|
|
|
|
 |
Click here for instructions and more pictures... |
|
|
|
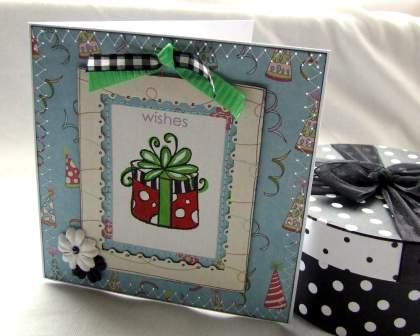 |
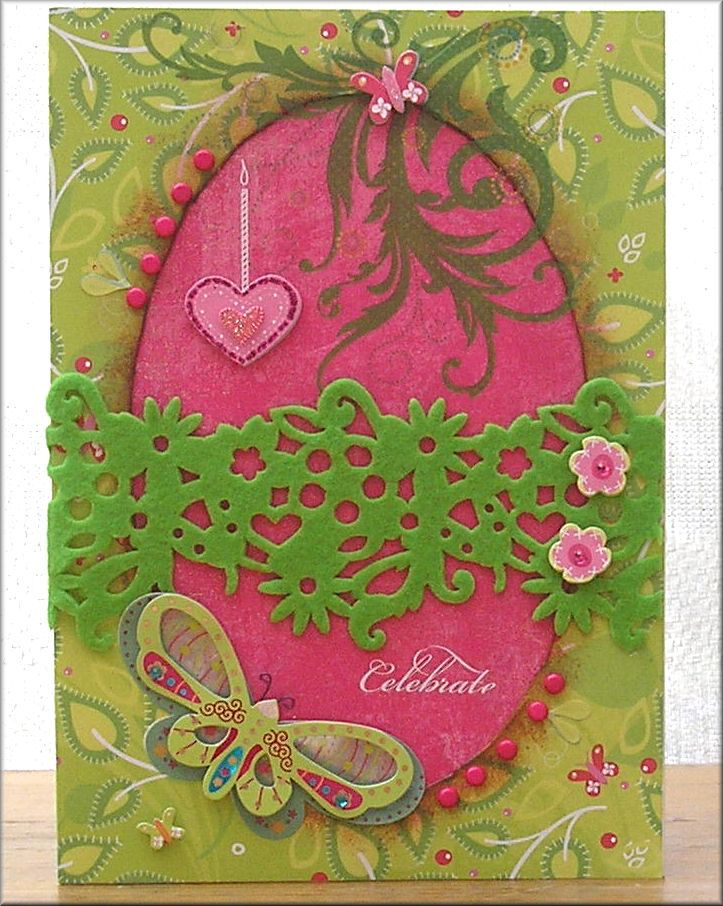
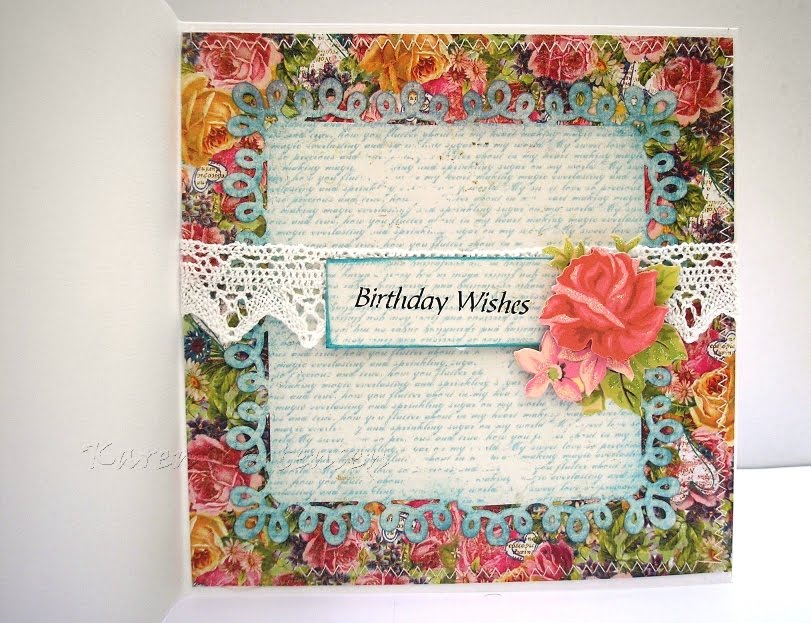
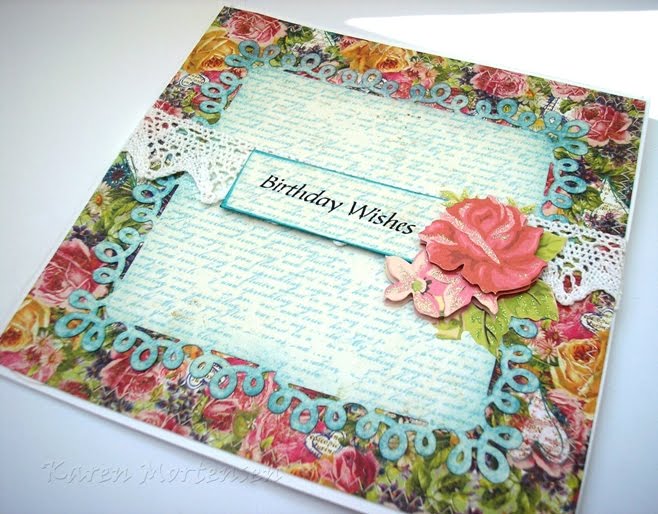
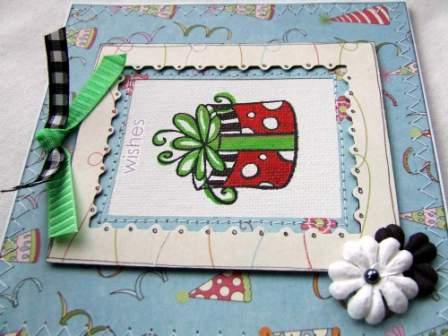
Products used:
Imaginisce
All Kinds of Happy Collection
Quick Guide
-
Cut a piece
of paper the same size as the folded card and ink around the edges.
-
- Stamp
image onto plain card and colour in.
-
- Sew this
onto the paper.
-
- The frame
is die cut. Ink the edges and doodle around edge.
-
- Stick to
the card using foam squares.
-
- The wishes
sentiment is a rub-on from this range.
-
- Sew in a
zig-zag stitch to the card front.
-
- Add Prima
flowers to the edge of the frame. I used foam squares to add depth.
-
- The ribbon
is attached with double-sided tape.
|
|
Created and Designed by DT member Carline
Scattergood |
|
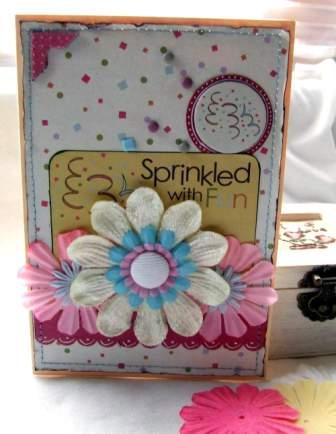 |
Products used:
Imaginisce
All Kinds of Happy Collection
Quick Guide
-
Cut a
piece of paper the size of a folded card.
-
Ink edges
with black ink
-
Sew paper
directly onto the card, before sewing I added some brads to create
depth to the sprinkles.
-
Attach all
Imaginisce embellishments to the top of the cards.
-
The scallop
border is made using a scallop punch and then highlighted with white
pen.
Once everything
is in place go around the edges of the paper and lift and tear in places
to give an aged look.
Created and Designed by DT member Carline
Scattergood |
|
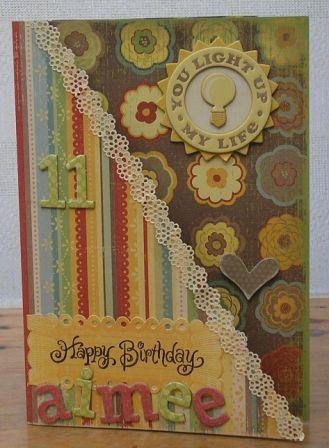 |
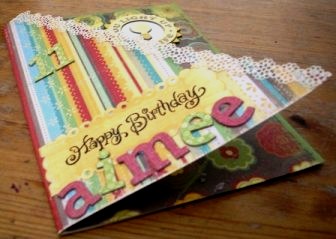
Card Size: A5
All
products are from
K&Co's Wild Saffron Collection.
Quick Guide:
- Cover the front of an
A5 card in Wild Saffron paper. The paper used is from
the 12x12 Pad and is double-sided
- Cut a piece of the same
paper (but we are using the reverse this time for a
coordinated look) the size of the fully opened
card. Cut from left top corner down to bottom right
corner.
- Stamp or write a
greeting on a tag from the Wild Saffron Die Cut Tag
pack. Stick onto paper 2 as shown. Add the name and age
of the recipient. I used chipboard letters.
- Cut a strip of the Wild
Saffron Paper Ribbon and glue onto the cut edge so that
half is over the edge.
- Glue the back of paper
2 to the card but leave the front unstuck so that it
opens. The card now opens both at the front and
normally.
- Add chipboard
embellishments to the original front of the card as
shown (Wild Saffron Adhesive Chipboard Buttons).
|
Created and
designed by Karen - Charmed Cards & Crafts |