|
|
|
|
|

These projects showcase the Basic Grey Wassail Christmas Collection
|
All projects on this page have been designed and created by Design Team member Karen Leahy |
 |
|
|
|
 |
 |
 |
 |
|
|
 |
 |
 |
|
|
|
|
|
|
|
Designed by Karen Leahy |
|
|
Click on pictures to enlarge
|
|
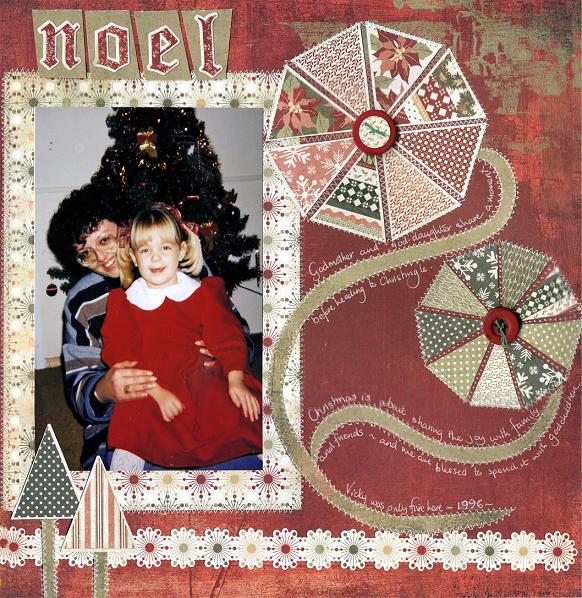
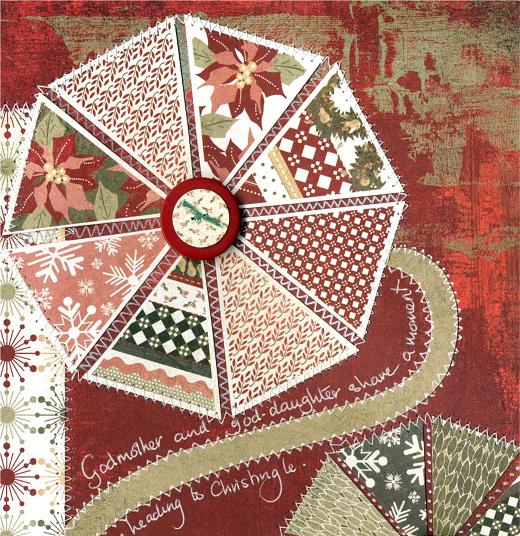
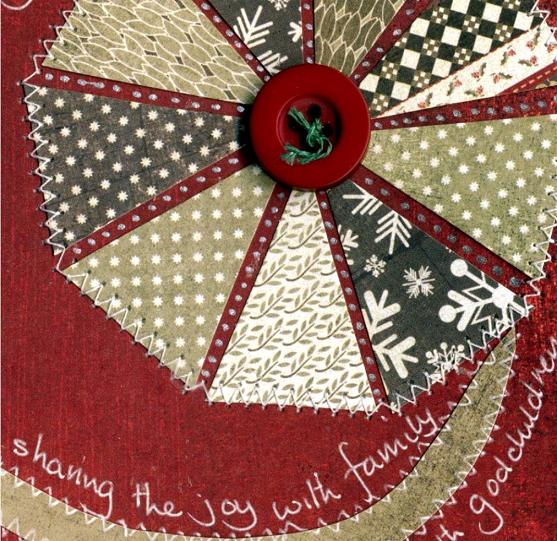
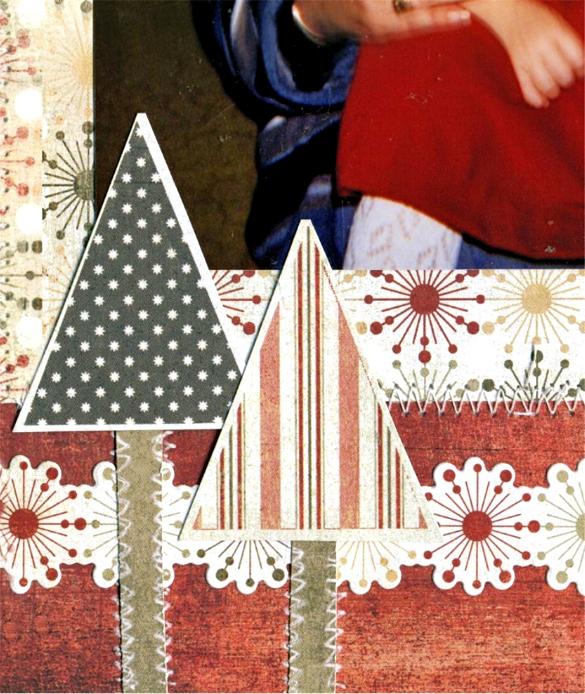
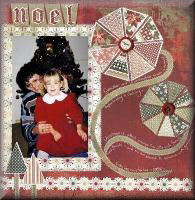
| Products used: Basic Grey Wassail Christmas Collection Instructions I loved the paper with all the different triangles in loads of different patterns, but was scared by how patterned it was, so I used my trusty old technique of cut it up and see what happens. When I cut lots of the triangles out they automatically made themselves into geometric flower shapes, but with a Christmassy feel because of the papers. I mounted the picture of my god-daughter and I on patterned paper and then stitched it onto the background, which was the reverse or plain side of one of the sheets. I stuck the two geometric flower designs in place and then sewed round the edges and added silver faux stitching or dots in between the triangles. I drew and cut two swirls for stems from the reverse side of the photo mount paper and faux stitched along their edges with a white pen. I added my journaling following the lines of the stems as well. The title was made using stickers from the sticker sheet mounted onto the same green paper. I couldn’t resist adding two more triangles as small trees at the bottom.
|
|
|
Designed by Karen Leahy |
|
Click on pictures to enlarge
|
| Products used: Basic Grey Wassail Christmas Collection Quick Guide I cut the large rose from the patterned paper and also the beautiful bird design and then using one of the gorgeous brocade effect patterned papers as the background, I reassembled the pieces along with the matching chipboard stickers and paper stickers. Using the papers and stickers this way enabled me to make a frame for one large photo.
|
|
|
Designed by Karen Leahy |
|
|
Click on picture to enlarge
|
|
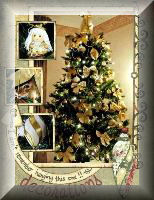
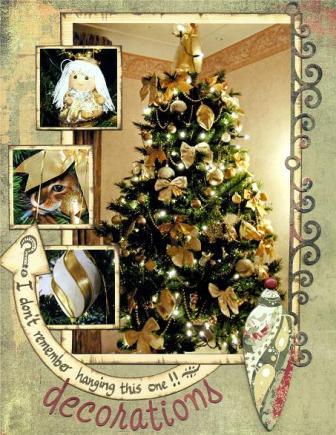
| Products used: Basic Grey Wassail Christmas Collection Instructions I loved the distressed feel of the paper collection – just right for how distressed I was with Fiki! The greens and creams went so well with our Christmas tree and even the colour of the chipboard decoration matched. I used the reverse of two of the papers for this page, inking the edges around picture mounts. The small square pictures pick out some of the details from the main picture and the arrow, cut from the same paper, calls attention to the small picture in the centre. As the page was about decorations to chipboard bauble was the perfect accent and the sticker swirl just accentuated the edge without he pictures and helped to balance it.
|
|
|
Designed by Karen Leahy |
|
|
Click on main picture below to enlarge
|
|
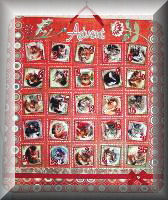
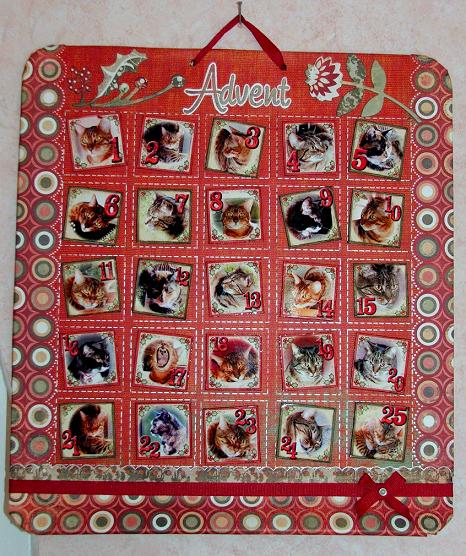
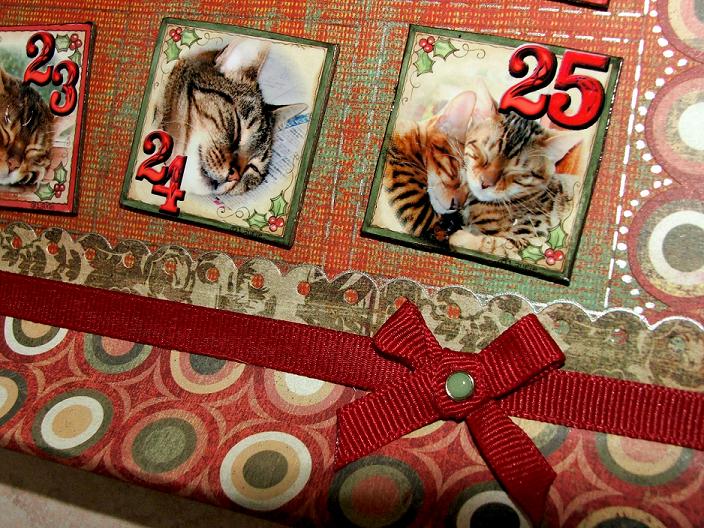
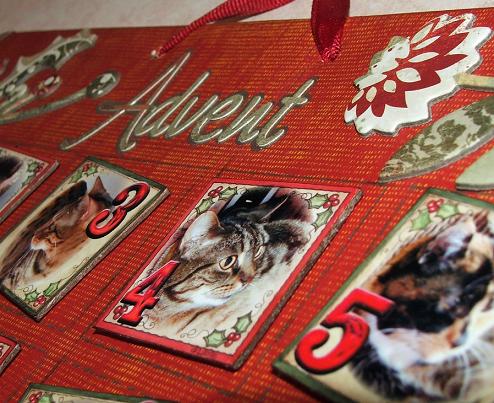
| Products used: Basic Grey Wassail Christmas Collection Instructions The base of the tray is a non stick baking sheet. Non stick means just that – so be prepared to use a lot of strong double sided tape. The first thing I did was make the tiles. I used photos of the cats and added numbers digitally to the tiles. When printed they were mounted on thick chipboard, inked around the edge and a small magnet was stuck onto the back of each finished tile. I covered the baking sheet with the red paper and then marked 25 squares (5 rows of 5) in faint pencil, measuring carefully so the squares were approximately 1” up from the bottom and 1” in from each side. The sizes will vary according to the size of your baking sheet and the size you want to make your tiles. My squares were 4.5 cm and my tiles were 4cm Once you are happy with the squares go over the pencil marks with a journaling pen. I used a silver pen as mine was a dark paper but you could use black, white or gold depending on what you use for the background. I cut strops from the circle paper and cut round the edge circles to give a fancier edge and then stuck them along the bottom and the sides. I also added the scallop sticker along the bottom edge and a piece of ribbon and a bow, fixed with a Wassail brad. I wanted the edge covered so I folded the paper over the edge and stuck it down on the back of the tray. I used some of the letter stickers for my title and edged them with silver pen. I also added two of the chipboard flower and holly sprigs to finish off the top. I drilled two holes through the top and added matching ribbon to hang the calendar.
|
|
|
Designed by Karen Leahy |
|
|
Click on pictures to enlarge
|
|
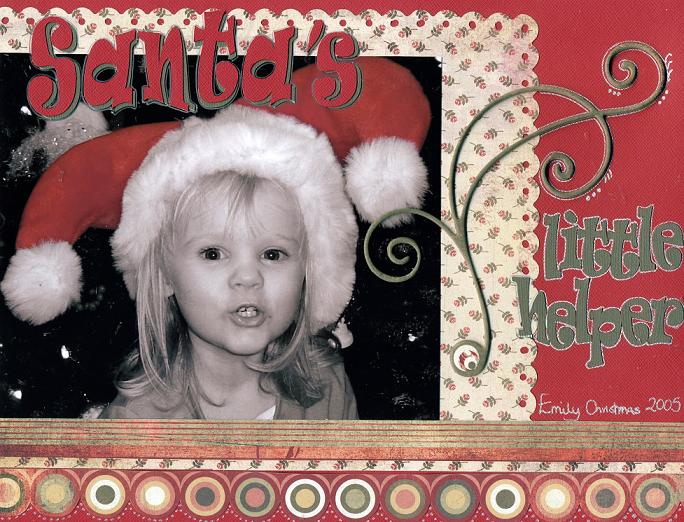
| Products used: Basic Grey Wassail Christmas Collection Instructions I loved the picture of Emily in her Santa hat, but the other colours in the picture were too garish (why would she have a pink jumper on with a red hat!!!) so the solution was to colourise the picture in PSE and just spot colour the hat. I cut a piece of the patterned paper so that both that and the photo fitted flush with the edge of the page and I used a threading water punch to scallop the other two edged to give some definition. I added strips of two other patterned papers along the bottom and a chipboard swirl, outlined in silver pen, along the side of the image. I cut the title using a coordinating card and edged that in silver as well.
|
|
|
Designed by Karen Leahy |
|
|
Click on pictures to enlarge
|
|
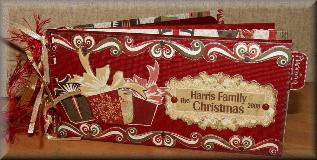
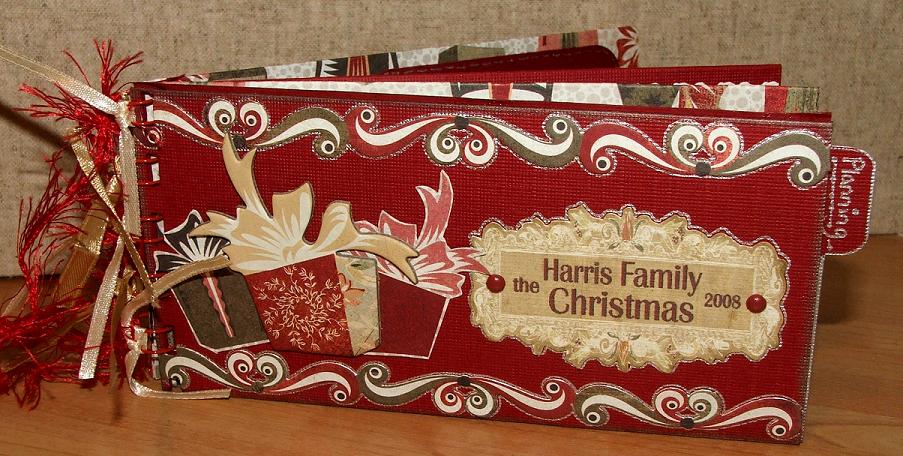
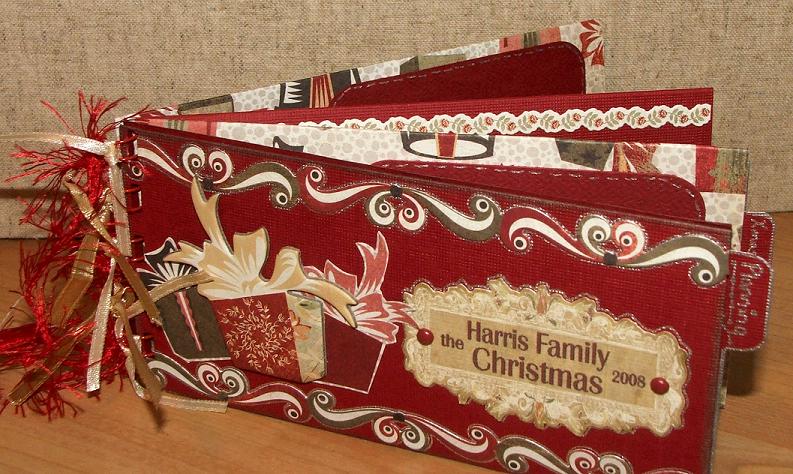
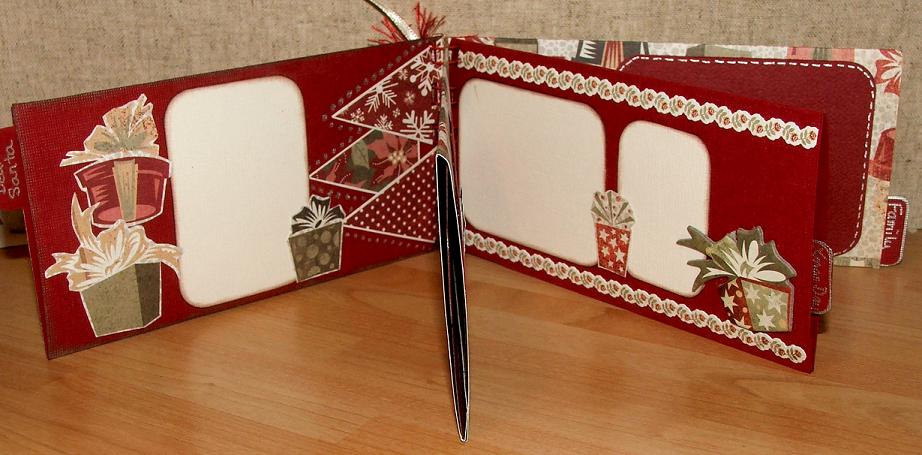
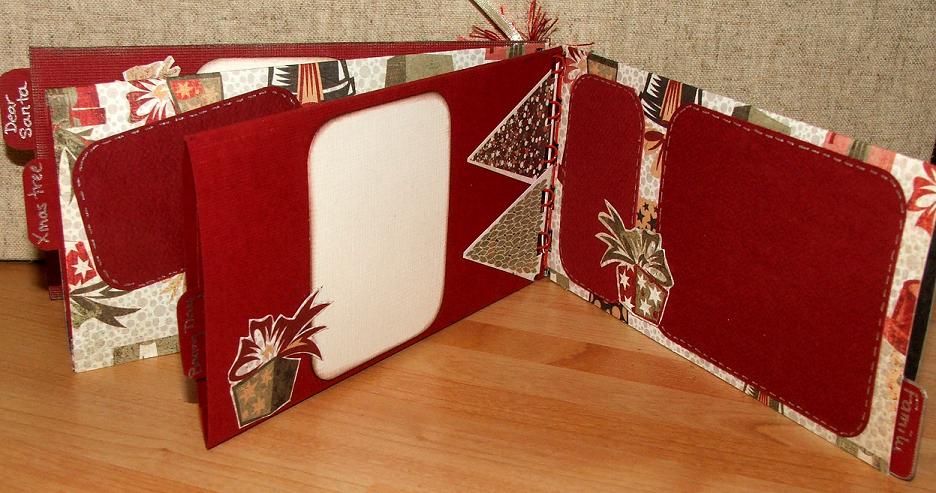
| Products used: Basic Grey Wassail Christmas Collection Instructions I am trying to encourage my god-daughter to scrap and this Christmas, now she has new baby Elinor as well, is the perfect opportunity so I wanted to make a gift book that had no pictures or journaling so that she could add her own. I made two pockets from patterned paper and two from coordinating cardstock. The pockets were simple a piece of card or paper measuring 6” wide by 6.5” long. Score the paper at 3”, and at 6” along the longest side and then you fold them into a pocket and stick the flap inside the pocket. I cut four journaling and photo cards to slip inside the pockets, edging them in silver. The front cover was decorated with stickers from the collection, presents cut from the patterned paper and a chipboard present to give dimension. I printed a title for the book and secured it with two brads. Everything was edged with silver to make it pop off the page. The inside pages were decorated with some blank mounts ready to hold pictures and presents cut from the patterned paper and mounted on foam pads. The mounts were all either edged with ink or silver faux stitching. I bound the book with a standard comb binder and threaded ribbon and fibres through the comb.
|
|
|
Designed by Karen Leahy |
|
|
|
|
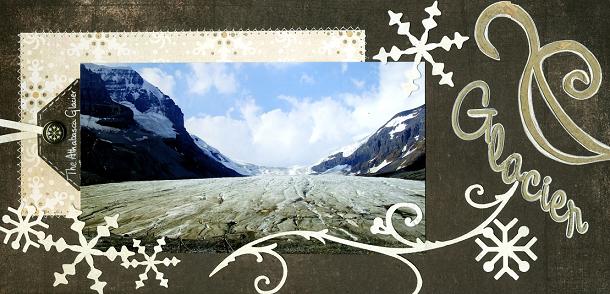
| Products used: Basic Grey Wassail Christmas Collection Quick Guide The paper had a real snowy feel and so I used one of our holiday pictures – snapped in August – of the glacier we walked on and one of the coldest places I have ever been to. I used some of the patterned paper as an offset mount, stitched to the background, which was the reverse of one of the papers in the pack, I cut snowflakes and swirls and added letter stickers for a title. There is a tag that pulls out from under the photo with the copious journaling and the paper ribbon is fixed with a snowflake brad from the collection.
|
|
|
Designed by Karen Leahy |
|
|
Click on pictures to enlarge
|
|
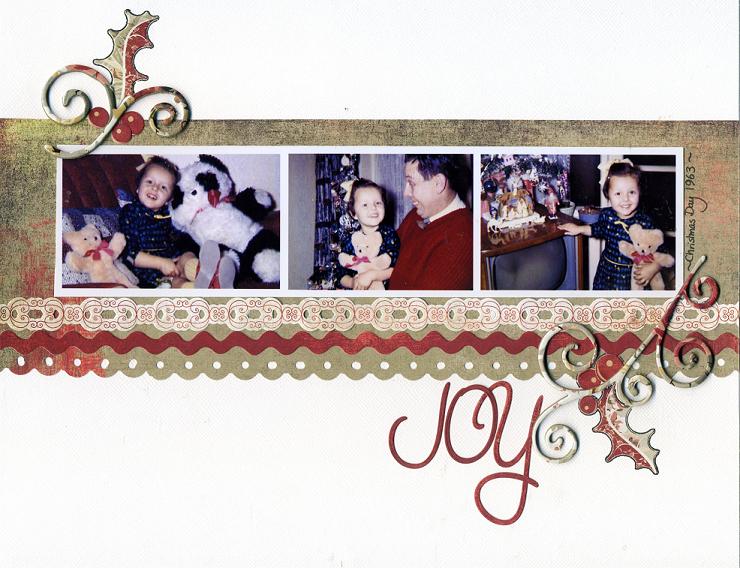
| Products used: Basic Grey Wassail Christmas Collection Quick Guide I wanted to use some very poor quality pictures that didn’t stand up well to being printed in a large format. I cropped them and joined them in one long strip in a photo editing programme then printed the strip. I mounted the strip onto a piece of the patterned paper, scalloped the edge and added two of the edge stickers. I added two of the chipboard swirls and some of the holly leaf stickers and finished the page with letter stickers and the date down the side. It was an easy way to use poor quality old photos.
|
|
|
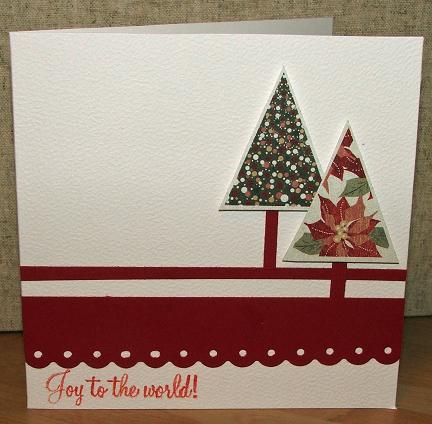
Deck the Halls and Joy to the World Cards Designed by Karen Leahy |
|
|
Click on pictures to enlarge
|
|
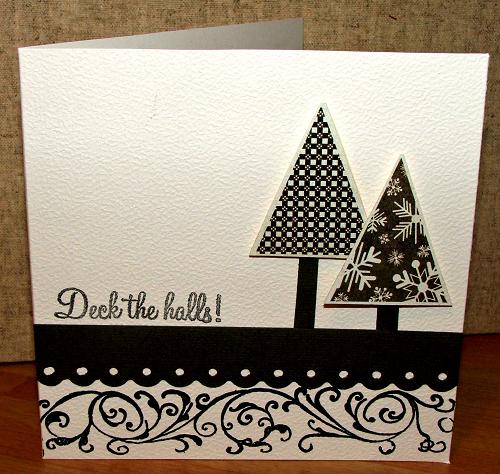
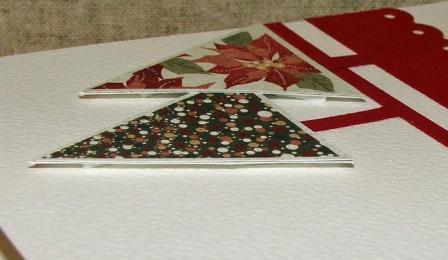
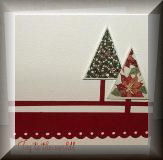
| Products used: Basic Grey Wassail Christmas Collection Quick Guide The triangular patterned paper was screaming out ‘Christmas Trees’ and the cards were so simple to make but have a stylish modern feel. On the black and white card I used a stamp along the bottom and then a piece of scallop edged paper. On the red card I just used scallop edged paper. In both cases the ‘trees’ were mounted onto thick card and then raised on foam pads.
|
|
|
Designed by Karen Leahy |
|
|
Click on pictures to enlarge
|
|
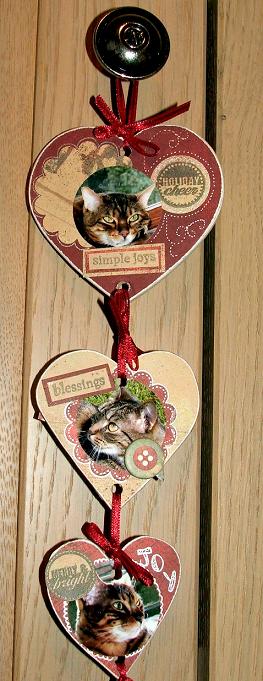
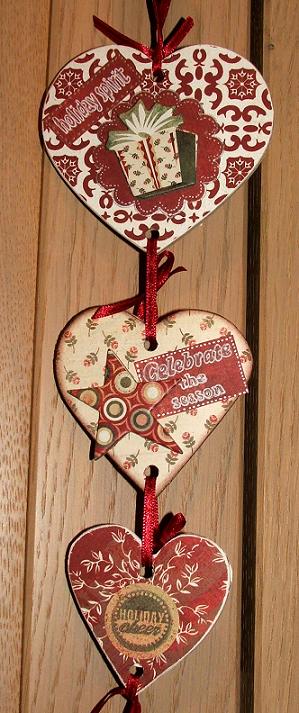
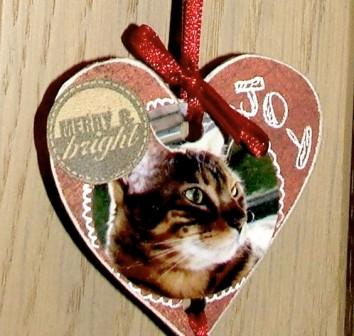
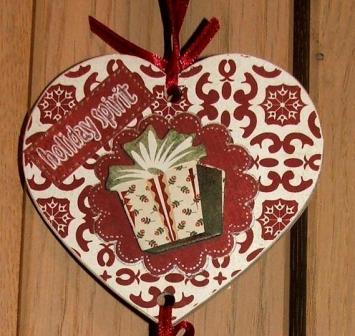
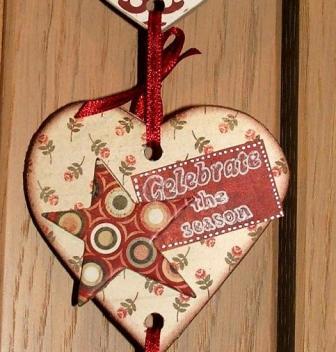
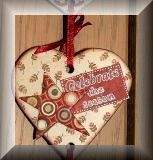
| Products used: Basic Grey Wassail Christmas Collection Quick Guide I used a wooden heart and two hand cut chipboard hearts for this simple decoration. I covered the hearts with different patterned papers and sanded the edges. I then added a whole selection of pictures, chipboard elements and stamped titles. One side has photos and the other has decorations only. I used a cropadile to punch holes top and bottom of each heart and then I linked them with red satin ribbon and bows. .
|
|
All projects copyright ® Charmed Cards & Crafts. All rights reserved.