|
|
|
|
|

These projects mainly showcases the "Nature" Collection by K & Company
|
All projects on this page have been designed by Design Team member Caroline Scattergood |
 |
 |
 |
 |
 |
 |
|
 |
 |
 |
 |
 |
|
 |
 |
|
|
|||||||||||||||||
|
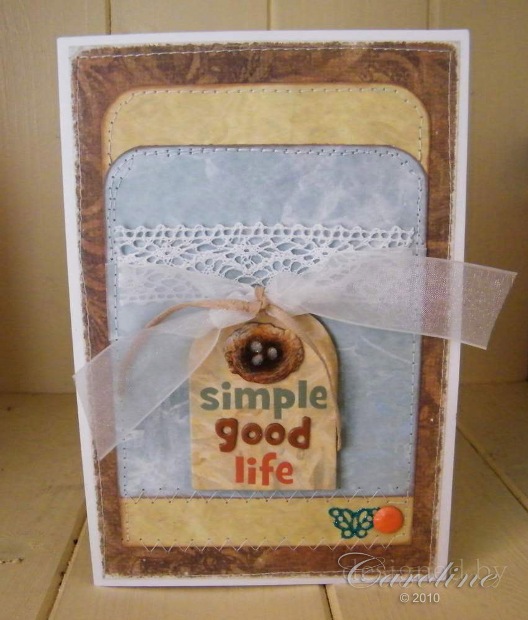
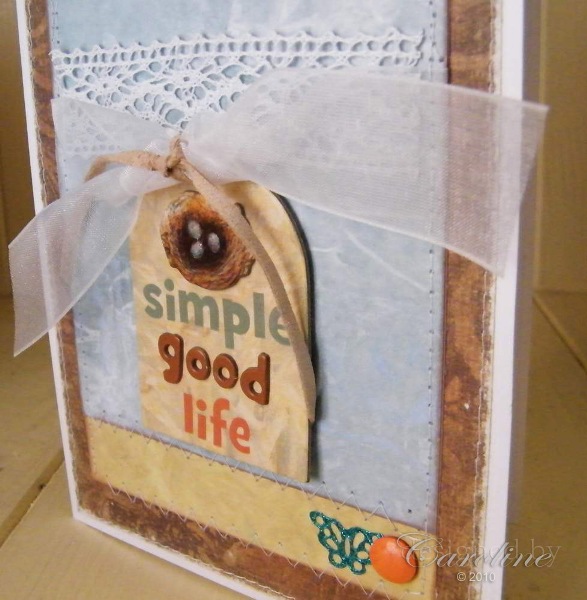
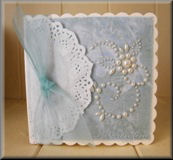
Click to enlarge Project Guide Trim paper from the K&Co Nature Designer Paper Pack, to fit a card blank. Scuff around the edges of the paper to reveal the white core. Sew onto card blank. Taking two coordinating papers cut slightly smaller than the card blank and round off the edges at the top, using a corner rounder. Ink the edges. Tie some white organza ribbon around these papers and then sew together, layered one on top of the other, onto the card blank. Adhere some simple white lace just behind the ribbon. Tie some suede string through a tag from the K&Co Nature Words Adhesive Chipboard pack, and attach to card. Little blue glitter butterfly, bottom right on the card, is from the K&Co Nature Word Glitter Stickers pack.
Click to enlarge
|
|||||||||||||||||
|
|||||||||||||||||
|
Designed by Caroline Scattergood |
|
|
|
Designed by Caroline Scattergood |
|
|
|
|
Designed by Caroline Scattergood |
|
|
|
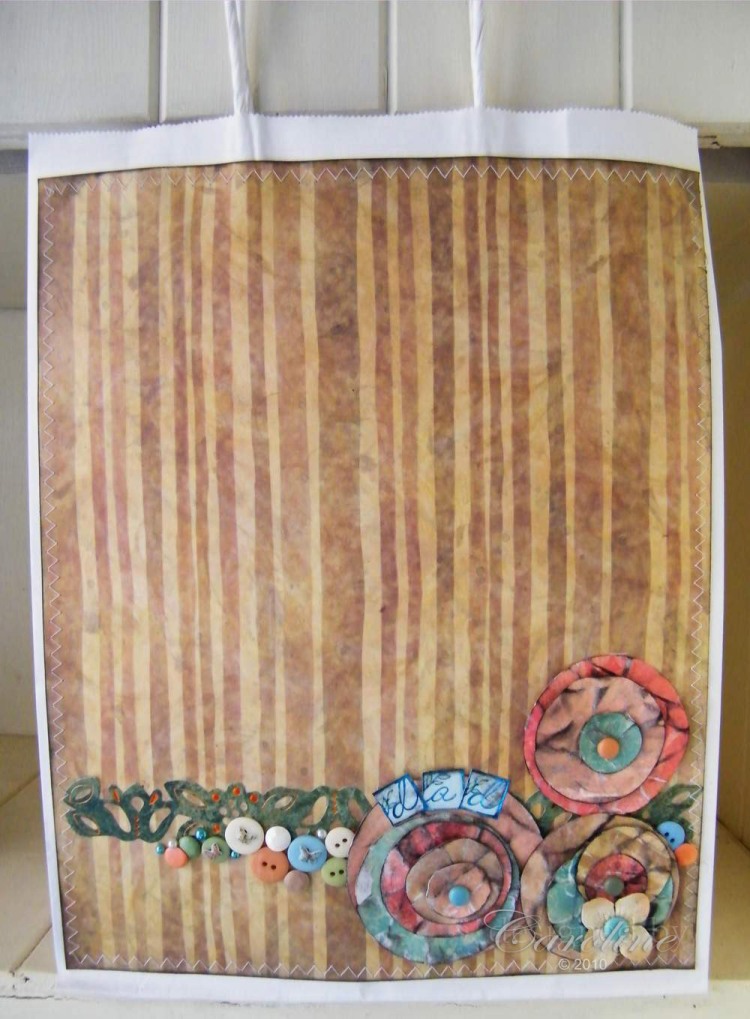
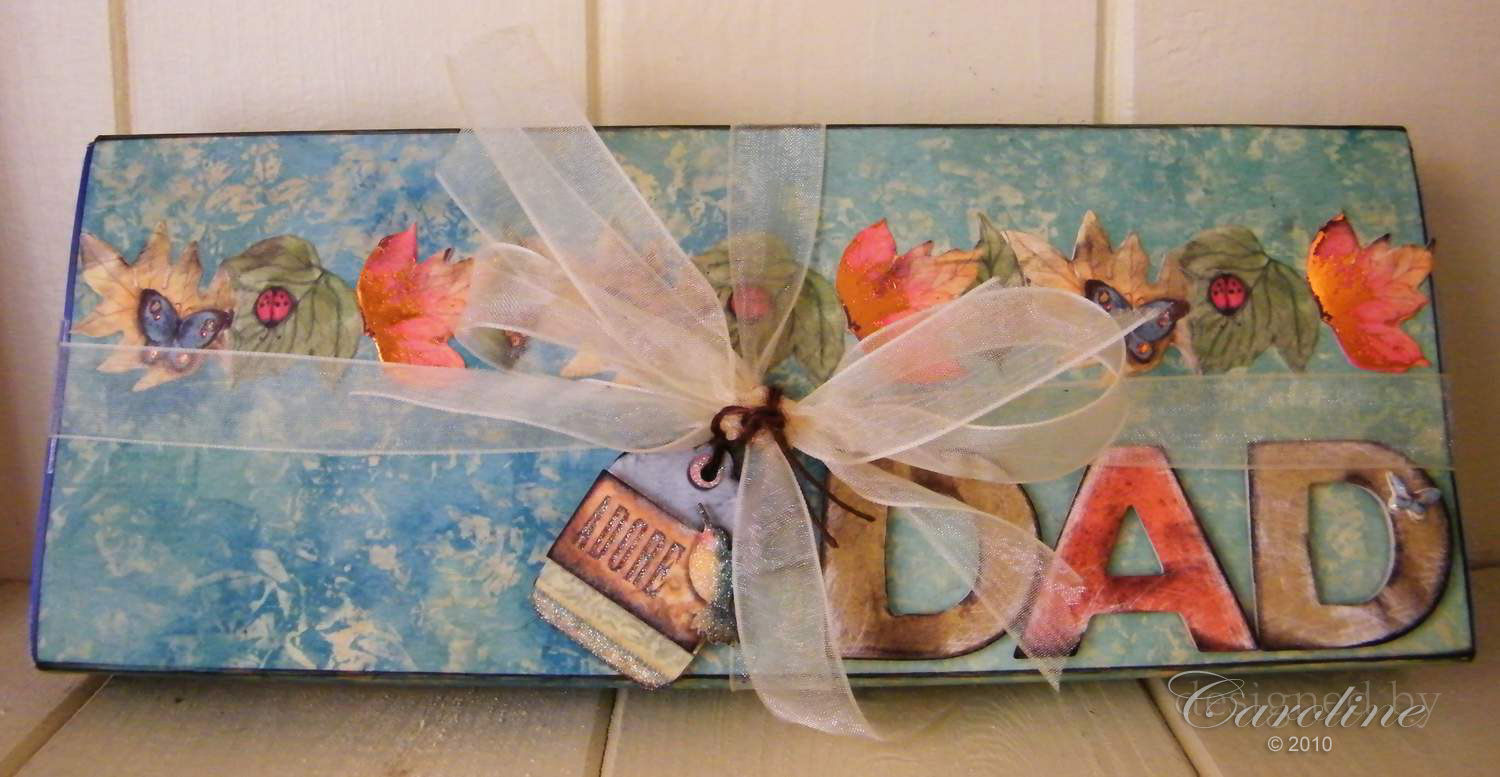
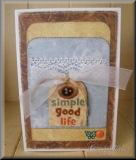
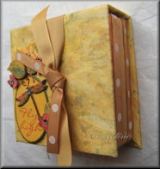
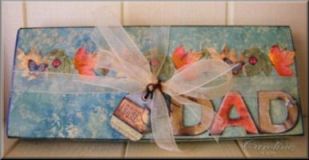
| Quick Guide This is quite a large gift bag that I decorated for my Dad. It was big enough to hold a bottle, chocolate and some smellies! Taking one of the papers from the K&Co Nature Designer Paper Pack, I inked all around the edges and sewed around the edges using a zig zag stitch and then stuck onto the white paper gift bag. I used a K&Co Nature Adhesive Border to run the width of the design. Using scraps of paper from the K&Co Nature Designer Paper Pack, I cut out different sized circles. I then scrumpled them up, flattened them out and then sanded. The white core shows in some of the areas which had been scrumpled. I then lightly inked. The ink picked up the sanded areas to create a worn look. I layered them according to size and poked a brad through the centre to hold them together. The ‘dad’ sentiment are the K&Co Alphabet Die-Cut Stickers. They are self-adhesive to I stuck them onto one of the circle flowers. I roughly inked them first, with black ink. I then added buttons and brads across the whole design.
|
|
|
Designed by Caroline Scattergood |
|
|
|
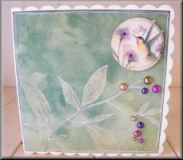
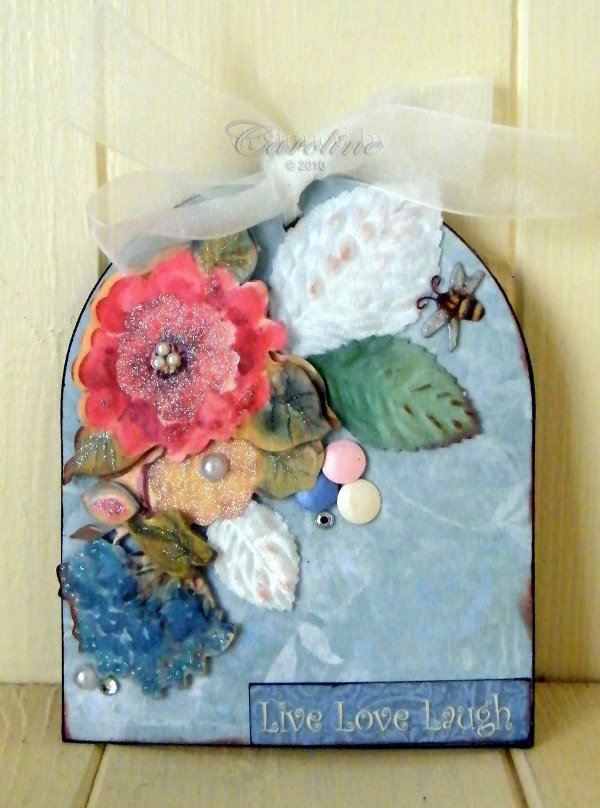
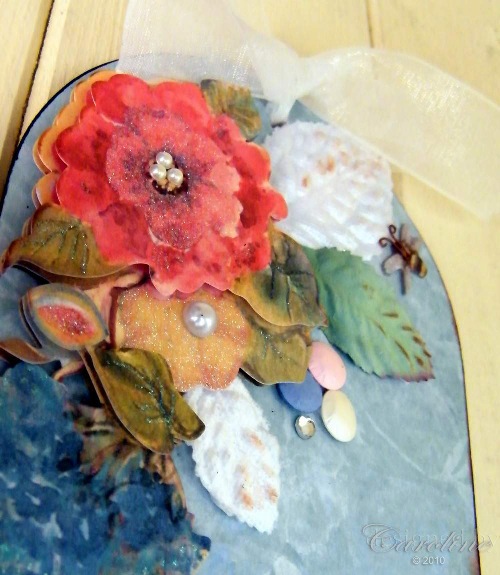
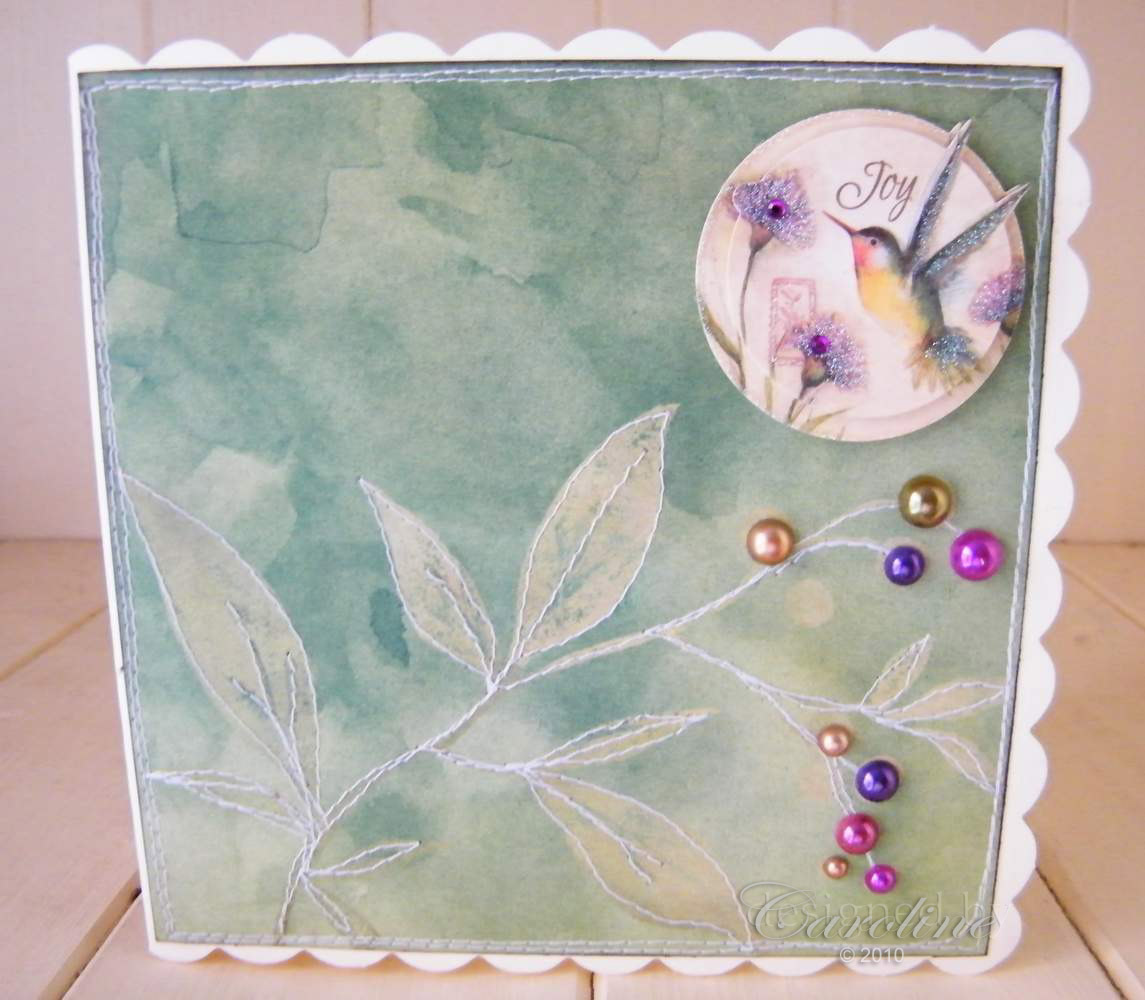
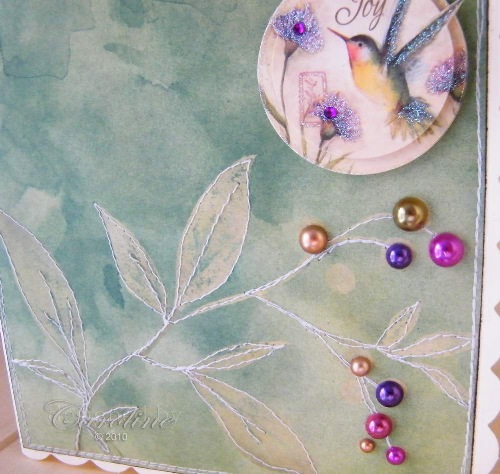
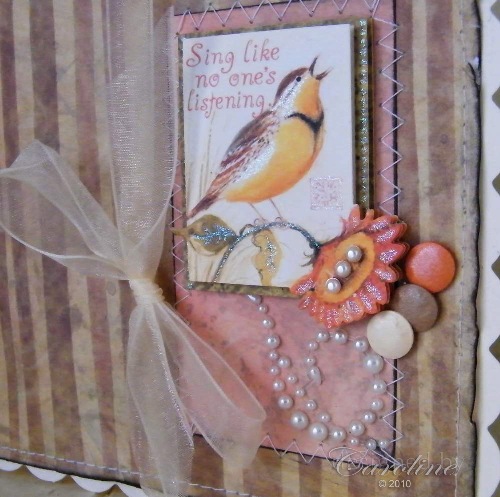
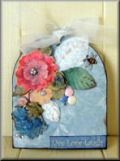
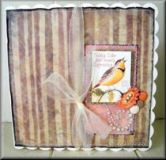
| Quick Guide Trim paper from the K&Co Nature Designer Paper Pack, to fit a card blank. Ink the edges of the paper. I used a paper from the Nature pad which had some branches. To highlight these further I traced around the leafs with my sewing machine! I then did a double stitched frame around the whole card, adhering it to the card blank. Add Prima pearls in some of the places where it indicates berries/blossom. Attach a K&Co Nature Bird Grand Adhesion to the top right of the card.
|
|
|
Designed by Caroline Scattergood
Click on picture to enlarge
|
|
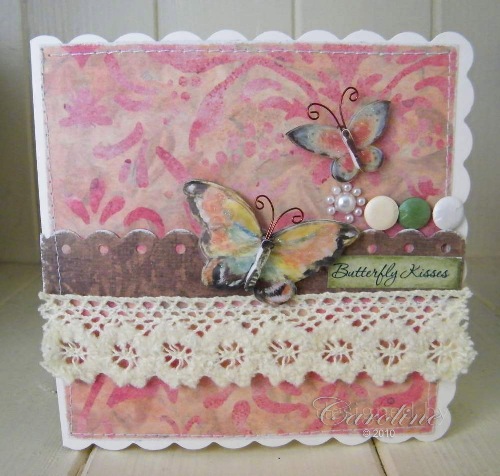
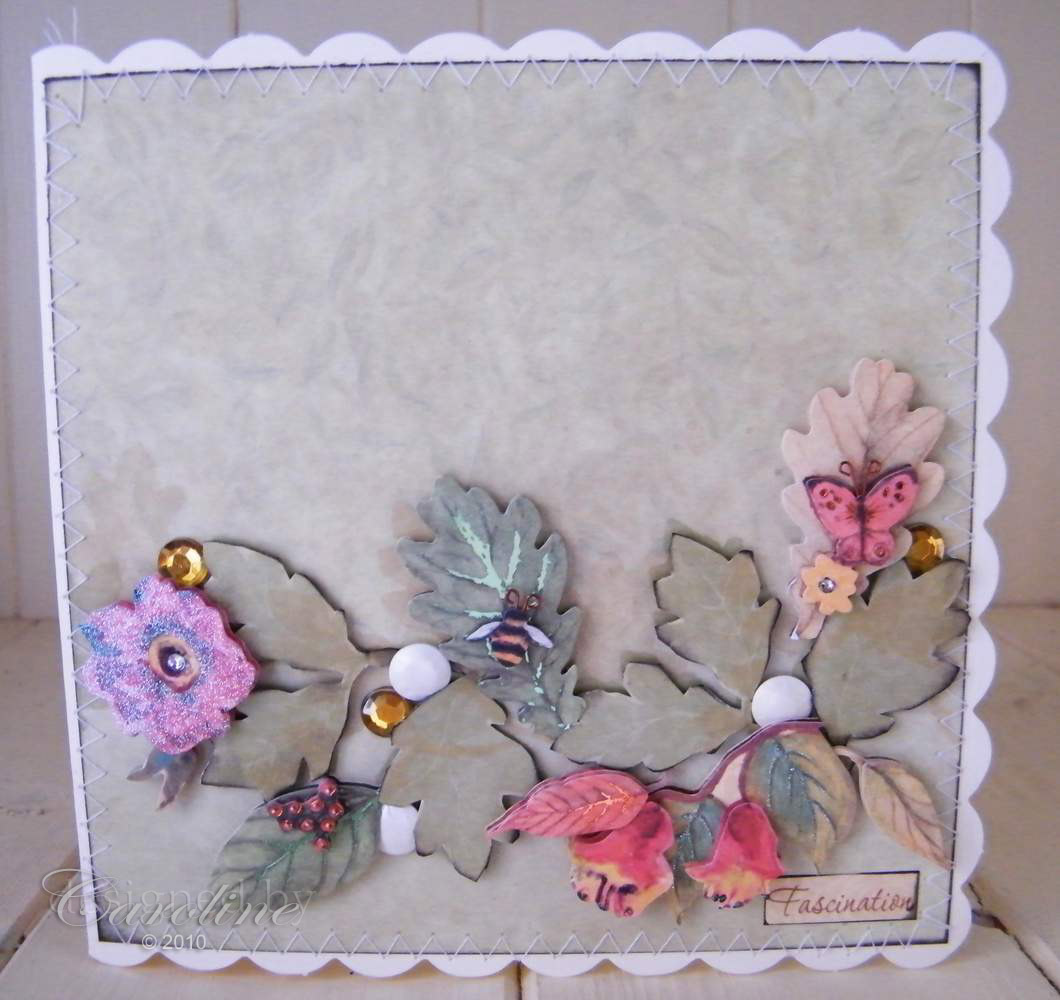
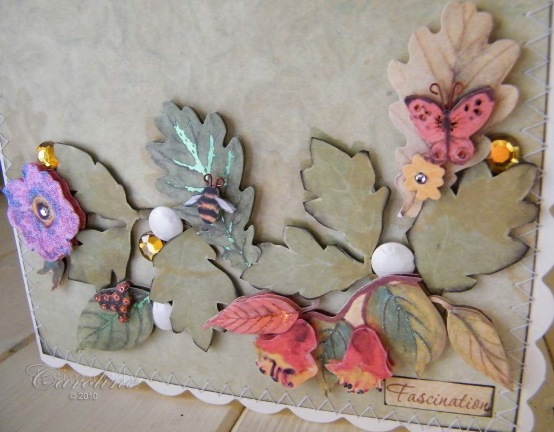
Quick Guide Trim paper from the K&Co Nature Designer Paper Pack, to fit a card blank. Ink the edges of the paper. Sew, with a zigzag stitch, the paper to the card blank. Take the same paper and cut out the leaves. Stick over the backing paper, creating a 3D effect with 3D foam pads. Fill in areas using some of the K&Co Nature Leaves and Flowers Grand Adhesions. Infill with Prima crystals and some brads. Sentiment ‘ Fascination’ is from the K&CO Nature Word Embossed Sticker pack.
|
|
|
Designed by Caroline Scattergood |
|
Click on picture to enlarge
|
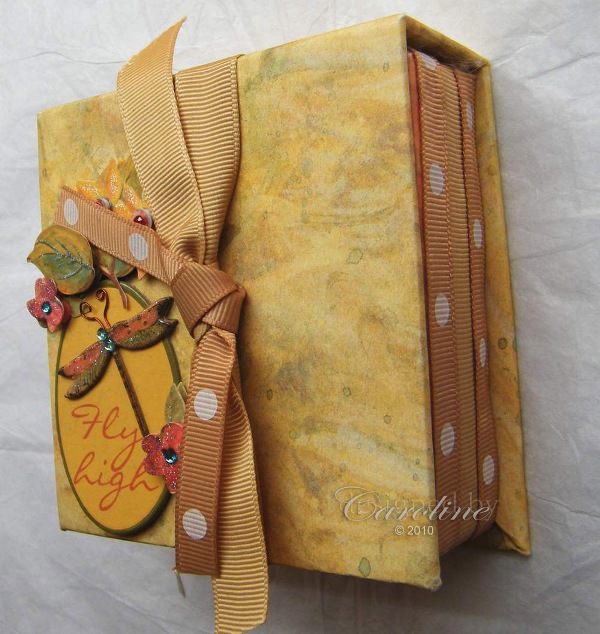
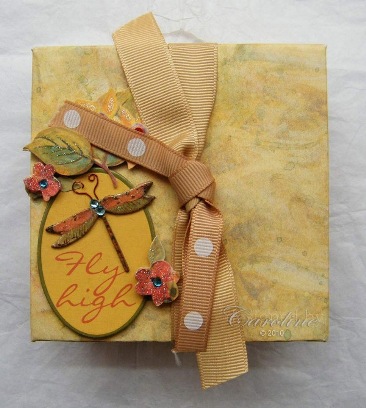
| Quick Guide This box was one I saved once the memo paper had gone! Such a handy little box that I was really loathe to throw away. I knew I would use it one day! I covered the inside and out with paper from the K&Co Nature Designer Paper Pack. I added ribbon to the sides of the outside of the box. I then added a K&Co Nature Words Adhesive Chipboard piece to the top of the box and finished off with tying ribbon around.
|
|
|
Designed by Caroline Scattergood |
|
|
|
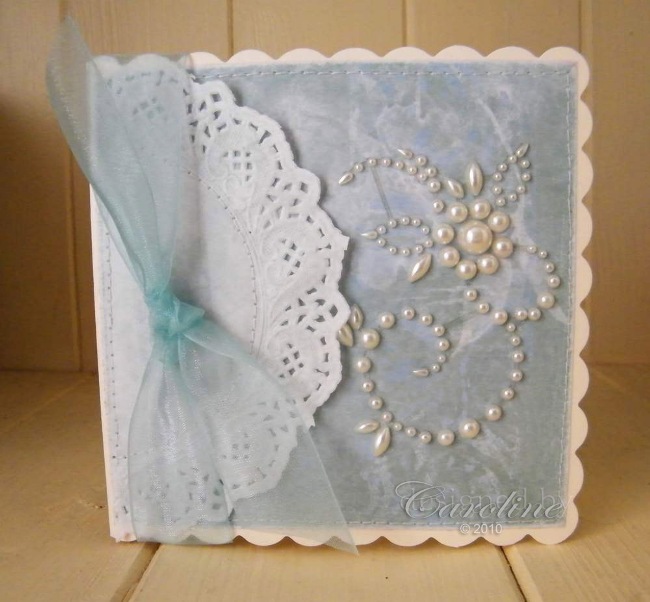
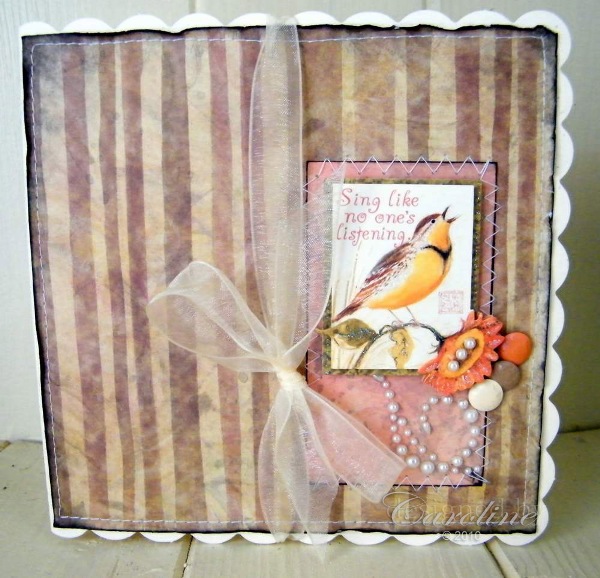
| Quick Guide Using paper from the K&Co Nature Designer Paper Pack, I trimmed to fit the card blank. I then inked around the edges with black ink. Cut out a piece of coordinating paper and sew to the backing paper. The bird image is K&Co Nature Bird Grand Adhesions. As they are 3D images, they give a lovely finished look to a card without really much effort! I added part of a Prima e-line pearl swirl (300043) underneath the image and some plain brads. I then tied a bow, with cream organza ribbon, around the whole card.
|
|
|
Designed by Caroline Scattergood |
|
|
|
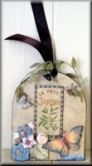
| Project Guide I wanted to wrap some chocolates to coordinate with the Gift Bag and as the sides of the chocolate box were already a blue (which would match with the papers anyway) all I had to do was wrap some paper around the box. Using the box as a guide, score the paper (from the K&Co NatureDesigner Paper Pack) where it needs to fold over the edges of the box
Ink with black ink to highlight. Wrap around the chocolate box and stick with double-sided tape.
I then added a border strip from the pack of K&Co Nature Adhesive Borders. I found some old chipboard letters which matched with the papers, sanded then down a little, added a K&Co Nature Butterfly, and then inked and stuck to the wrap. As the wrap did not go around the sides of the box, I tied a ribbon around all four sides, to finish in a bow centre top. The lovely tag is from the K&Co Nature Tag Grand Adhesions pack. This is tied around the bow using brown string.
|
|
|
Scrapbook Layout - Delight in the Simple Things Designed by Caroline Scattergood |
|
Click on picture to enlarge
|
|
|
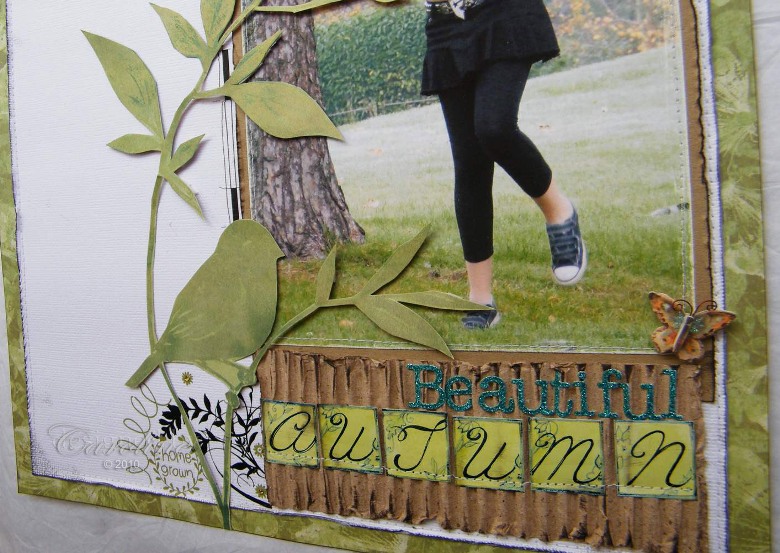
Project Guide I used one of the papers from the K&Co Nature Designer Paper Pack as the backing page. I then cut two sides of a 12x12 piece of white cardstock and layered on top, so that the patterned paper created a frame. I then sewed them together. The white cardstock was inked with black ink. Once sewn onto the patterned paper, I ran some scissors along each length of the cardstock to give it a more aged look. Back the photo onto kraft paper and sew. Using the K&Co Nature Alpha Die-Cut Stickers and K&Co Nature Word Glitter Stickers I created the sentiment ‘Beauty’ and ‘Autumn’. This was stuck onto corrugated card from an old cardboard box. The corrugated card was roughly inked with black ink to highlight some of the ridges. I added a little K&Co Nature Insect Grand Adhesion to bring the photo and corrugated card together. The bird and branch is cut out from one of the pages from the K&Co Nature Designer Paper Pack, and then stuck to the page using a mixture of double-sided tape and 3D Pads. I added a K&Co Nature Word Embossed Sticker to the top left – ‘Design in the simple things’. I added a flower rub-on, some brads and a Prima crystal. The flourishes below the bird are rub-ons also. Both BasicGrey.
|
|
|
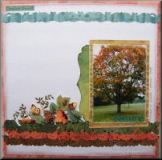
Designed by Caroline Scattergood |
|
Click on picture to enlarge
|
|
|
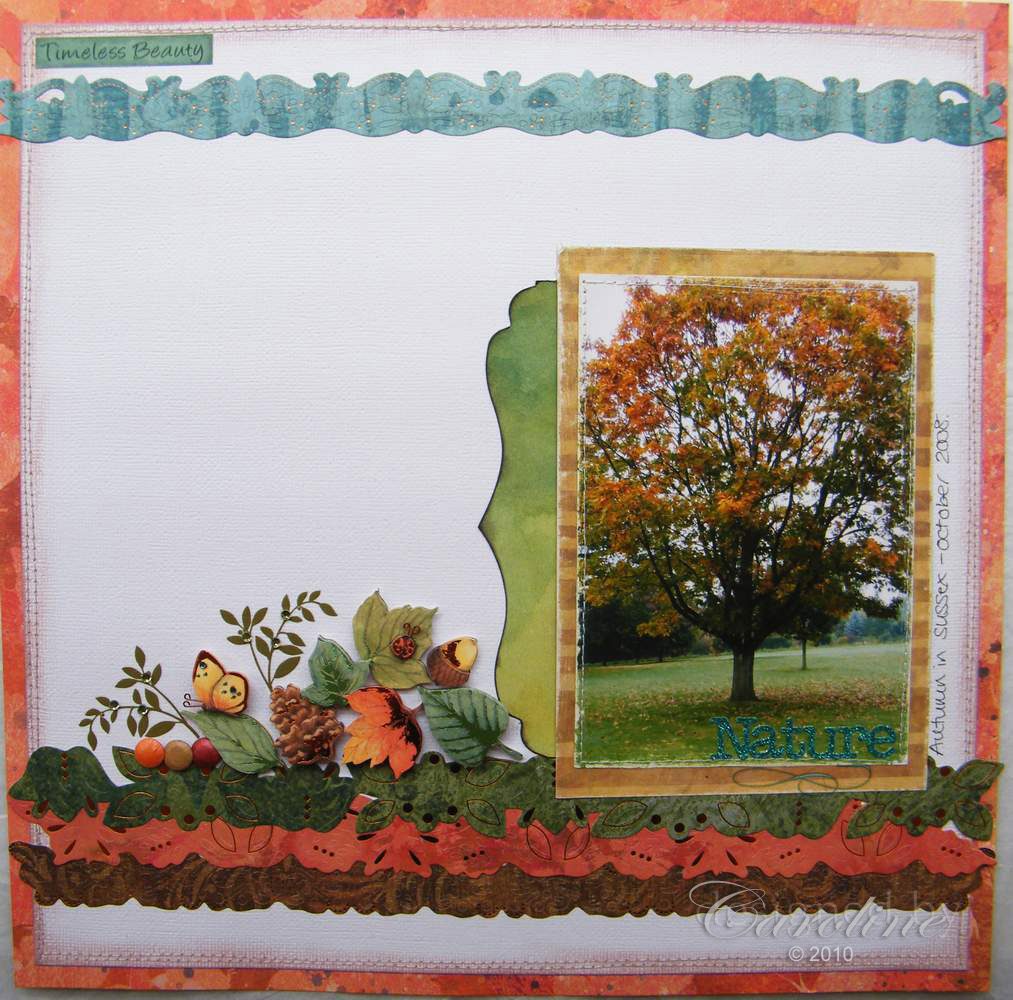
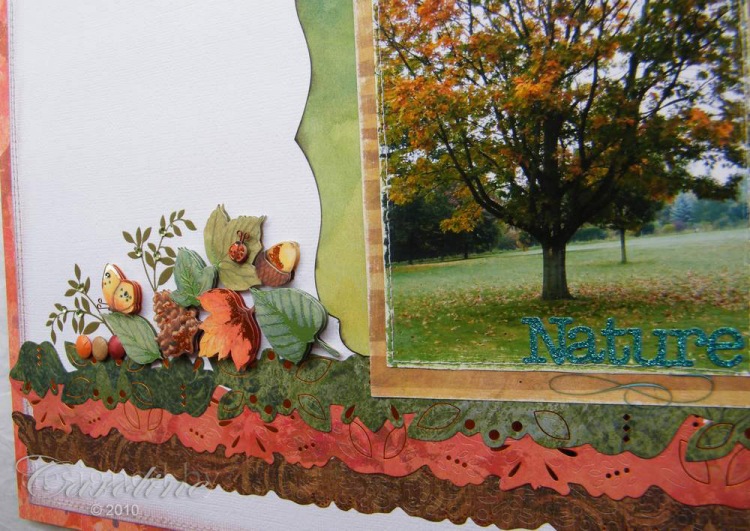
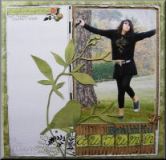
Project Guide This is a lovely photo of a typical autumnal tree. These papers and embellishments are a mixture of lovely colours and so are very versatile and will cover most events, including Autumn. I used one of the papers from the K&Co Nature Designer Paper Pack as the backing page. I then cut two sides of a 12x12 piece of white cardstock and layered on top, so that the patterned paper created a frame. The white cardstock was inked with brown ink. I then sewed them together. I backed the photo with some of the paper from the Designer Pack and sewed into place. I used a scrap piece of paper to create the green border to the left of the photo. I overlapped three of the K&Co Nature Adhesive Borders underneath the photo, and one across the top. The ‘Nature’ word is from the K&Co Nature Word Glitter Stickers pack – they are such a lovely contrasting but complimentary colour to this collection. ‘Timeless Beauty’ , top left, is a K&Co Nature Word Embossed Sticker, inked around the edges. Using K&Co Nature Leaves Grand Adhesions, I created the embellishment cluster running across the top of the border strips. I added some crystal rub-ons (BasicGrey) and card candy in amongst the cluster to add to the autumnal feel.
|
|
All projects copyright ® Charmed Cards & Crafts. All rights reserved.