|

|
|

Christmas Card Making Ideas: Graphic 45
by Karen Mortensen
Here I am using the Graphic 45 collection "Twas The Night Before Christmas" to make a bunch of super easy Christmas cards.
 |
 |
|
 |
 |
|
 |
 |
|
 |
|
|
|
Christmas Card Making Ideas: Graphic 45
by Karen Mortensen
Here I am using the Graphic 45 collection "Twas The Night Before Christmas" to make a bunch of super easy Christmas cards.
|
|
|
|
|
|
|
|
|
|
|
|
|
|

|
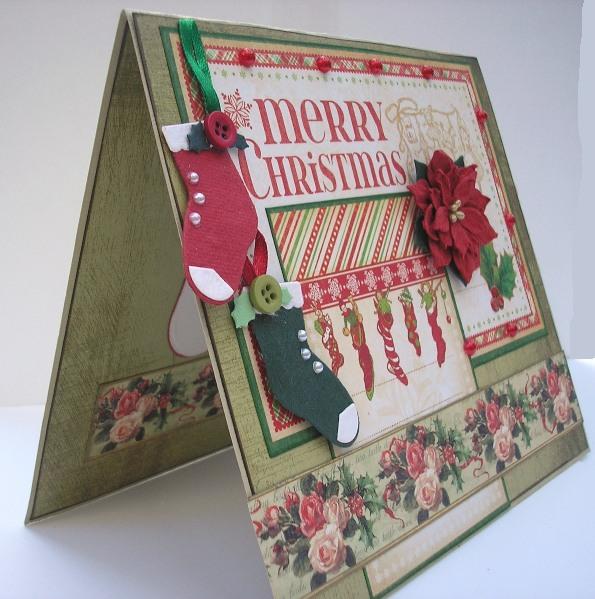
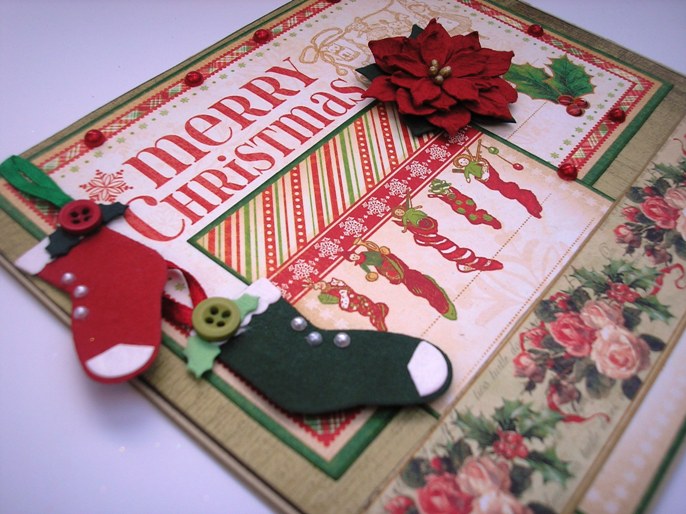
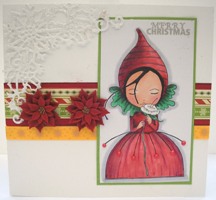
"Christmas Stockings" Christmas Card by Karen Mortensen
I used:
Cut and fold a piece of cardstock into a card sized 17cm (width) x 15cm (height) Cover the front and inside with Basic Grey Blitzen paper - ink edges before sticking down. Cut out the Merry Christmas image from the " Up On The Housetop" paper. Ink edges then stick onto the card at the top. Cut out the Stockings image from the same sheet. Again ink edges then stick into position (see pictures for guidance) Cut a Christmas Rose border strip from Graphic 45 Twelve Days of Christmas "Joyeux Noel" sheet.
Stick a piece on the front, and a 13.5cm piece for the inside below your sentiment (I used a Spellbinders die for my die-cut)
Add two felt stocking, a poinsettia, and some red pearls. I also used Glossy Accents on the berries on the holly image.
|
|||||
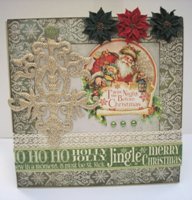
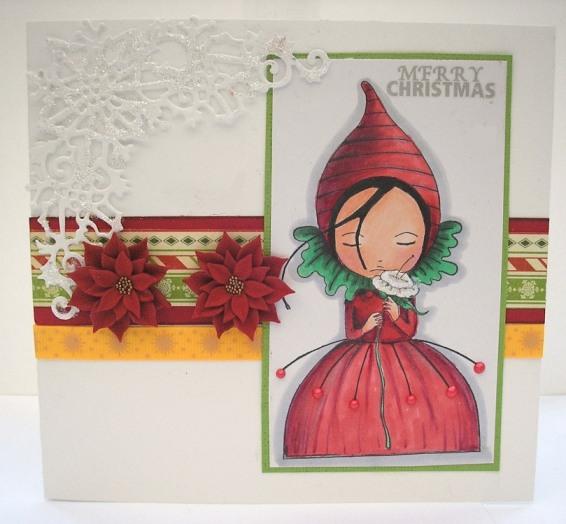
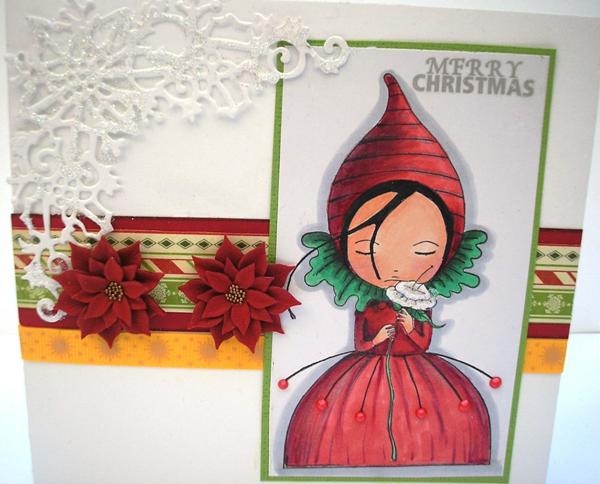
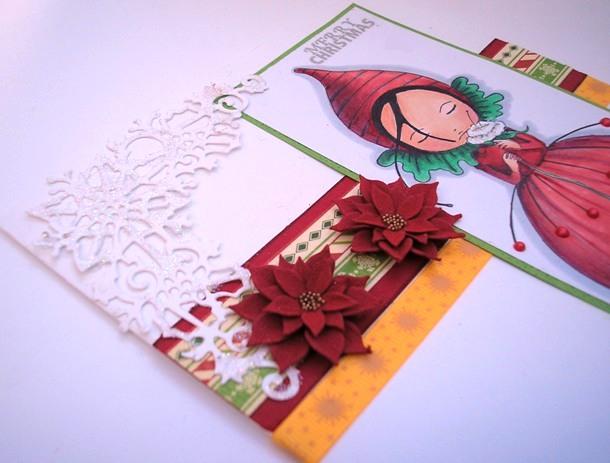
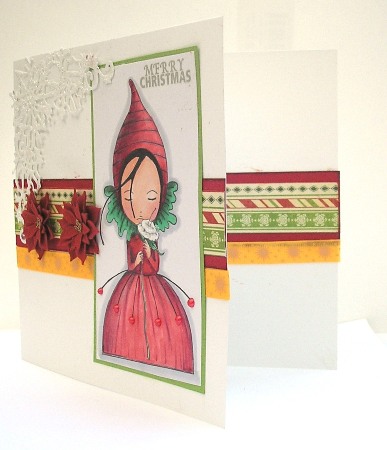
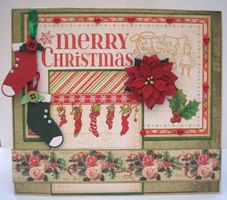
| "Merry Christmas" Christmas Card by Karen Mortensen
I used:
Cut and fold a piece of white smooth cardstock into a card size15cm x 14.5cm Cut a few borders from the Graphic 45 Ho Ho Ho, and mount them on red cardstock. Ink edges, then stick it to the middle of the card. Add a piece of ribbon below the paper borders. Add the same to the inside. You can add a die-cut to take a sentiment on top of the borders inside.
Stamp and colour your image, then cut it out and mount on lime green cardstock. Add a sentiment. I used a rub-on. Add Liquid Pearls to the dress:
Stick your main image onto the card (see pictures for guidance). Cut a large corner and stick it onto the card. Add glitter there and there to the corner die-cut, and also on the little flower on the stamped image. Add two large poinsettia.
|
|||||
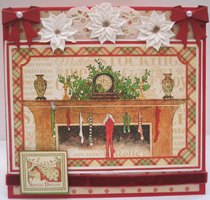
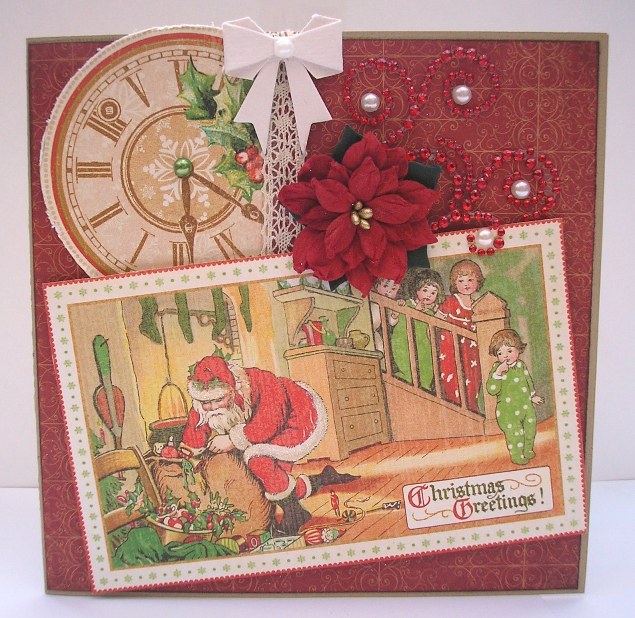
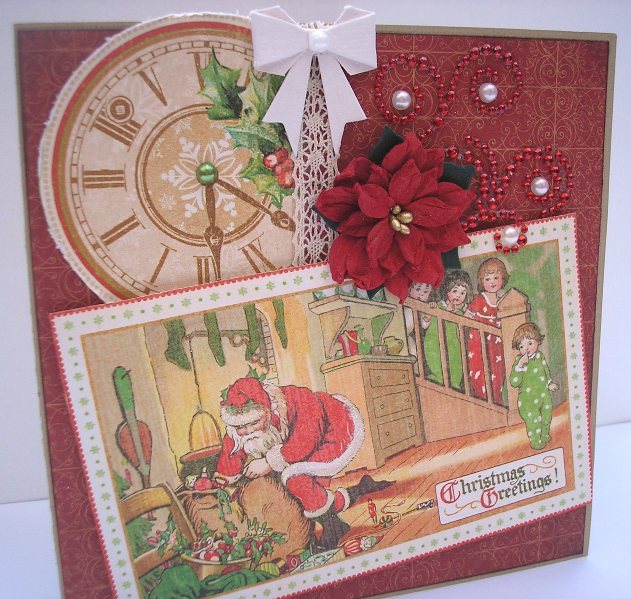
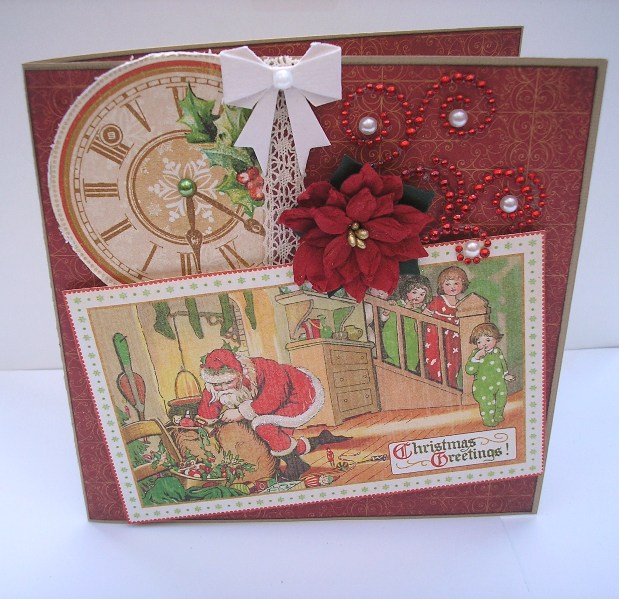
| "Waiting for Santa" Christmas Card by Karen Mortensen
I used:
Cut and fold a piece of plain cardstock into size 15cm x 15cm Cover inside and out with Silver & Gold paper. Ink edges before sticking down. Cut a large clock from the Jolly Old Elf paper. Rough up edges with a distresser, I used the Tim Holtz Paper Distresser. Stick it onto left-hand corner, so that it is sticking outside the edges of the card at the top (see pictures for guidance). Add a strip of lace right-hand side of clock and top with a white Bow with Pearl. Cut out the image from the "Long Winter's Nap" paper. Mount on foam pads, then attach to card at an angle (see pictures for guidance) Add a Prima Swirl and arrange some white pearls in the swirl. Add one green pearl in the middle of the clock by the hands. Finally add a large poinsettia and a little glitter to Santa (on the fur of his clothes)
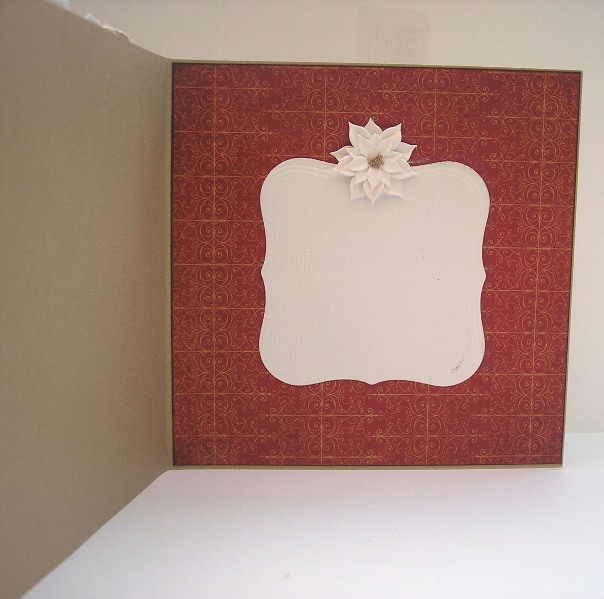
Decorate the inside:
|
|||||
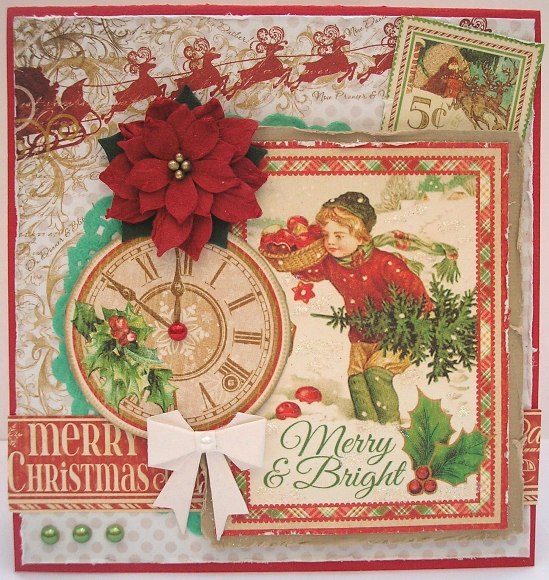
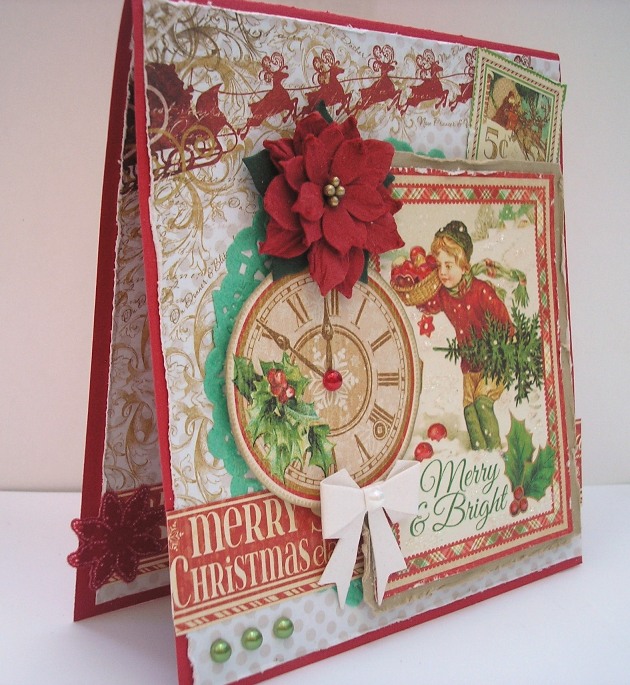
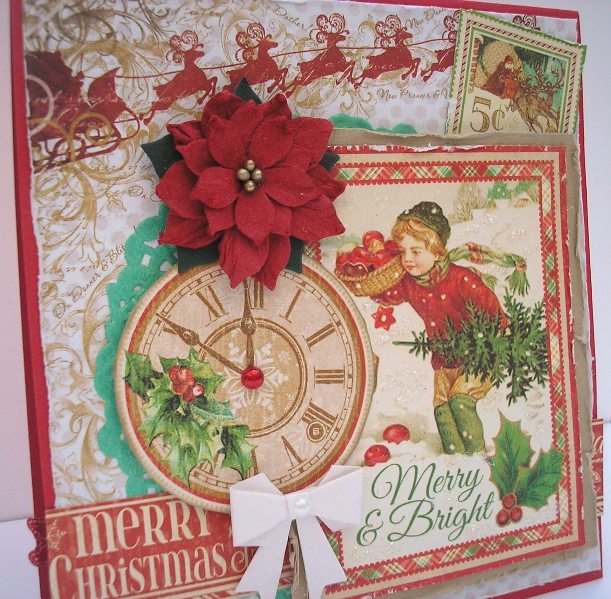
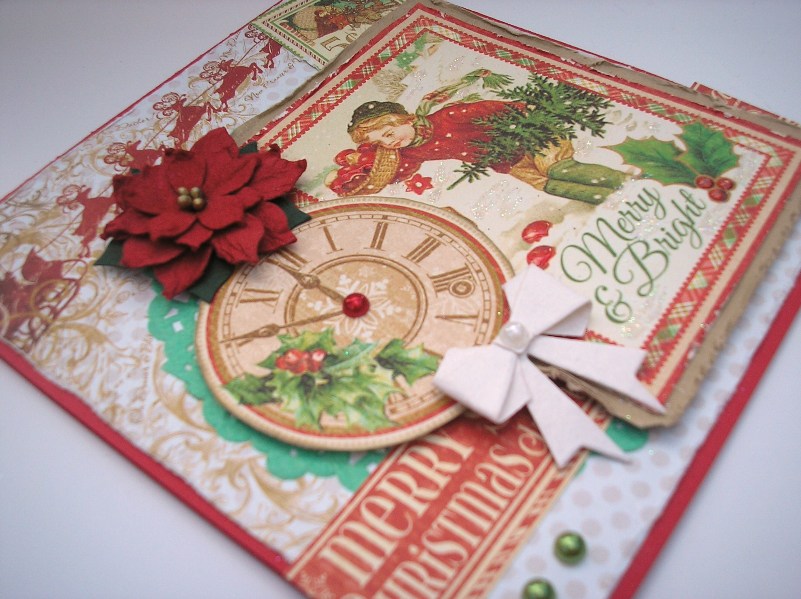
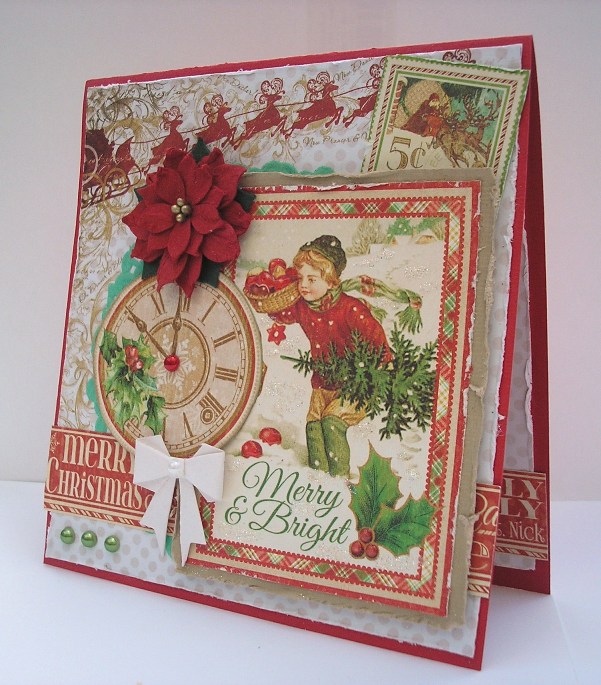
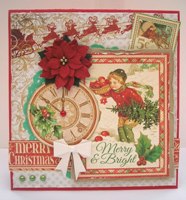
| "Merry & Bright" Christmas Card by Karen Mortensen
I used:
Cut and fold plain red cardstock into size 14cm (width) x 15cm (height) Cut two pieces of Silver & Gold paper into size 14.5cm (height) x 13.5cm (width). Scuff edges with a distresser, then stick one piece on the front of the card, and the other on the inside of the card. Stick a green doily onto the front of the card, slightly towards the left and down a bit, so that it is mostly on the bottom left-hand side (see pictures for guidance). Add a border strip cut from the Ho Ho Ho paper to both the front, and the inside of the card (see pictures for guidance). Cut it so tha you get the sentiment you want for the front. Cut a Stamp from the Ho Ho Ho paper. Scuff edges, then stick to the right-hand side (see pictures for guidance) Cut the Merry & Bright image from the "Long Winter's Nap" paper and mount it on plain cardstock. Scuff the edges of the cardstock. Cut a small clock from the Jolly Old Elf paper, and stick it onto the Merry & Bright image. Mount on foam tape and stick onto card so that you can see parts of the doily (see pictures for guidance). Add a large poinsettia. Add crystal stickles here and there to the image for glistening snow effect Add glossy accents to all berries and apples on images. Add a white bow with pearl, three green pearls to the bottom of the card, and one red pearl to the middle of the clock.
|
|||||
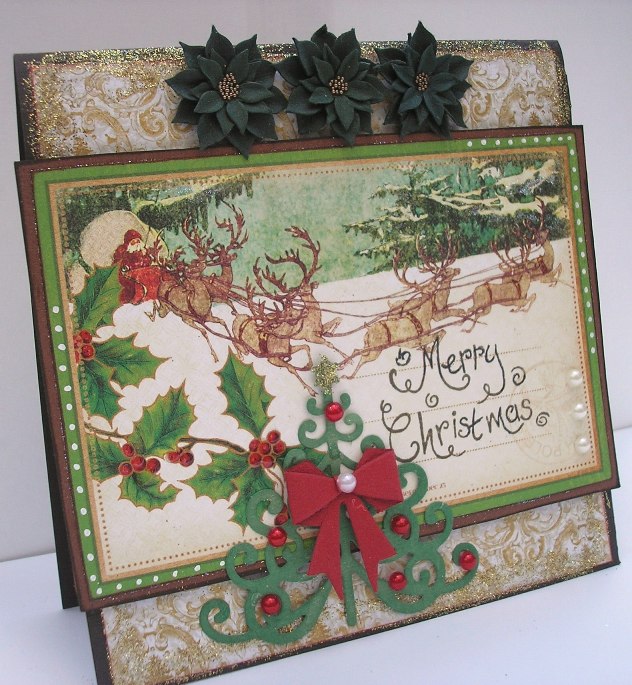
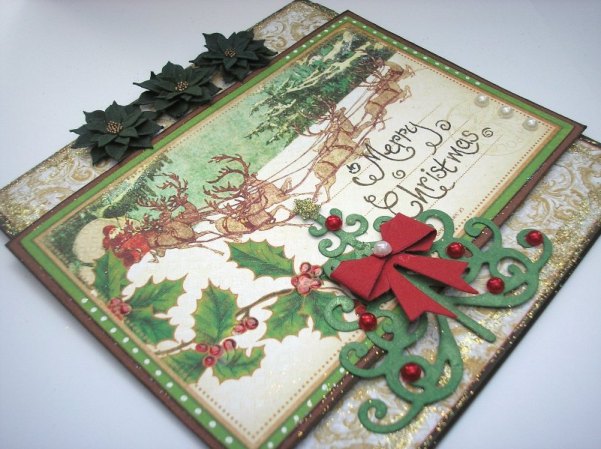
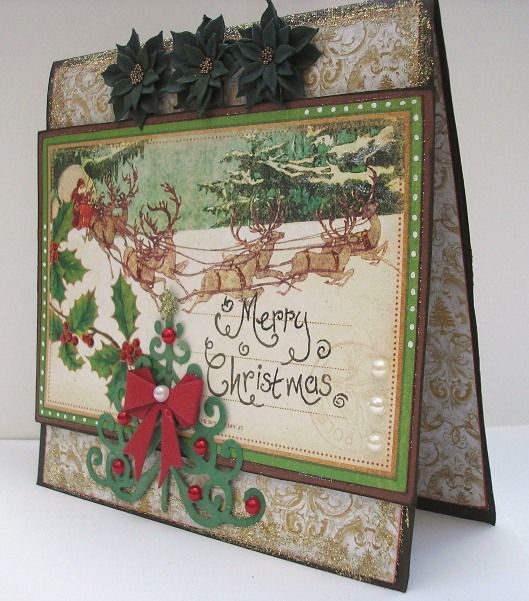
| "Santa is Coming" Christmas Card by Karen Mortensen
I used:
Cut and fold a piece of dark brown cardstock into a card sized 15cm x 15cm Cover the front with a sheet of paper from the Silver & Gold 6x6 Pad, or from the 12x12 sheet Cut a piece of cardstock size 15.5cm x 10.5cm. Ink edges. Cut the "Santa & Reindeer" image from the "Up on the housetop" sheet, ink edges then mount it onto the cardstock. Dot with a white pen, I used a Sharpie marker. Write or stamp a sentiment. Add this piece to the middle of the card front. Add glue from, say, a glue stick, around the exposed edges of the main card, then sprinkle with Gold Glitter - I used Gold Glamour Dust. I wanted a heavy coverage. Add three poinsettias to the top. Cut a Christmas tree from the Sweet Dixie die. Glitter the star, I used Gold Stickles. I also sprayed my tree with a shimmer spray, although it doesn't show up in the pictures. Glue tree onto card, then add red pearls and a red paper bow.
Add some clear stickles to various areas on there to emulate the glittering snow. I added some on the snow on the branches. I also added Glossy Accents to the holly berries.
Cover the inside with the Silver & Gold paper, ink edges with red distress ink. Add a white panel to take your sentiment. I used a Spellbinder die. Top with a red poinsettia.
|
|||||
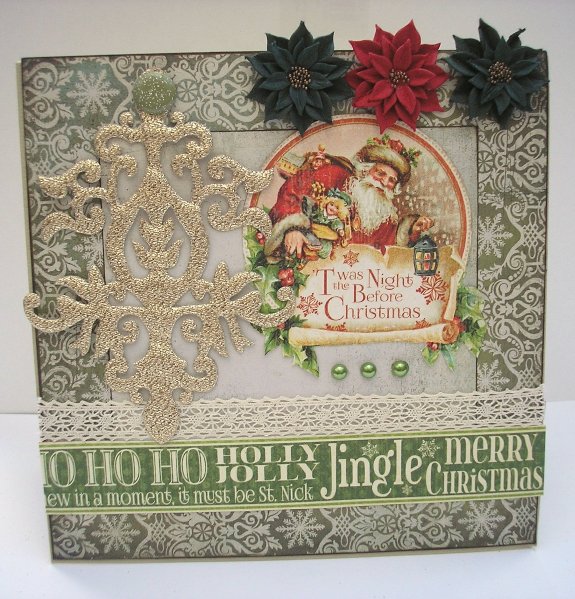
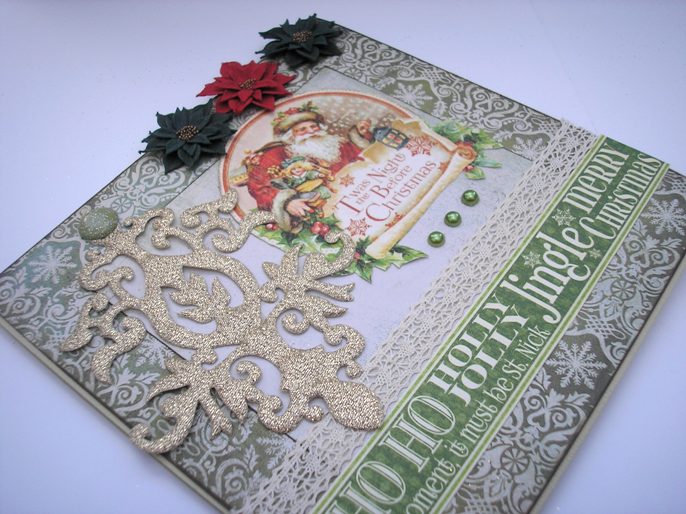
|
by Karen Mortensen
I used:
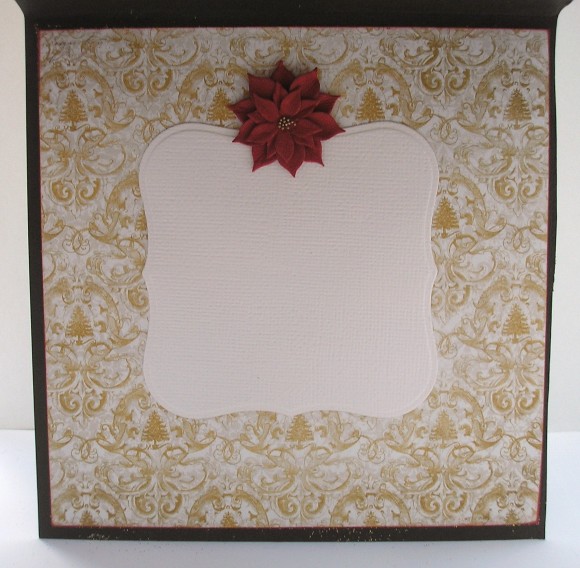
Cut a piece of cardstock into a card size: 15.5cm x 15.5cm Cut a piece of patterned paper size 15.2cm x 15.2cm. Ink edges then stick onto the fron of the card. Cut a piece of Basic Grey paper into size 9cm x 11cm (width). Ink edges, then stick onto front (see pictures for guidance). Add a strip of cream lace, and a paper border strip from the Ho Ho Ho paper Cut out the smaller "Twas the night Before Christmas" image from the Jolly Old Elf paper. Rough up the edges of the circle, then stick it onto the mat as pictured. Add a Gold Satin Vivant Perle Tag. Used double-sided tape to attach parts of the centre, and add a green Gumdrop brad at the top. Add three poinsettia and three green pearls.
Add a border strip, a white die-cut to take the sentiment, and a red bow with Pearl to the inside
|
|||||
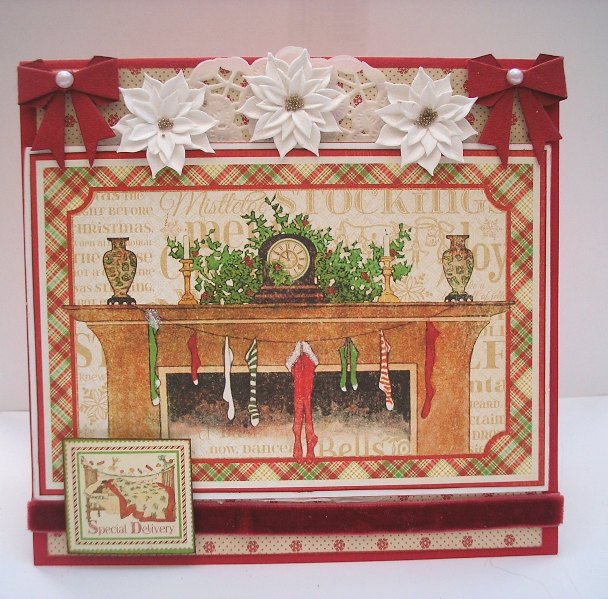
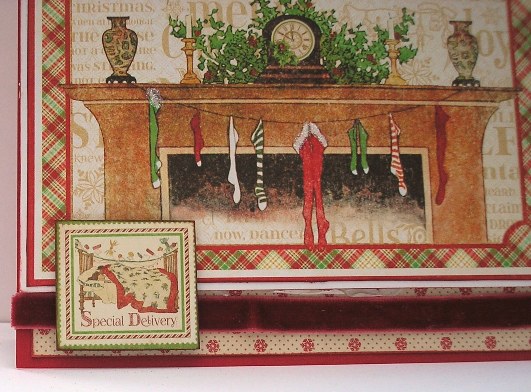
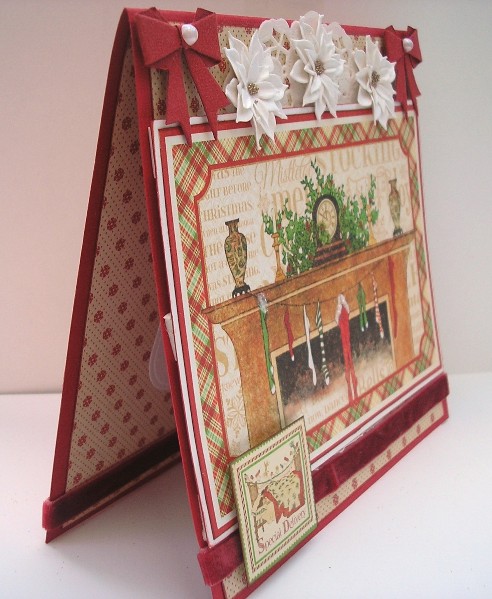
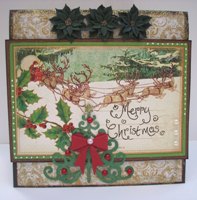
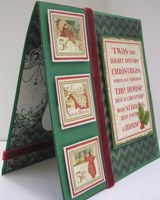
| "Hanging the Stockings" Christmas Card by Karen Mortensen
I used Plain Cardstock Graphic 45 Twas the Night Before Christmas "Long Winter's Nap" paper Graphic 45 The Twelve Days of Christmas paper (From the Patterns & Solid Pad) White Poinsettia Red velvet Ribbon White/crystal Stickles Cut plain red cardstock into a card size 16.3cm (width) x 15.3cm (height) Cut two pieces of Graphic 45 Twelve Days of Christmas paper into size 14.5cm (height) x 15cm (width). Ink edges with red ink, then attach one to the front of the card, and the other to the inside of the card. Stick on a small white doily to the top of the card (see pictures for guidance). TIP: use just the part you need, save what isn't showing for another card. Cut the appropriate image from the "Long Winter's Nap" sheet and mount this onto white cardstock. Mount onto foam tape, then stick onto front of card. Embellish with a piece of red velvet ribbon at the bottom, and poinsettias and bows to the top. Add Stickles to parts of the stocking. Cut a stamp from the "Ho Ho Ho" sheet. Ink edges then mount on foam tape and stick to card (see pictures for guidance)
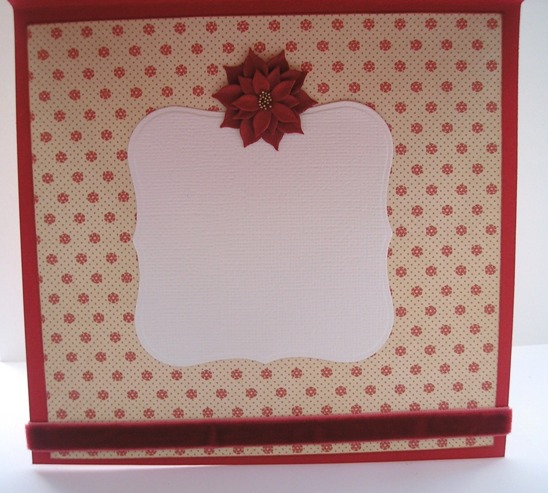
A simple inside.
|
|||||
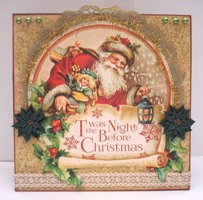
| "Twas The night Before Christmas" Christmas Card, by Karen Mortensen
I used: Plain Cardstock Graphic 45 Twas the Night Before Christmas "Long Winter's Nap" paper Graphic 45 Twas the Night Before Christmas "Ho Ho Ho" paper Bo Bunny Silver & Gold 6x6 Paper Pad Red Velvet Ribbon Crackle Accent Spellbinders Dies (Inside card)
Cut a piece of green cardstock into size 15.3cm x 15.3cm. Cut a piece of the Zig Zag paper from the Silver & Gold pad into size 14.5cm x 9cm and stick to the front right-hand side. Add a piece of red velvet ribbon Cut out the appropriate image from the "Long Winter's Nap" paper, mount on green cardstock. Ink edges, then mount on foam tape, and stick onto card (see picture for guidance). Cut out three stamps from "Ho Ho Ho" paper. Mount on white cardstock. Mount on foam tape, then stick onto card (see pictures for guidance). Add some Crackle Accent to the ivy on the image.
Inside using the same paper, ribbon, and a die-cut using spellbinders dies:
|
|||||
|
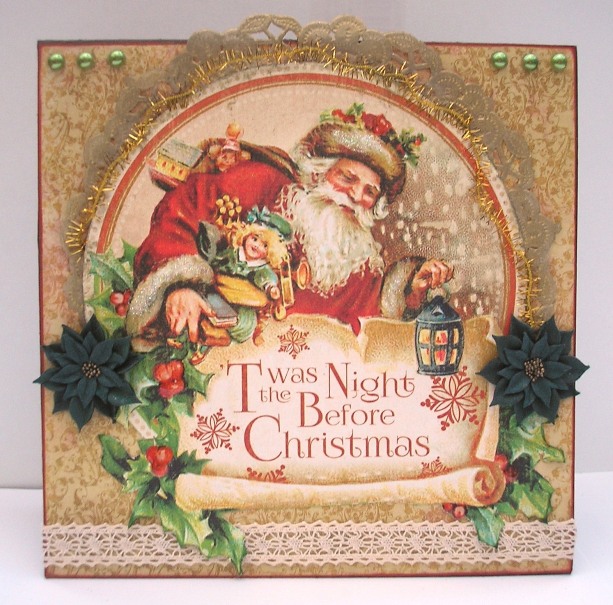
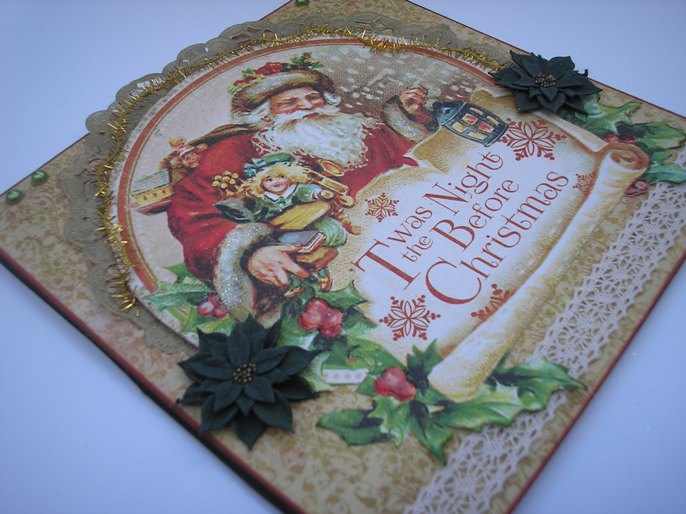
"Twas the Night Before Christmas 2" Card by Karen Mortensen
I used: Graphic 45 Twas the Night Before Christmas "Jolly Old Elf" Paper Bo Bunny Silver & Gold 6" x 6" paper Pad Cream Lace Velvet Ribbon Green and red Poinsettia Little gold fibre crystal Stickles
Cut and fold plain dark brown cardstock into a card size 15.3cm x 15.3cm (6" x 6") Take two sheets from the Silver & Gold 6x6paper pad. Ink edges with red ink, then stick one to the front of the card, and the other inside. Take a 5.5" wide gold doily and stick it onto the card, so that the top is above the edge of the card. TIP: if you haven't got a gold doily, just use a white one and colour just the parts that will be on show gold (as I did). Cut out the large Father Christmas image from the "Jolly Old Elf" Paper paper. Rough the edges of the circle up a little, then stick it onto the card. Add a little stickles on the trim of Santa's suit. Add Glossy Accent to the berries on the ivy Add a piece of lace at the bottom, two poinsettias, and six pearls:
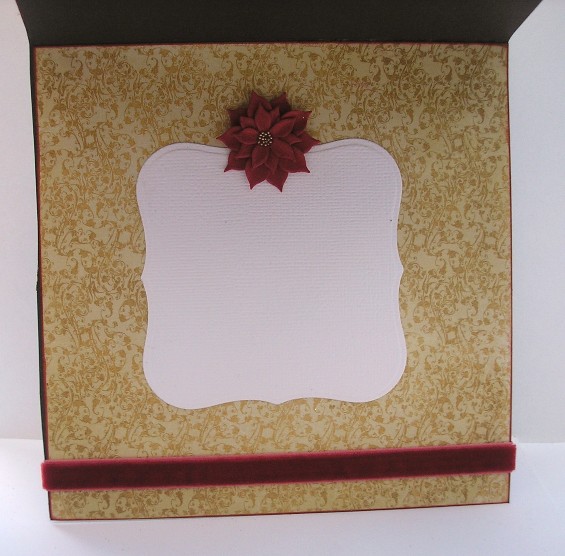
Simple inside:
|
|||||
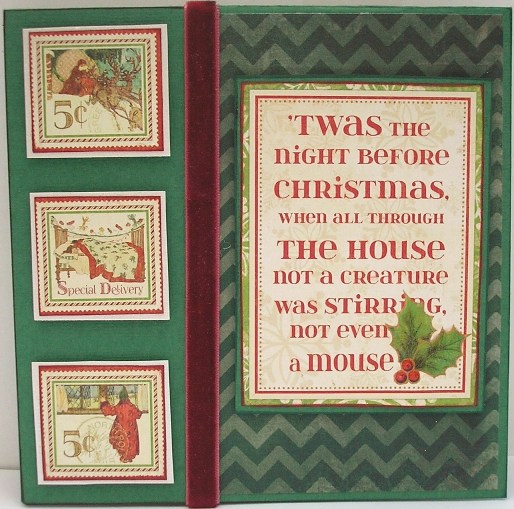
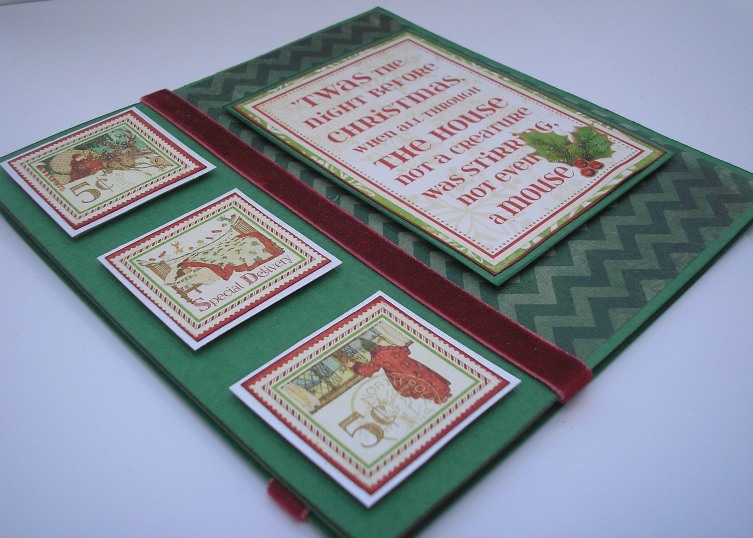
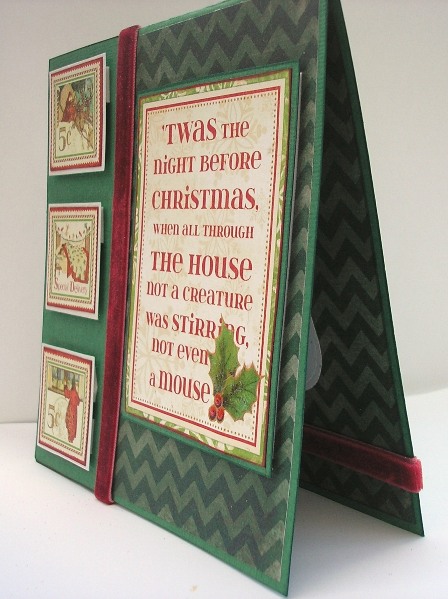
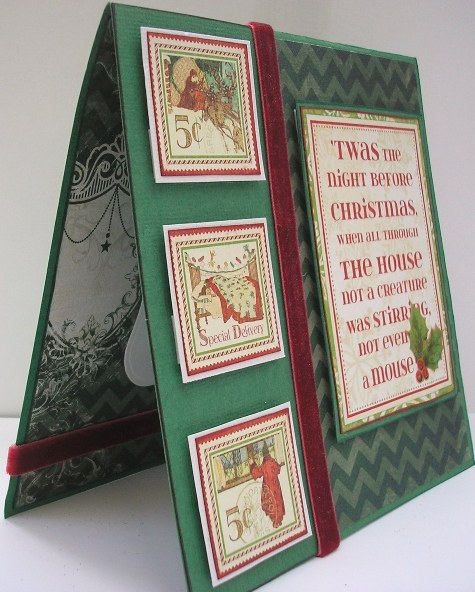
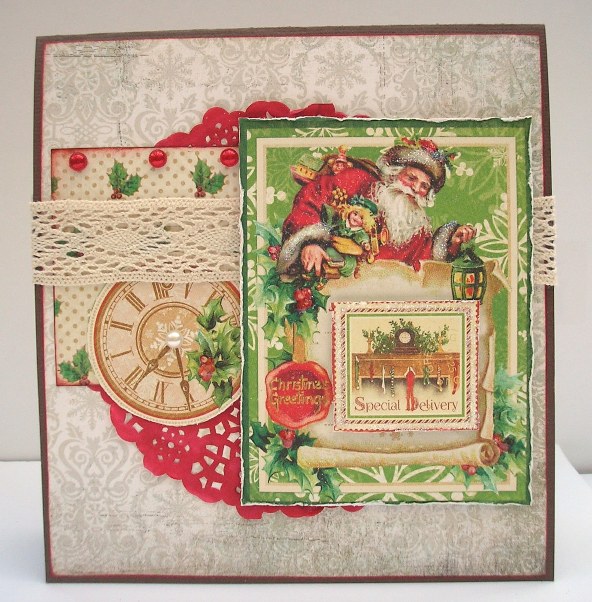
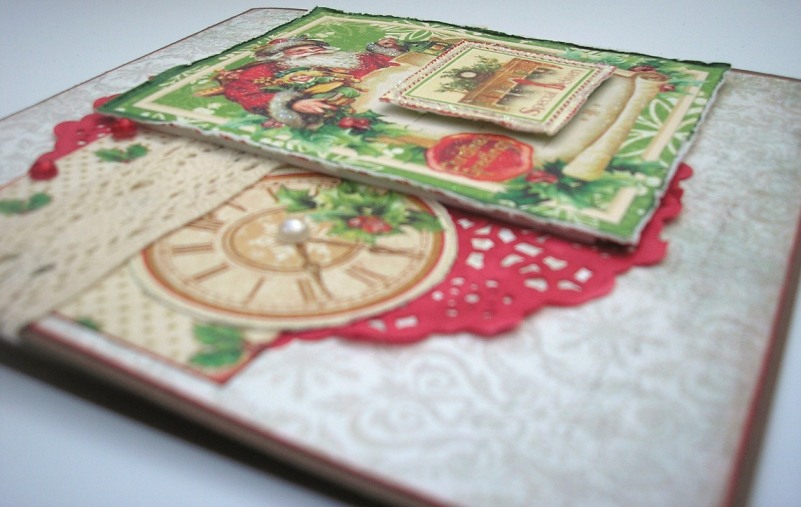
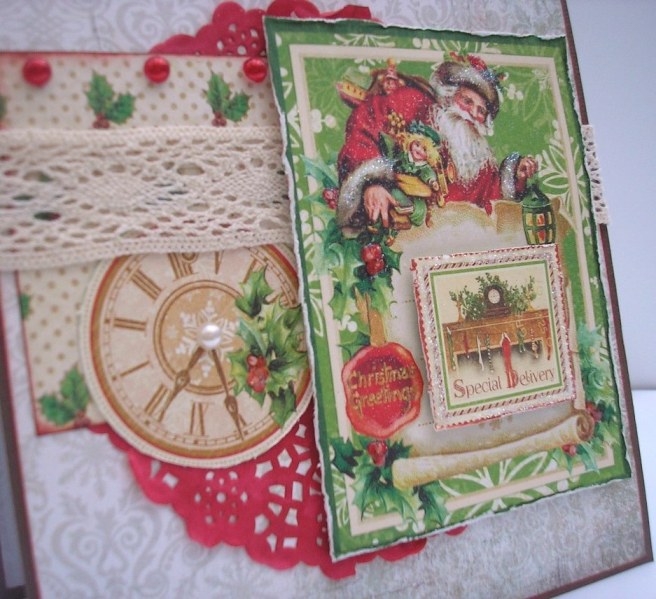
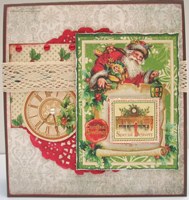
| "Special Delivery" Christmas Card by Karen Mortensen
I used:
Cut and fold a piece of dark brown cardstock into a card size 14cm (width) x 15cm (height) Cut a piece of the Basic Grey paper into size 14.5cm (height) x 13.5cm (width). Ink edges with red ink. Stick onto front of card. Stick a small red doily to the middle of the card, Cut a piece of the "Jolly Old Elf" paper into size 5.5cm x 5.5cm (we are using the reverse side here, NOT the clock side) . Ink edges with red ink, then stick onto left-hand side of card (see pictures for guidance) Cut a small clock out from the "Jolly Old Elf" paper, Scuff edges gently then stick on card (see pictures for guidance). Add a strip of wide cream lace across the width of card. Cut the appropriate image from the "Up on the Housetop" paper, and the stamp from the "Ho Ho Ho" paper. Mount the stamp onto foam tape then stick onto the Santa image. Scuff edges of the image with a paper distresser then mount on foam tape and stick onto card (see pictures for guidance). To finish embellish with a few pearls and glitter. I also added some Glossy Accent to the red berries.
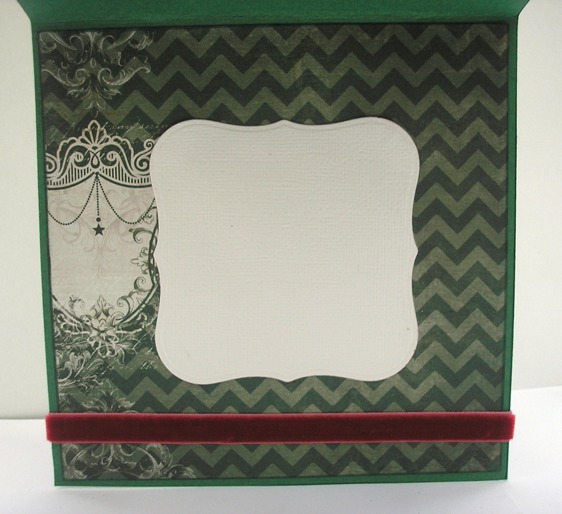
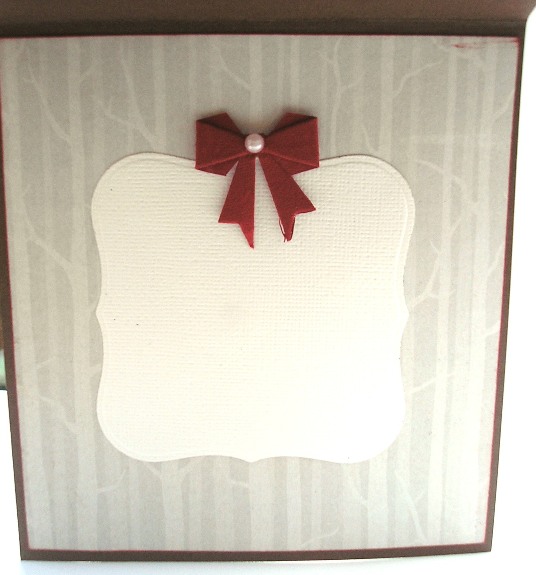
Simple inside. The paper is from the We R Memory Keepers Yuletide 6x6 pad.
|
All projects copyright ®Charmed Cards & Crafts. All rights reserved.