|
|
|
|
|
|
Charmed Cards & Crafts January '18 Kit Project Instructions
These are the instructions for using our January'18 Kit. The kit is based on the Rose Avenue collection by Kaisercraft.
We are showing you one layout and various cards, including one using the large card and envelope that comes with the kit. © Charmed Cards & Crafts 2018
|
|
|
|
|
|
|
|
|
|
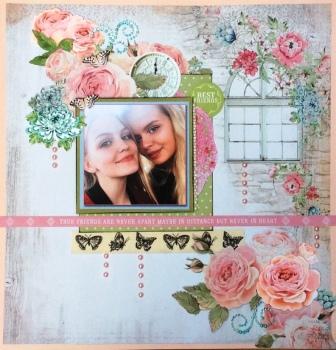
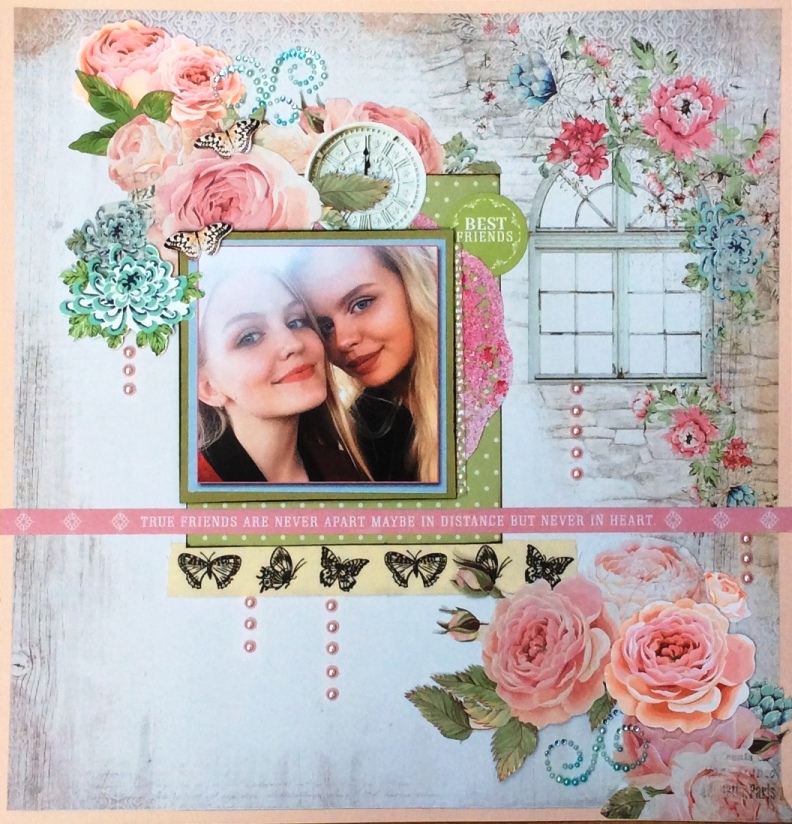
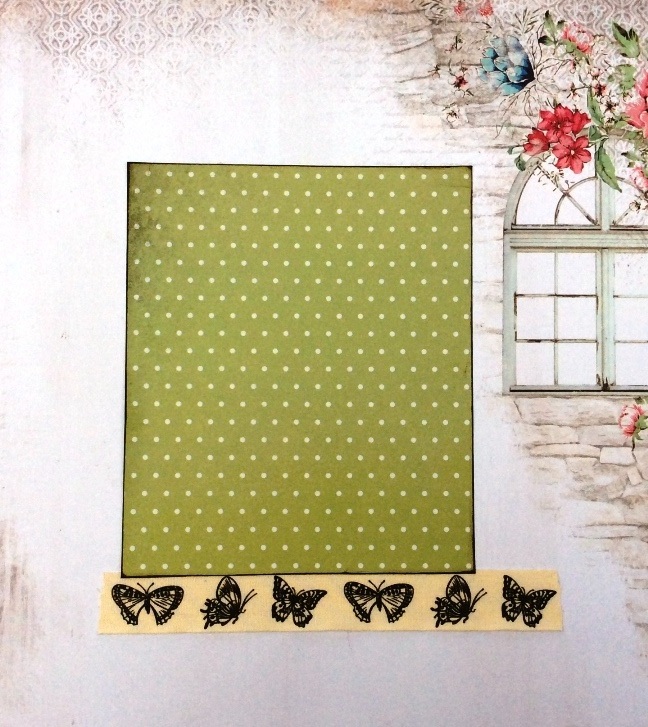
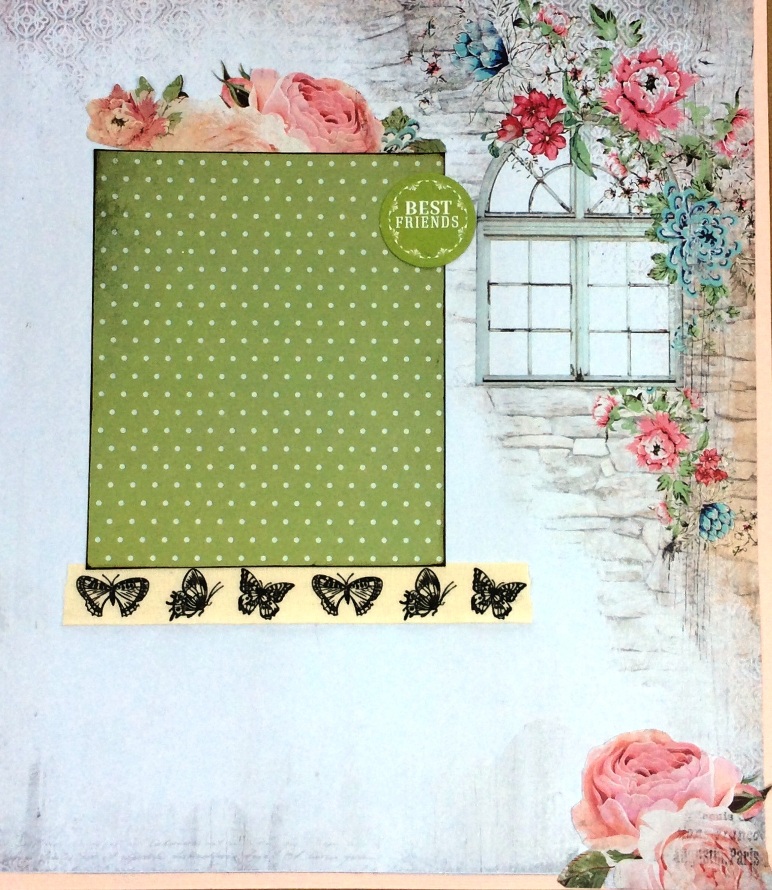
| Before you do anything else cut of all the bottom strips on all the patterned papers. All Kaisercraft papers have strips of words etc at the very bottom of the paper.
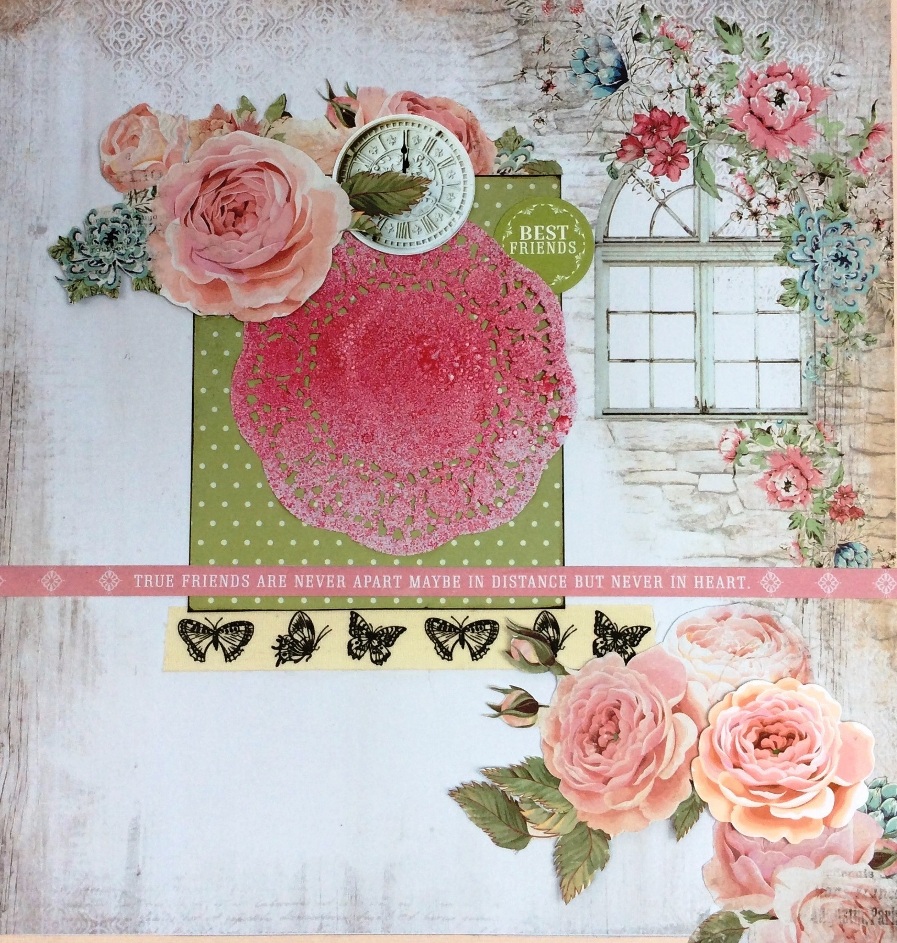
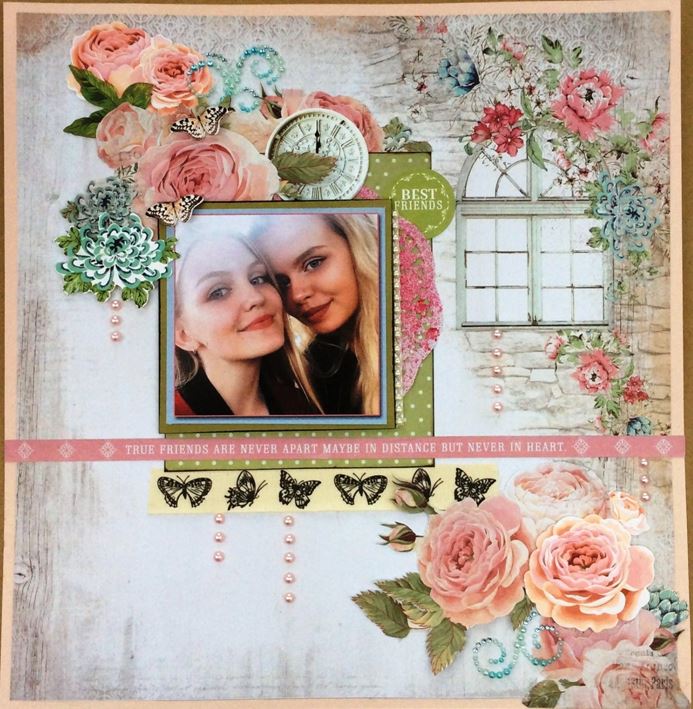
Papers used: "Rose Window, "Patio", "Terrace", Plain cardstock: "Ballet", "Sprout". Embellishments from the kit.
· Take your Kaisercraft white doily and spray it with an ink spray (not included), if you don't have any you can ink your doily by dapping on an ink pad, or you can just leave it white. TIP: I put the whole doily on here but as it turns out I only showed a tiny bit, you can therefore half yours and save the other half for something else. · Add more floral cut out from the "Patio" sheet. · Add some die-cuts from your collectable pack. Remember that content will vary so you may not have exactly what I am using here. I also added a large rose from the collectables to the bottom right-hand corner, mounting it on foam pad for an elevated look. · Stick on the lower border from the "Patio" paper so it spans across the layout at the bottom of the mat.
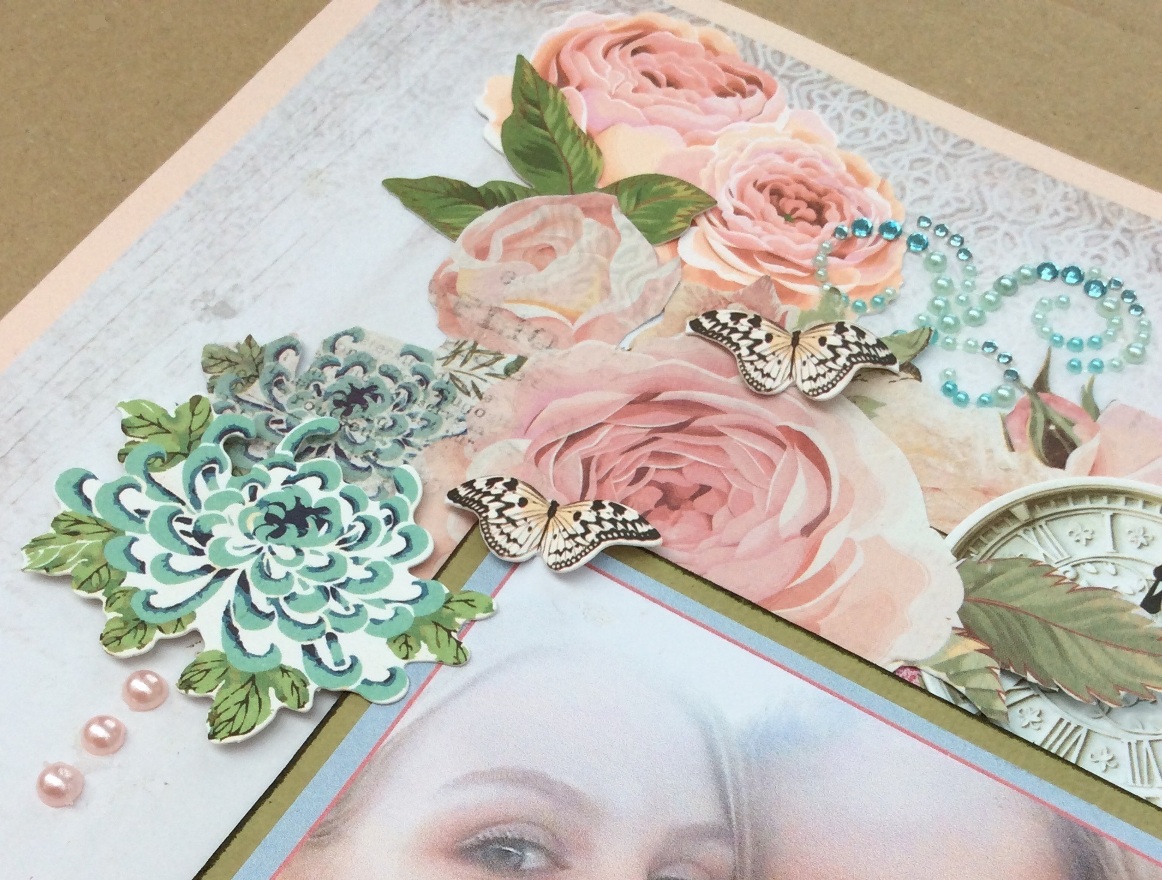
· Mount your picture on foam tape and add to layout. · Add more flowers and foliage as depicted below (both cut-outs and collectable die-cuts). · Add the two blue Prima Pearl Swirls as depicted. · Add pink pearls in five hanging strips as depicted. · Take your two butterflies from the die-cut pack and gently shape them as depicted. Add to layout.
Your layout is now complete.
There is an extra large scalloped card and envelope in your kit. Here is an example project using this card.
Papers used: "Patio", "Wood Panels", "Irreplaceable", "Chalet". Plain cardstock: "Duck Egg Blue", "Sprout". Embellishments and card from the kit.
Before you do anything else cut of all the bottom strips on all the patterned papers. Cut a piece of Sprout cardstock to fit the front of the card. Cut a piece of "Chalet" paper and adhere to the front as shown Cut a panel of "Woodpanels" and adhere to the front as depicted. Prior to sticking on I cut out part of the design to overlap the paper:
Cut out the "Thank you" sentiment from Irreplaceable and stick onto front after inking edges. Mount the "So Grateful" sentiment from "Irreplaceable" onto Duck Egg Blue cardstock. I inked edges all edges first. Mount on foam tape and then onto card front as shown.
Add fussy cut roses from "Patio" - Collectable Die-cuts including small window - pearl strip to left-hand side - two small lace flowers topped with a cream pearl - pink twine bow- heart charm threaded with the pink twine (charms may differ) - Blue Pearls - Metal key -Please refer to main picture for placement. I also added Glossy Accents on some of the flowers.
Here is a super easy card, takes literally just five minutes to make. Papers used: "Patio", "Chalet", "Irreplaceable". Plain cardstock: ""Sprout". Twine from the kit.
Fold a piece of 12" x 4.5" "Sprout" plain cardstock into a card size 6" x 4.5". Cut a 4.6" x 4.5 piece of "Patio" paper depicting roses as shown. Stick onto card with a 1/4" cap below. Cut a 0.75" x 4.5" piece of "Chalet", ink edges with a dark green ink then stick to the top of the Patio paper, leaving a tiny margin at the top showing the Sprout cardstock. Cut out "Hello" from "Irreplacable". Ink edges then mount on a piece of Sprout cardstock. Attach to front of card with foam tape to elevate it from the card. Tie pink twine top and bottom of the card as shown. Tie a bow and add to the top.
"Perfect day" Card Another super quick card. Although I have used "Perfect Day" here, you may have another little frame die-cut in your kit.
Papers used: "Terrace", "Irreplaceable". Plain cardstock: "Sprout". Embellishments from the kit. Fold a 8" x 6" piece of "Sprout" cardstock into a card sized 4" x 6". Cut a piece of "Terrace" paper into size 5.8" x 3.75" and attach to front Cut out the green piece showing in the middle from "Irreplaceable". Ink edges and attach to middle of card. Take your little frame from your die-cut pack and add to card mounted on foam tape. Add two velvet corners from the kit. Tie beige twine around the top as shown.
Papers used: "Wood Panels", "Irreplaceable". Plain cardstock: "Duck Egg Blue" (white - not included). Embellishments from the kit. Cut a 7.5" x 12.4" piece of "Duck Egg" cardstock into a card size 7.5 x 6.2". Mount a 5.1" x 7.2" piece of "Woodpanels" onto white cardstock (using the reverse design for the front) and stick onto front of card. Cut the strip from the bottom of "Wood Panels" if you haven't already and stick to the top as depicted. Add a piece of pearl ribbon ass shown. Cut the large panel used here from "Irreplacable" . Mat on white cardstock and adhere to the front of the card at an angel. Add a window to the front (I used Glossy Accents on this window when the card was completed). Place a sentiment from the die-cut pack in your frame (your frame and die-cut may differ to mine but you will have a similar one of each). Adhere to the front of the card. Arrange roses in one corner along with feathers and pink pearls. Add a small twine bow. Add a Prima Sequined Quail to the top of the frame.
Just Us Card
Papers used: "Terrace" . Plain cardstock: "Sprout". Embellishments from the kit. Fold a 6" x 8" piece of "Sprout" cardstock into a card size 6" x 4" Cut a piece of "Terrace" paper slightly smaller and adhere to front of card. add a piece of the Rose Burlap ribbon to the middle I had a narrow strip of Rose Window paper left when trimmed for the layout so cut the edges of this and adhered to the top of the Burlap ribbon Add Feather under the large Prima Lace flower, which I topped with a metal piece and the pearl cluster (both from kit)
Add three white pearls either side. Add one of the round sentiments from your die-cut pack (your might be different to mine) on foam tape and add a peg fromm your kit. Add velvet corners.
Papers used: "Patio", "Wood Panels", "Irreplaceable", "Chalet". Plain cardstock: "Duck Egg Blue", "Sprout". Embellishments from the kit. Fold a piece of cardstock into size 7.2" x 5.6" Add a piece of the word strip from the bottom of "Terrace" to the top of the card. Cut a 7.2" x 4.4" piece of "Chalet" with the flowers on the right hand side, and adhere below the word strip. Cut a strip from the reverse side of "Irreplaceable" and adhere to the bottom. Add a 5" piece of the butterfly ribbon as shown Mat the "Love Always" rose window panel from "Irreplaceable" onto duck egg cardstock. I doodled a little stitched border around it. Attach to front of card on foamtape. Add pearls as shown Add a Prima bird clip and paper die-cut.
Papers used: "Wood Panels", "Irreplaceable" . Pearls from the kit. I covered a shaped card here in pieces of "Wood Panel" (reverse side) I had left over (you can cut white cardstock free hand to match the shape of the sentiment). I sanded down the edges to give a distressed effect and inked the edges of the sentiment cut from "Irreplaceable", which I mounted on foam tape to the card. Four pink pearls from the kit finished the card.
All projects copyright ® Charmed Cards & Crafts. All rights reserved.
|
s.JPG)
s.JPG)
.JPG)
s.JPG)
s.JPG)
s.jpg)
.JPG)

.JPG)
.JPG)
.JPG)
.JPG)

.JPG)
.JPG)
.JPG)
.JPG)
.JPG)
.JPG)
.JPG)
.JPG)
.JPG)
.JPG)
.JPG)
.JPG)
.JPG)
.JPG)
.JPG)
.JPG)
.JPG)
.JPG)
.JPG)
.jpg)
.jpg)
.jpg)
.JPG)
.JPG)