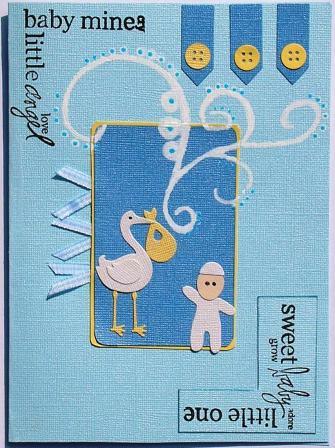
Card Making

Baby Boy Cards

[Home][Back]


Card 1

Large card using QuicKutz dies, Bazzill Bling cardstock, Heidi Swapp Clear Stamps and doodling.

Card size: A5

Note* The Bazzill Bling cardstock is thick enough to use as a card.

  • Score and fold the Bazzill cardstock into the required size.
  • Stamp one corner from the Heidi Swapp Baby Corner set.
  • Stamp the other corner on a separate piece of the same card. Cut around the stamped image and ink the edges with blue ink. TIP* To ink the edges simply run the paper along the pad.
  • Glue the corner onto the card.
  • Mat a piece of darker blue Bazzill Bling onto a piece a yellow Bazzill Bling cardstock. Stick onto card adding blue gingham ribbon along on edge .
  • Doodle as shown with a white pen or paint dabber. You can either do this freehand with a pen or using one of our doodling templates (which I did here).  Dot each of the circles with a blue Sakura Gel Pen giving a glossy raised appearance
  • Cut QuicKutz Stork shape. Using light brown chalk , chalk the beak, the edges of the wing and the belly and tail of the bird. Cut the Baby shapes and stick both onto card.
  • Cut three QuicKutz Button tabs contrasting the buttons and the tabs; glue onto card.


Card 2

Gorgeous card to celebrate the birth of a new baby boy.

Card size: A5

  • Wrap a card in Buttercream Bazzill paper (got lost somehow in the picture!)
  • Stamp a suitable sentiment to the card and emboss using Hampton Art Sky Blue Embossing powder.
  • Stick a length of Doodlebug Bumblebee Rick Rack on the spine of the card, ensuring that the edge is hidden behind the ribbon.
  • Stick on two All My Memories Herbanella "Baby Boy" Page Accents to the front of the card.
  • Punch out footprints in blue cardstock and stick on as though the baby is walking up the card.
  • Stick on Dress It Up buttons using large Glue Dots for extra strength.


Card 3

Another super card with a "Lullaby" feel.

Card size: A6

  • Wrap the front of a square aperture card in Basic Grey "Oh Baby Boy - Larkspur". Cut through the middle from the back and wrap it neatly around the edges of the aperture.
  • Stick a Herbanella "Baby Boy" Page Accent behind the aperture and stick down the fold.
  • Stick a border from the Herbanella Baby Boy Page Accents  onto the bottom half of the card and decorate with Basic Grey Oh Baby Boy Letters and Dress It Up buttons.
  • Glue a Dress It Up star and blue teddy button on the card to finish.


Card 4

A simple but effective card to celebrate the birth of a new baby boy. 

  • A large round accent from the Pixie Press Baby Collection was stuck on top of a round piece of  frayed blue mulberry paper.  The centrepiece was then stuck onto a pale blue deckle edge hammer card and a pastel blue eyelet was attached to the round hole in the tag.... TIP - To feather the edge use a small artist's brush to paint a circle of water onto the paper. Leave it to soak in for a few minutes then gently tear pulling the paper outwards away from the circle.

  • Next a circle of small baby boy words were stuck around the centrepiece with "It's A Boy" white peel off stickers below the circle.

  • Finally embellishments from CraftyBitz 3D Sticker set DS33 were stuck into position.