|
|
|
[Home] [Shop] [Project Ideas] [Forum] |
|
Sweet Moments Project Ideas
By DT member Louise Brigden for Charmed Cards & Crafts
These projects uses the Bo Bunny Sweet Moments collection.
 |
 |
 |
 |
 |
|
|
Bo Bunny Sweet Moments Products used here: A variety of Sweet Moments 12x12 Papers - Chipboard embellishments from the 12x12 Chipboard pack and Adhesive Chipboard Pack.
Some people think that circular easel cards will be tricky. Follow this tutorial to find out just how simple it is.
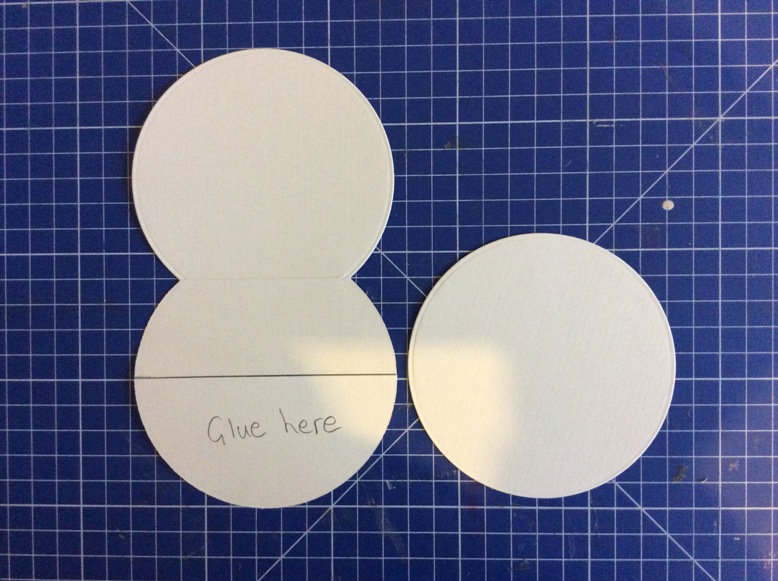
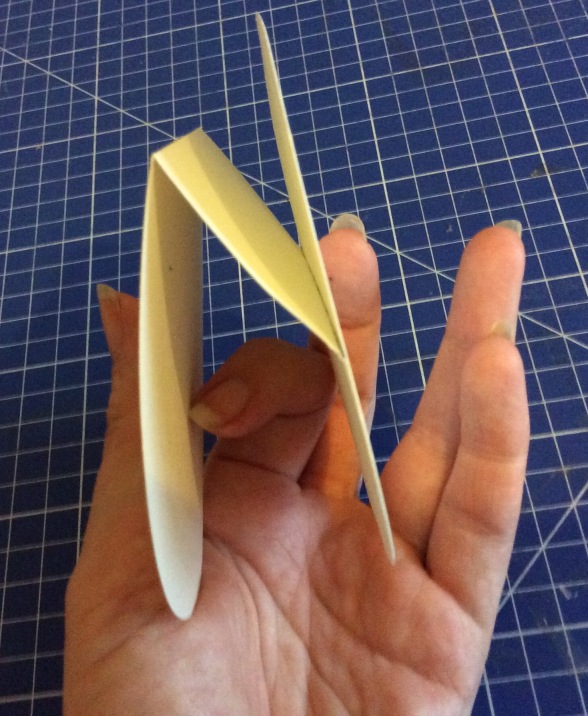
Step 1 Fold your choice of medium weight cardstock in half and cut a double circle on the fold using your chosen technique – I used a 10cm circle die with my spellbinders die cutting machine. Ensure you don't cut a full circle (see below) because you need the two partial circles to be joined.
Step 2 Cut a third circle exactly the same diameter as the others but this time make it a whole circle.
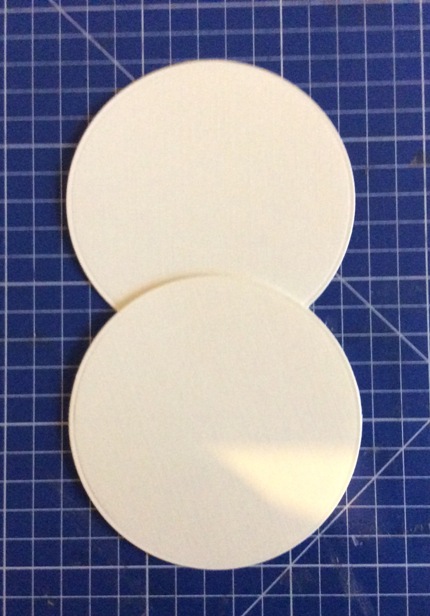
Step 3 Now score along the middle of one of your double circles (the position is indicated by the line in the picture above). Then glue the area indicated above and adhere the third circle into place directly on top of the scored circle (see below)
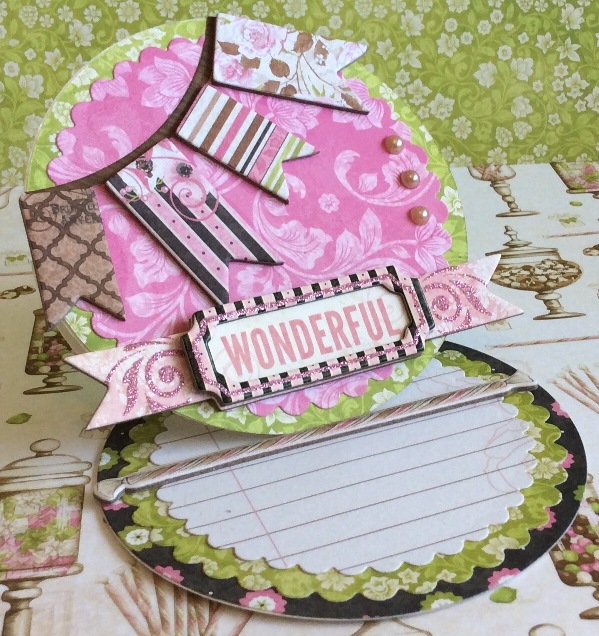
You now have your simple circular easel card base, all that is left to do is work your magic! I have used a selection of papers and embellishments from the Bo Bunny Sweet Moments collection, all available here at Charmed cards and crafts.
Bo Bunny Sweet Moments Products used here: A variety of Sweet Moments 12x12 Papers - Embellishments from the Ephemera Pack (Butterfly), Chipboard embellishments from the 12x12 Chipboard pack and Die-Cuts from the Noteworthy pack
With this shaped easel card we follow exactly the same steps as with my circular easel card tutorial.
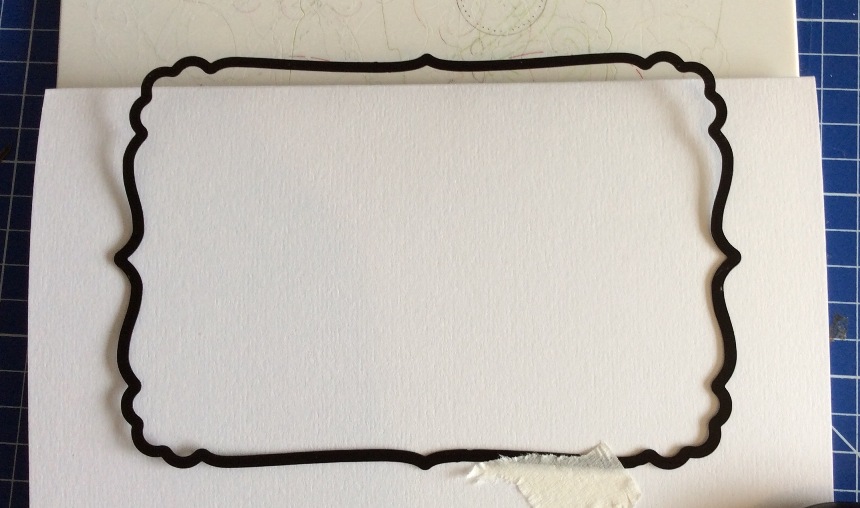
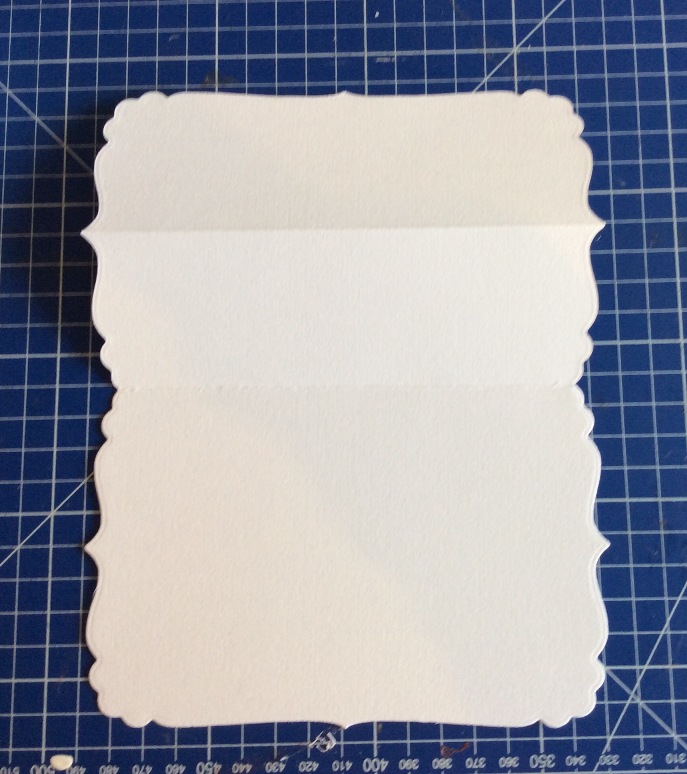
Step 1 Fold your choice of medium weight cardstock in half and cut a double rectangle (or whatever other shape you choose) on the fold using your chosen technique – I used a fancy rectangular die with my spellbinders die cutting machine (I'm sorry I can't tell you it's name because I foolishly discarded all my packaging!). Ensure you don't cut a full shape (see below) because you need the two partial rectangles to be joined by the fold.
Step 2 Now score and fold one side of your double shape (see below)
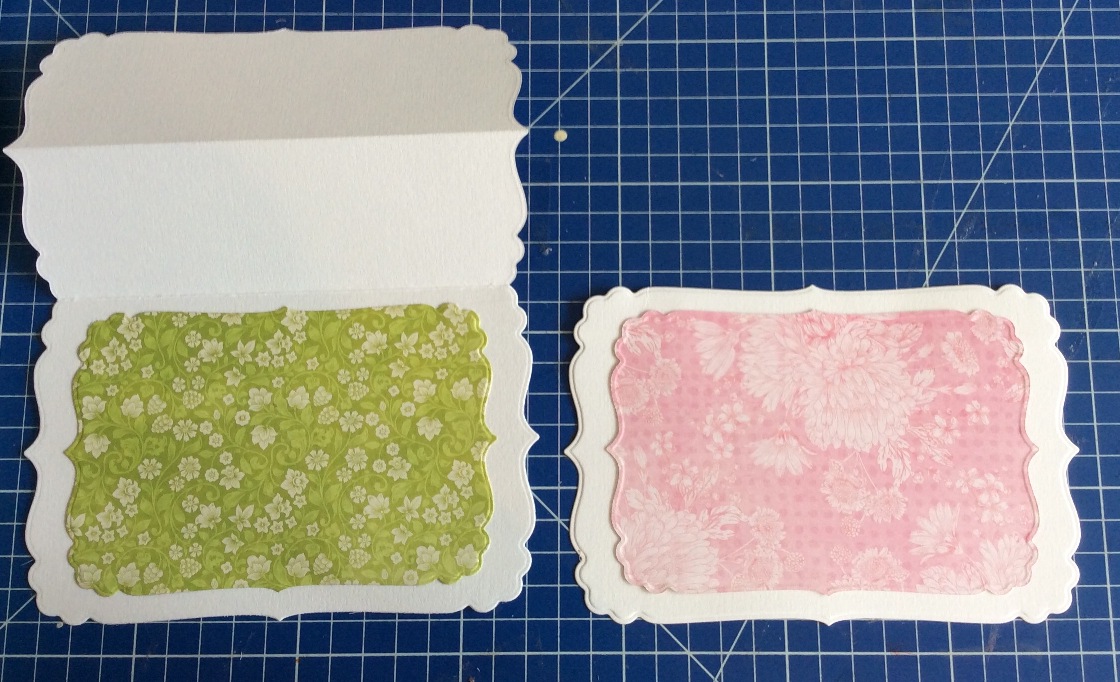
Step 3 Cut a third piece the same shape as your first but this time it needs to be the full shape and not doubled up. Decorate both shapes with your choice of patterned paper as shown below.
Step 4
Now fold your scored shape back and cover it wit glue as shown below then adhere your single shape directly on top.
Step 5
Now decorate your card front with your choice of Bo Bunny papers and embellishments.
Step 6 Finally, to make your easel card stay standing add three brads along the centre of the base.
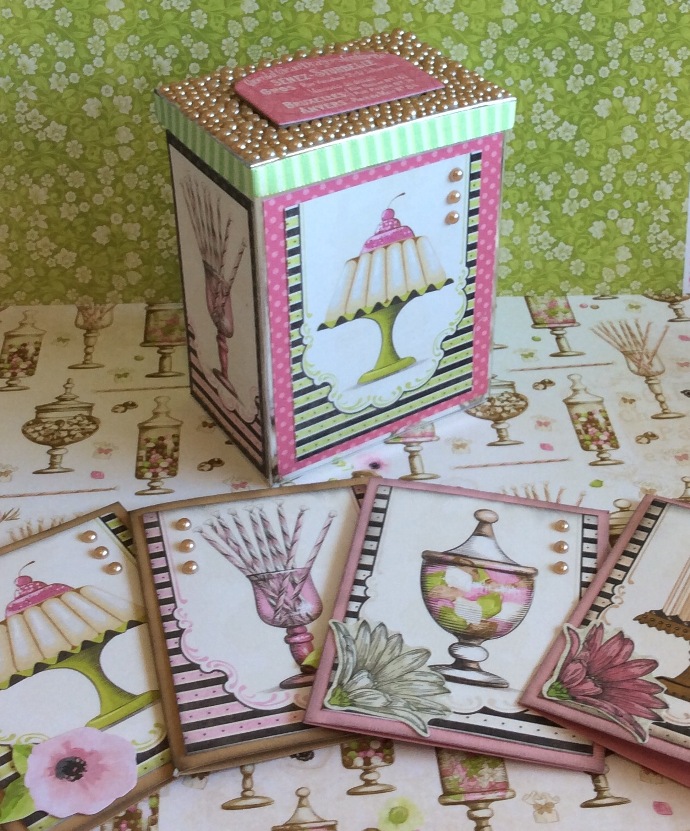
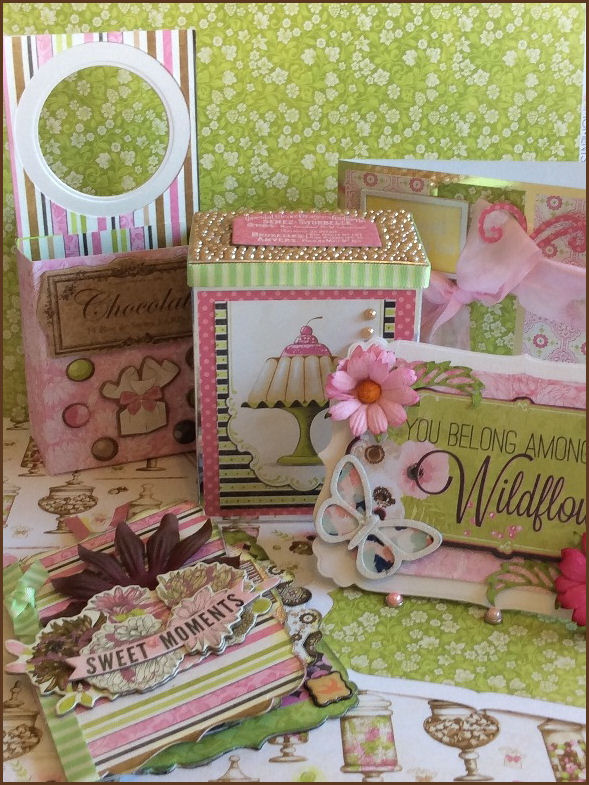
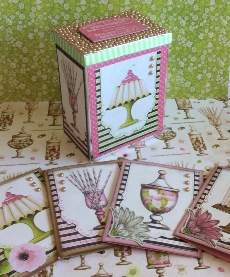
The beautiful papers from the Bo Bunny Sweet Moments collection lend themselves so well to more the just card making, just look what I made using two sheets of 12” sweet Moments Allure for the pictures.
Bo Bunny Sweet Moments Products used here: Sweet Moments "Allure" and "Confectionary" 12x12 Papers - Chipboard embellishments from the 12x12 Chipboard pack and die-cuts from the Noteworthy Pack.
The cards
Step 1 Cut four side fold card bases measuring 8.5cm x 10 cm. I slightly aged the edges of mine with an old ink pad which no longer stamps but is perfect for giving a subtle aged effect.
Step 2 Cut out the four sweetie pictures from the Bo Bunny Sweet Moments Allure paper, ink the edges then adhere to the card fronts.
Step 3 Embellish with flowers from the Bo Bunny Sweet Moments Noteworthy Die-cuts set and flat backed beads, brads or buttons.
The Box
Step 1 Cut out your box as shown below Depth 6.3cm, width 9.6cm, height 12.5cm. Score, fold and stick together. I used silver mirror card for my box base.
At this stage you can simply add the pictures from your second sheet of Bo Bunny Sweet Moments Allure paper (you will need to trim the pictures to fit on the two sides) to the faces of the box or you can do what I have done and layer patterned paper on first. I added three flat backed pearls to each picture to match the card set.
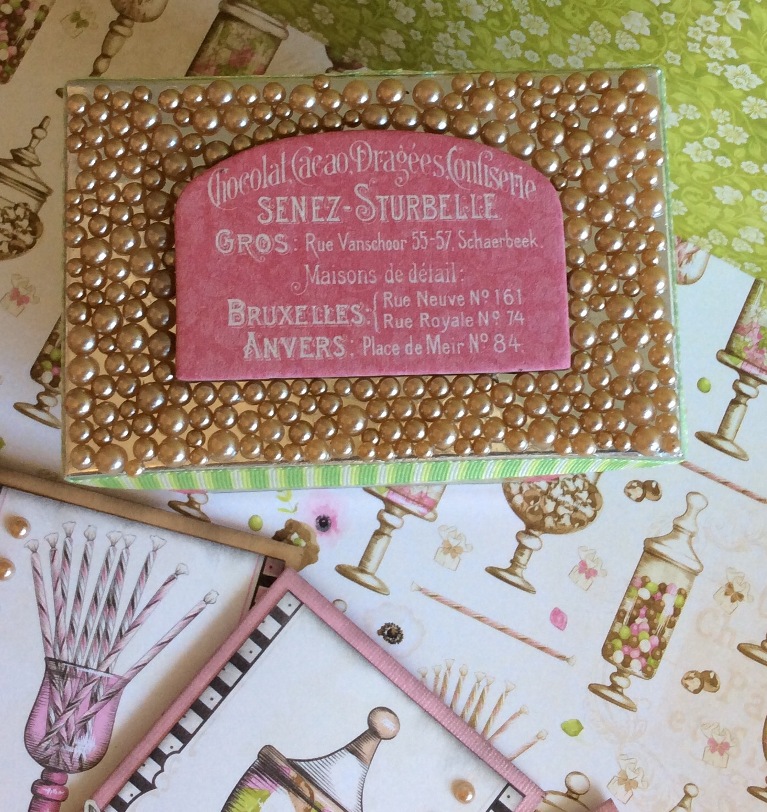
Step 3 The Lid Construct your lid in the same way you made your box; depth 6.5cm, width 10cm, height 1cm. Now decorate with lots of flat backed beads glued (PVA) around the sentiment from the Bo Bunny Sweet Moments chipboard set – it takes ages but it is well worth it! Finish by wrapping and gluing some ribbon from the ephemera pack around the rim of the lid.
Bo Bunny Sweet Moments Products used here: A variety of Sweet Moments 12x12 Papers - Embellishments from the Ephemera Pack (Brads, Fabric Flower, Ribbon), Chipboard embellishments from the Layered Chipboard pack and the 12x12 Chipboard Pack, Stickers from the 12x12 Combo Sticker sheet, and Die-Cuts from the Noteworthy pack
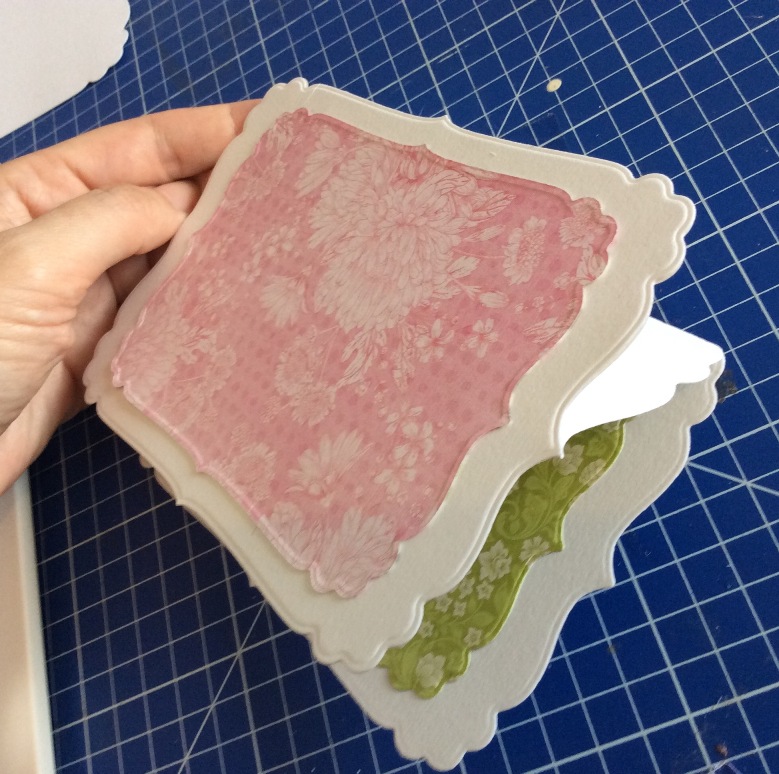
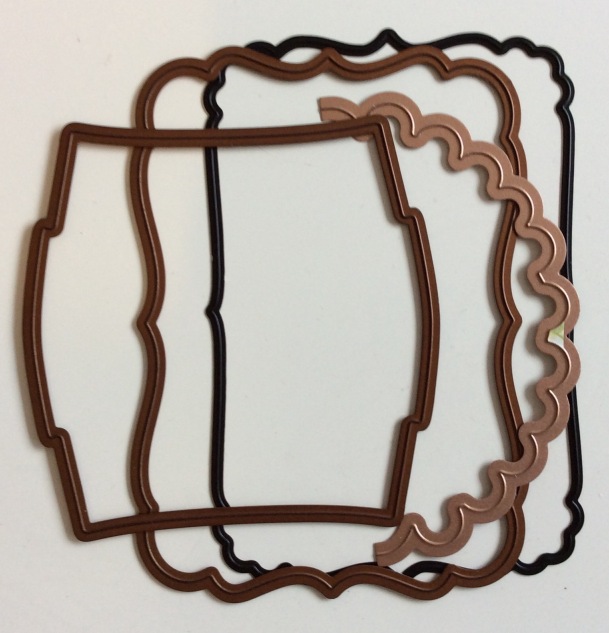
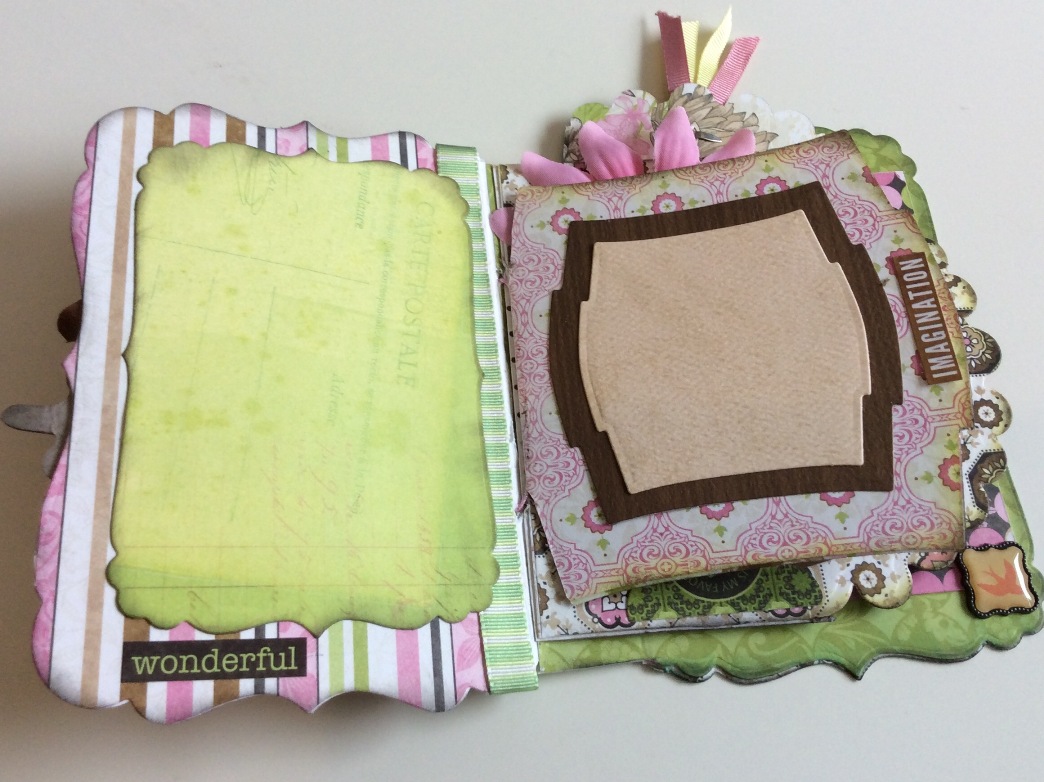
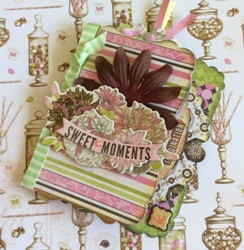
To make this memory book, a selection of shaped dies (preferably 4) is essential.
Step 1
Select your dies which will cut and form the shaped, layered edges of the book. Arrange them on a clear surface to help you visualise how your pages will look.
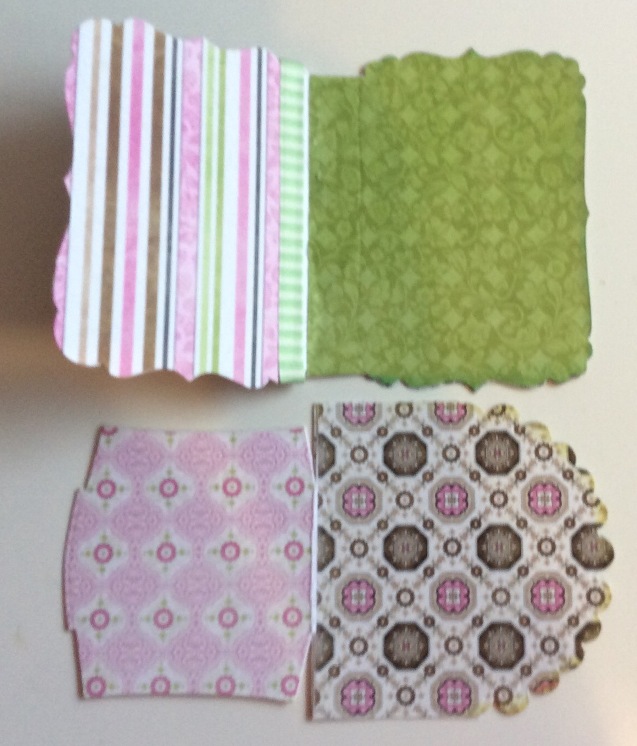
The picture below shows you what you need to make for the book. In simple terms, it is two side fold cards which will be attached together to make a book. (sorry it's blurry)
Step 2 I am sure there is a trick to masking dies so that you only cut with part of them but I haven't mastered it so this is what I did; I die cut each side of the side fold card separately, trimmed them to the shaped I wanted (I needed a straight side for the centre fold) then attached the two sides together with tape . Next I cut the same shapes out of patterned paper and covered my card bases, thus hiding the tape.
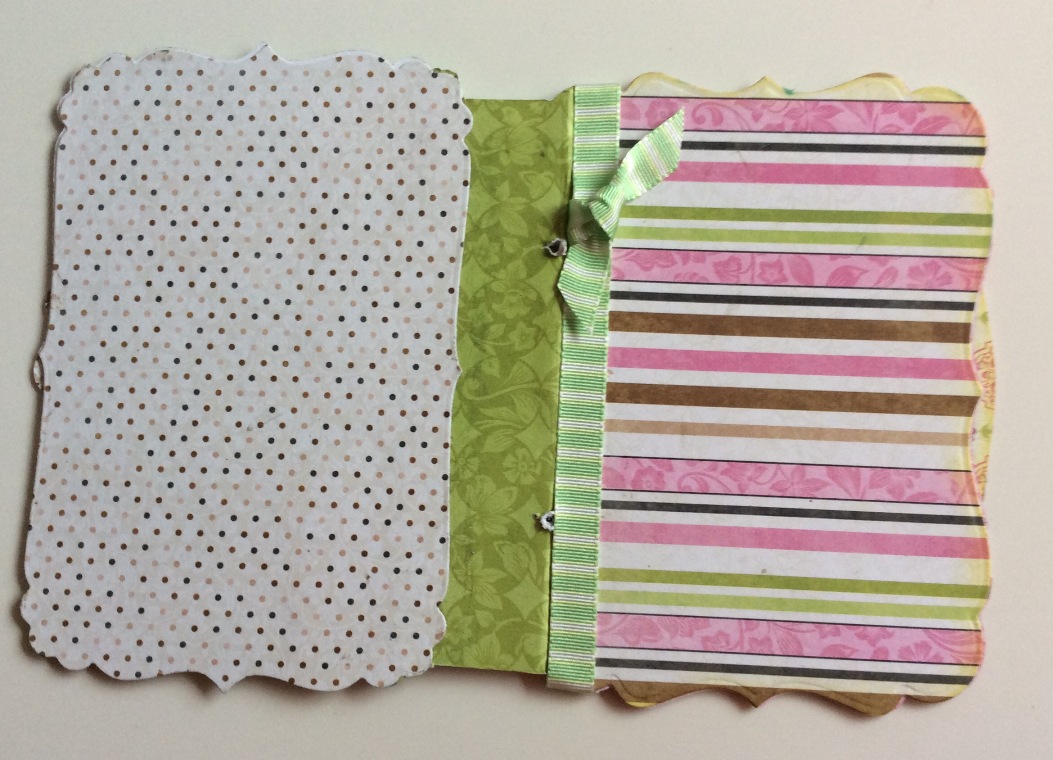
Step three Now to fix your two side fold cards together. You will need to gague this step on the shape of your two cards. With mine I pierced two small holes in my outer card (see below) then threaded thin string through the holes then slotted my inner card into the outer card and brought the string around both pieces and tied the string tightly. I didn't need to pierce holes in the inner page because the folded part was quite narrow. It's hard to explain but you will see what I mean when you make yours.
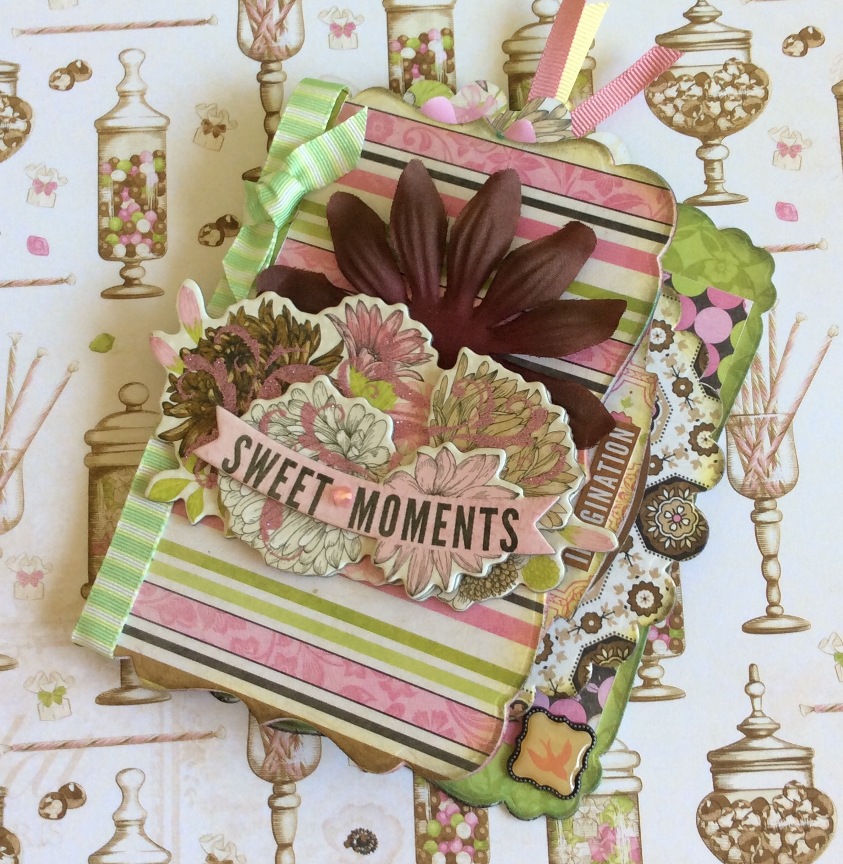
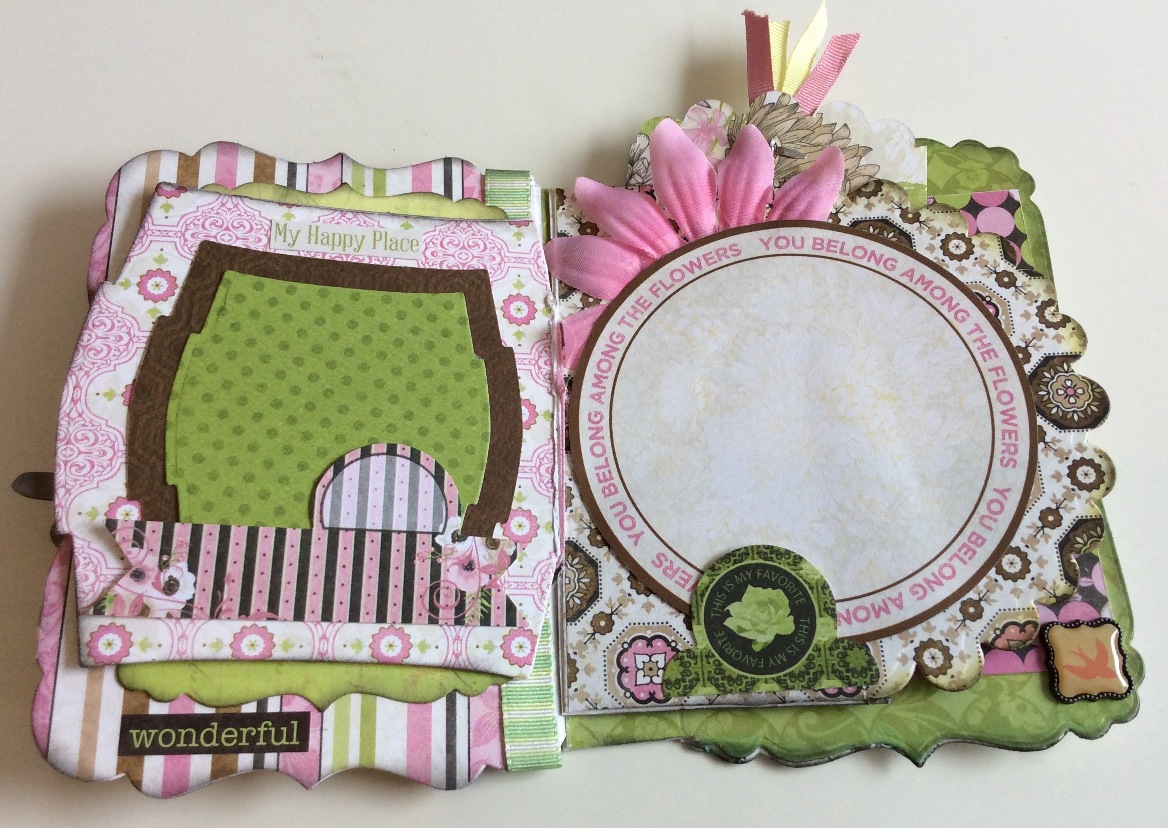
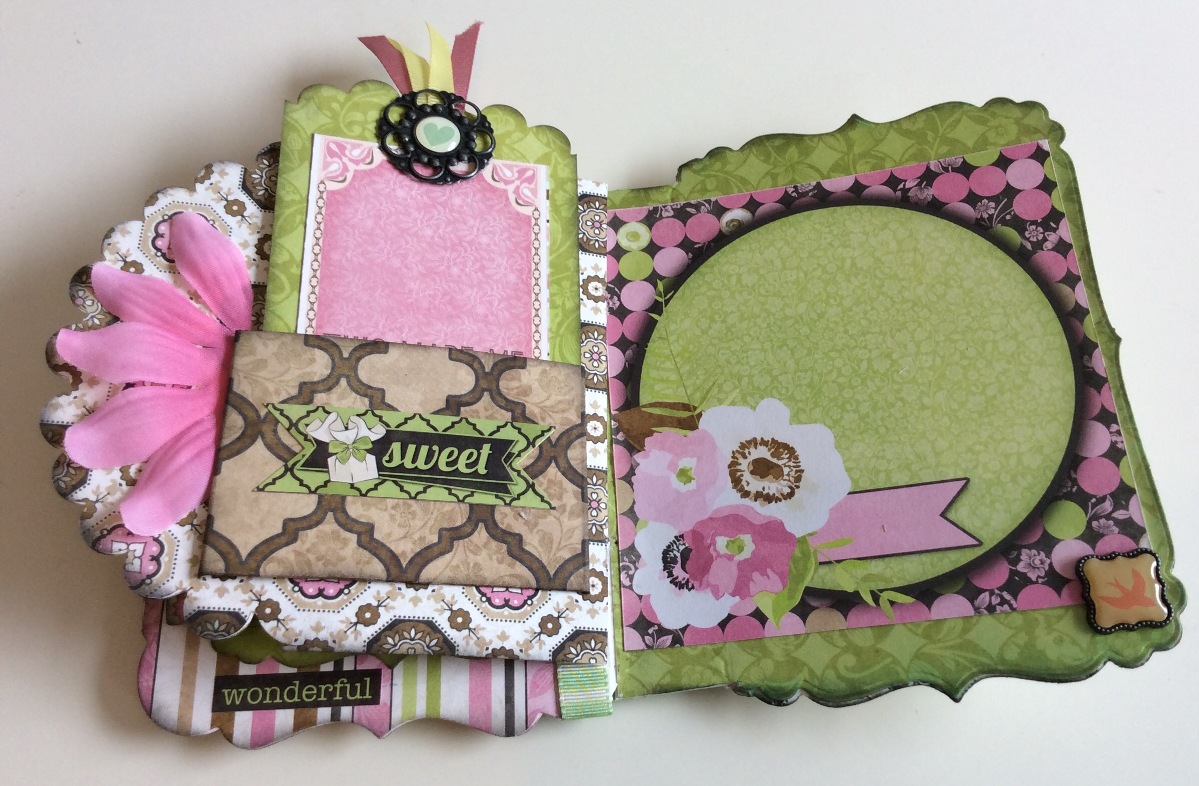
So that's the hard part done. Now for the fun. I have used papers and embellishments from the Bo Bunny Sweet Moments collection, there is so much to choose one, I could have done page after page after page! Take a look.....
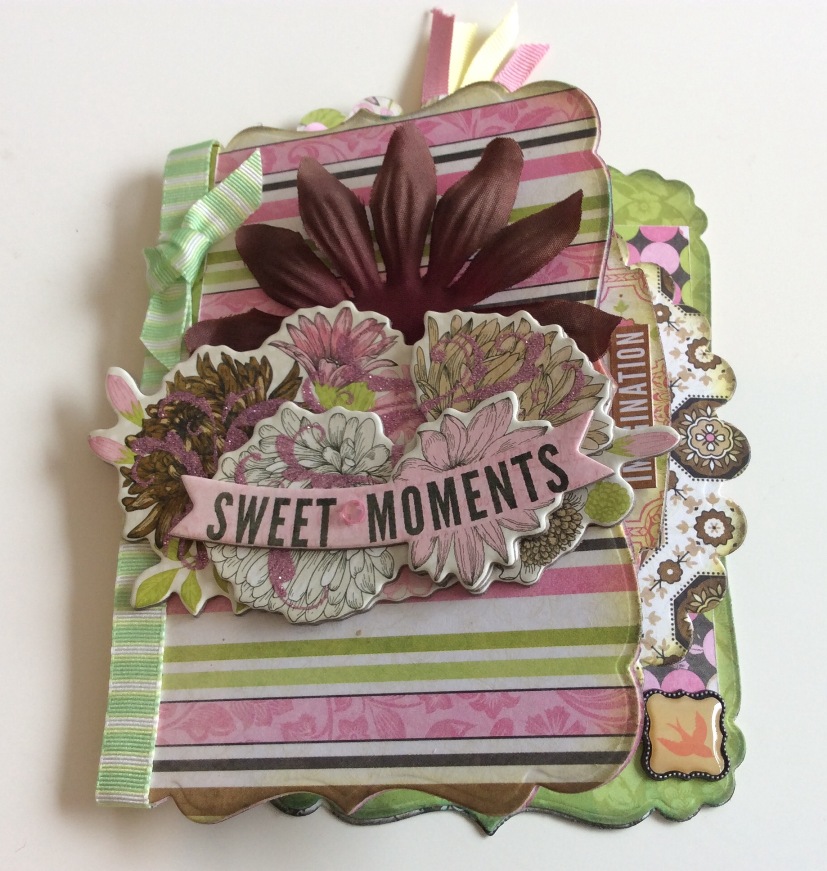
Here I have cut a big flower in half and paired it with a Bo Bunny Sweet Moments chipboard sentiment.
Here I have simply die cut some pretty papers then added some labels from the Bo Bunny Sweet Moments Combo Sticker sheet. Here I have married my own die cut shapes with ready made sentiments and labels, also from the Bo Bunny Sweet Moments collection., namely the hugely versatile Noteworthy pack.
Finally, here I added a cute little pocket and tag, as before all made from papers and die cuts from the Bo Bunny Sweet Moments collection.
Bo Bunny Sweet Moments Products used here: Sweet Moments Delectable 12x12 Paper - Embellishments from the 2x12 Chipboard Pack I will start with a confession, for photographic purposes I was going to fill this with chocolate bars but if I know there is chocolate in the house I eat it, so for that reason alone I'm afraid you will have to use your imagination.
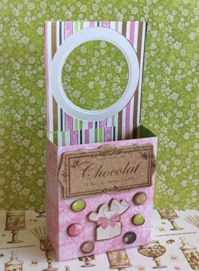
You don't really need step by step instructions for this one. It is simply a box attached to a rectangle of card with a hole cut into it (big enough for your doorknob/ handle). You can make your box from scratch or you could up-cycle something you already have (perhaps a Cup-a-soup box!). Whatever size you make your box just make sure the rectangle of heavyweight card stock that you attach it to is the same width. For the hole in the back part I used a circular cutting die. I decorated and embellished with Bo Bunny Sweet Moments papers and Bo Bunny Sweet Moments chipboard pieces.
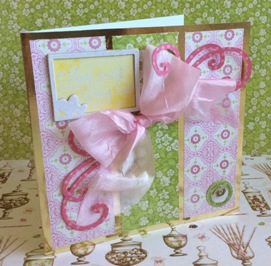
Bo Bunny Sweet Moments Products used here: A variety of Sweet Moments 12x12 Papers "Divine" and the reverse of the Signature paper "Sweet Moments" - Embellishments from the Ephemera Pack and Noteworthy pack With this card I wanted to show you how you can make a lovely card in just a matter of minutes.
Step 1 Cut a square, side fold card (any size will do). I used gold mirror card.
Step 2 Now cut three equal sized panels of Bo Bunny Sweet Moments paper. Place in position to check for spacing – you may need to do some trimming but remember to keep all three the same size. Glue the three panels into place. You can use the same sheet and flip the middle, but I used two different papers here.
Step 3 Now decorate with a lovely big bow, some die-cuts and a Bo Bunny Sweet Moments chipboard sentiment from the Ephemera pack.
|
All projects copyright ®Charmed Cards & Crafts. All rights reserved.