|
|
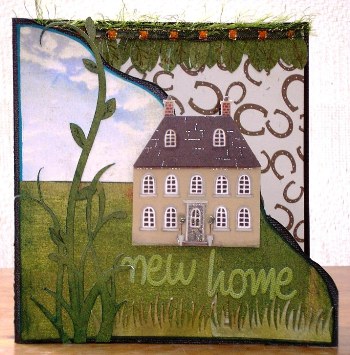
Card 1
A "good luck in your new home" card
with a funky edge.
- Cut a base card from
Bazzill Bling Sugar Daddy cardstock in size 30cm x
15cm. Score and fold.
- Line the inside of the card
with Horse shoe paper leaving a slight edge around the card.
- Draw a funky line as shown.
Mark where the
3D house will be and cut the line you drew around the house
shape where it rises from the line.
-
Cut a piece of
Mellow Lenient paper so that it follows the funky line of
the card, ink the edges with blue ink then stick onto card. I
used paper from the Mellow 6x6 pad as the designs are scaled
down.
-
Cut out a piece of
Green Basic Grey paper so that the design again follows the
funky edge. Ink edges with green ink and stick onto card.
-
Attach the house to
the card.
-
Cut the following
from a
Quickutz Silhouette: Large vine, two x grass, lots of
different sized leaves. Attach the leaves and grass as shown
then glue the leaves to the inside of the card to form a leafy
border.
-
Attach various
coordinating
Mellow Fibres at the very top of the leaf border.
-
Stick on the words
"new home" using
Basic Grey Mellow Maude Alphabet stickers
|
|
|
|
|
|
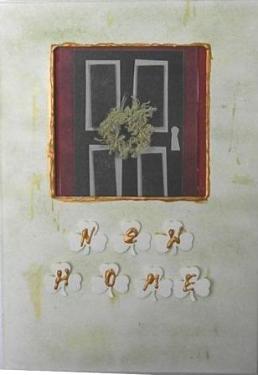
Card
2 A rustic card with a
warm welcoming feel.
-
Chalk a square
aperture card in light green, then apply darker green chalked
highlights.
-
Put a little
Vintage Gold Paper Effect on your finger and smudge it
randomly on the card using downward strokes. This provides a
wonderful effect when the card catches the light.
-
Place a sticker
from an
AMM Herbanella Home & Heart Tag sticker sheet on a
piece of
Doodlebug Bazzill Kisses and stick the centrepiece to
the back panel so that the focal point is central in the
aperture.
-
Roughly pipe a
golden border around the aperture with the Vintage Gold Paper
Effect, taking care not to touch the centre.
-
Cut out seven three
leaf clovers and pipe the word "New Home", putting one letter on
each of the clover leaves. If you want the leaves to stand out
more you can use a dark green cardstock instead of white. Stick
the clover leaves on the card when the Paper Effects is dry. I
used glue dots in the centre only as I wanted the leaves to
stand out from the card, providing a 3D effect.
|
|
|
|
|
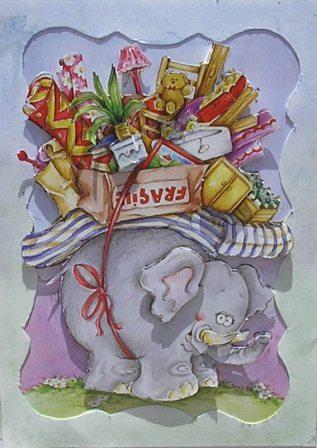 |
Card 3
Oh you can just feel the strain endured
by the poor elephant!
- Create a decoupage design for
the centre separating the layers with foam pads or silicon glue
- do not stick it on the plain decoupage section just yet.
- Draw and cut out a frame large
enough to fit around the design with a few bits overlapping, as
seen in the picture. Chalk the frame emulating some of the
colours on the decoupage background. Use different shades of the
same colour to add depth.
- Glue down a plain section of
the decoupage design on an A6 card and stick the frame on top.
I made the card a little smaller to make the design stand out
even more.
- Stick the finished decoupage
design on top overlapping the design a little over the edges of
the frame.
|

