|
|
|
|
|

Craft Classes
Recipe Book
By Karen Mortensen
This recipe book really is a lovely keep-sake. It's quite simple to make and would make a wonderful special gift.

Class supply list:
My image embellishment bundle, which I have made available to you HERE. Click on the link and it will initiate download. Choose "Save as" and not "open" when prompted. Treat as any download and apply suitable caution. This is a zipped file so you will need to unzip the bundle before use.
Patterned Papers: I used Melissa Frances Kitchy Kitchen, Bo Bunny Silver & Gold and Basic Grey
Lightweight chipboard for cover
Eyelets (I used eyelets from my Crop-a-dile kit)
Double-sided tape and adhesive
Embellishments of your choice, I used:
Marianne Die for Lace Edges
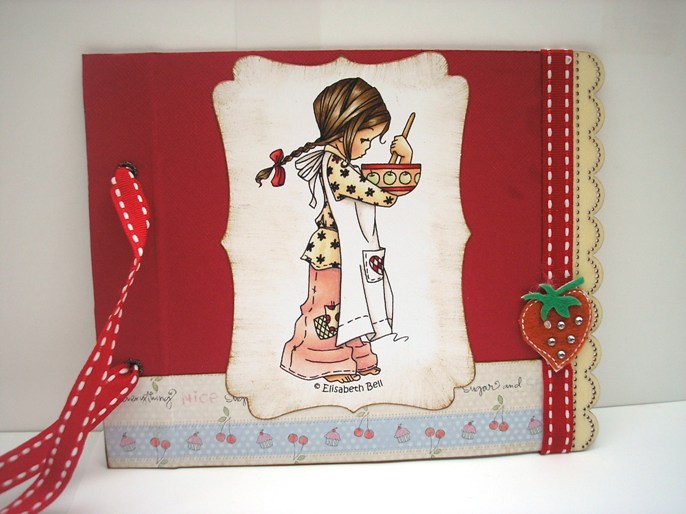
Elisabeth Bell Die-Cut Toppers
Melissa Frances Kitchy Kitchen
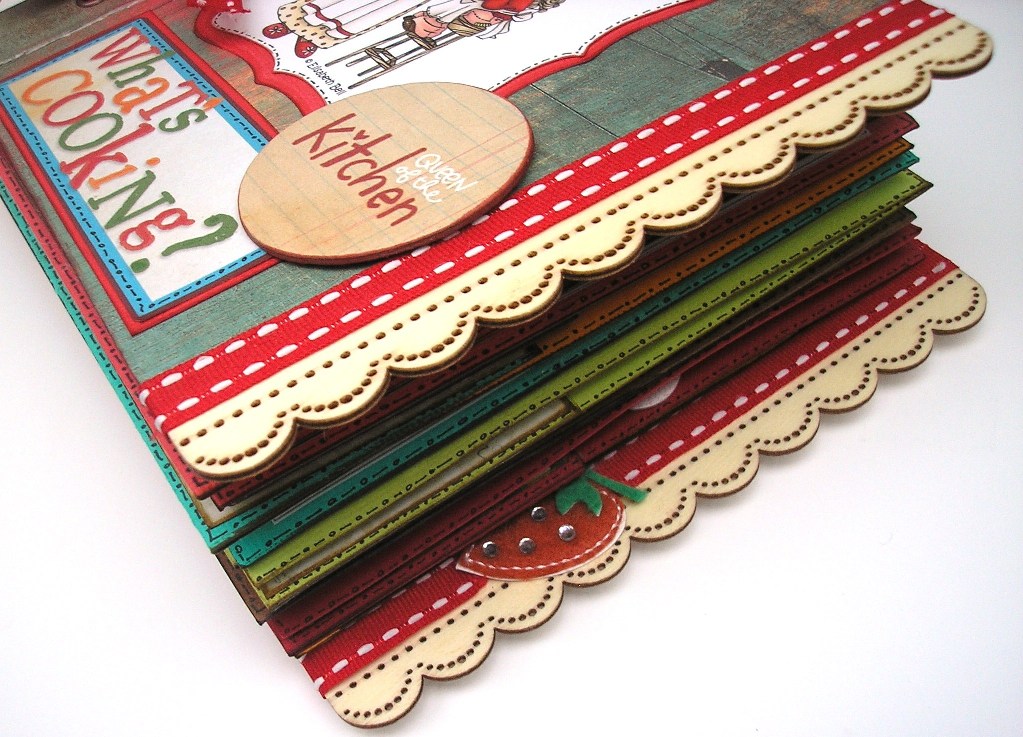
Prima Wooden Borders (for cover edges)
And you will need a printer to print the images in the embellishment pack.
Lets get crafting!
| Read through the class BEFORE
you start making the book, so you know what each step entails, and
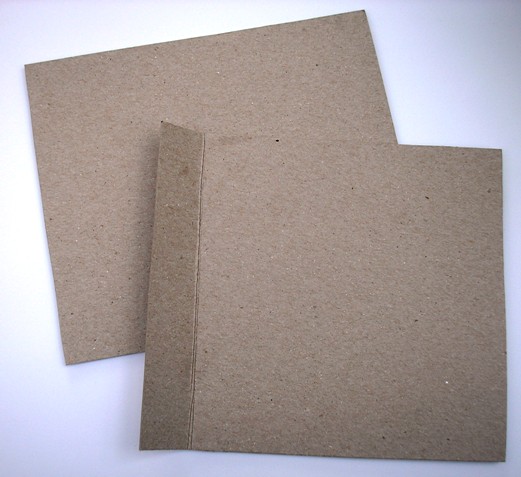
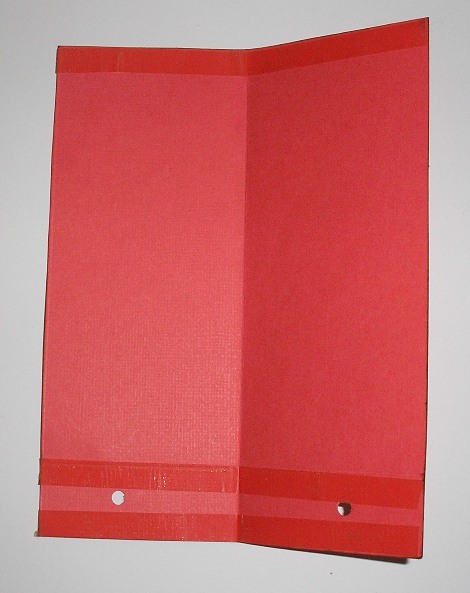
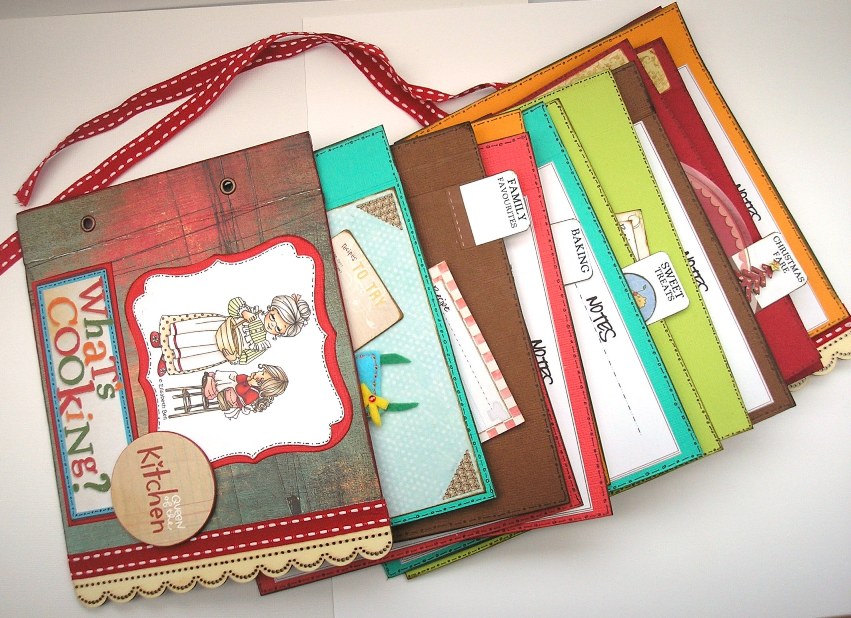
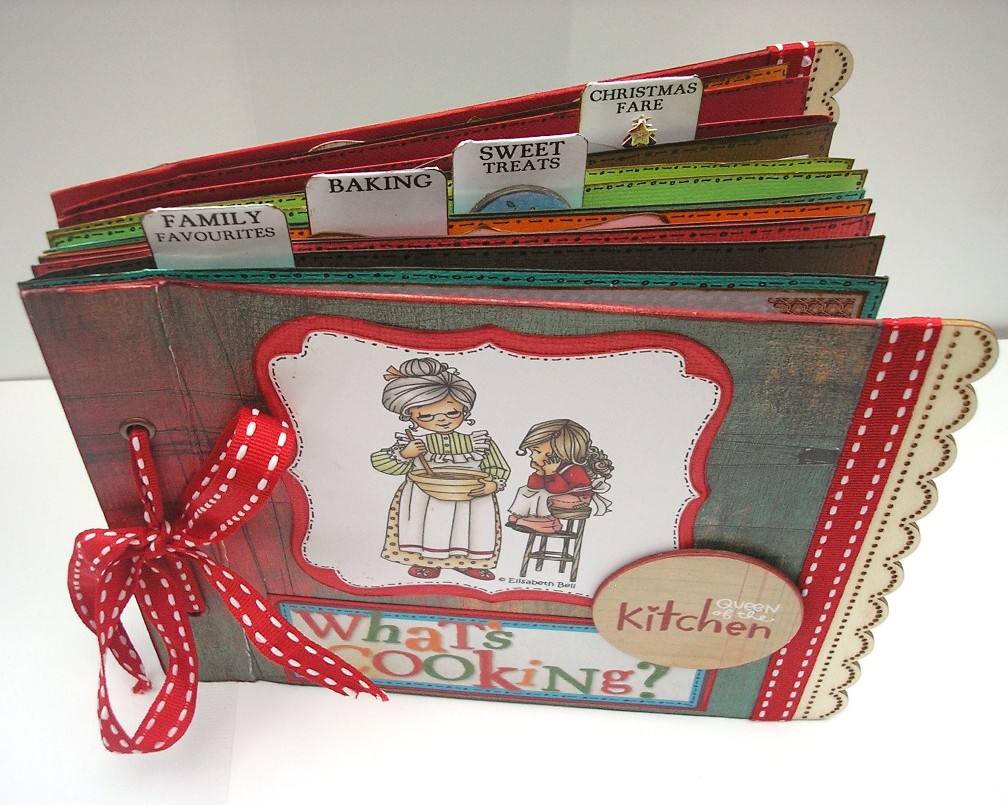
you can make informed decisions on colours, binding method etc. I am making my covers size 7" x 6", and the pages 6.75" x 6", but you can of course make it any size you want. I also added a wooden edge from Prima, which took the covers to size 7.5", but this is entirely optional and you don't have to have this edge. The good thing about this book is that you don't have to make any immediate decisions on the amount of pages etc you want before you start, you can simply add on as you work on the project. See how the book takes you. Decide how you want to bind your book. I am using ribbon here, but you can use large book rings, or emperor tags. I decided on ribbon as it makes it more flexible size-wise as the book grows, and I like the way it holds the book together, but book rings will enable you to open and insert new pages at any point in the book, if in future you decide to add more pages, whereas binding with ribbon means you have to remove pages the long way. Ribbon is nicer in my opinion. I am using some lightweight cardboard type chipboard for my covers, I didn't want anything too thick as I wanted to be able to bend the edge. Cut two into size 7" x 6". Score an edge 1" in:
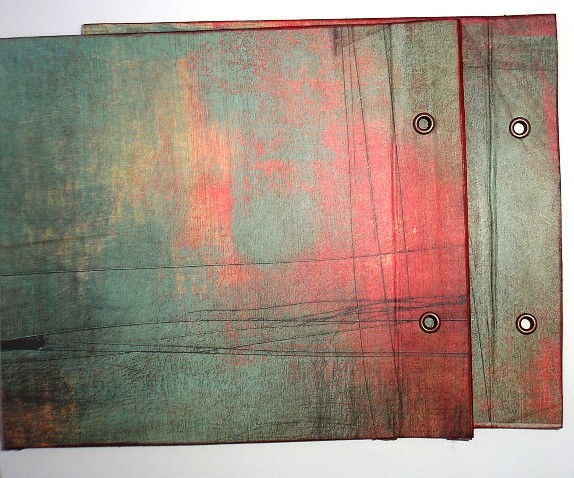
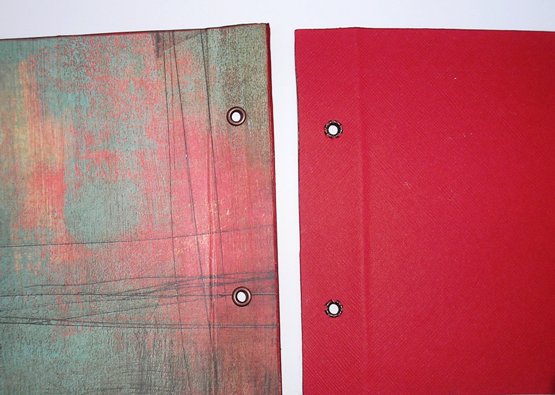
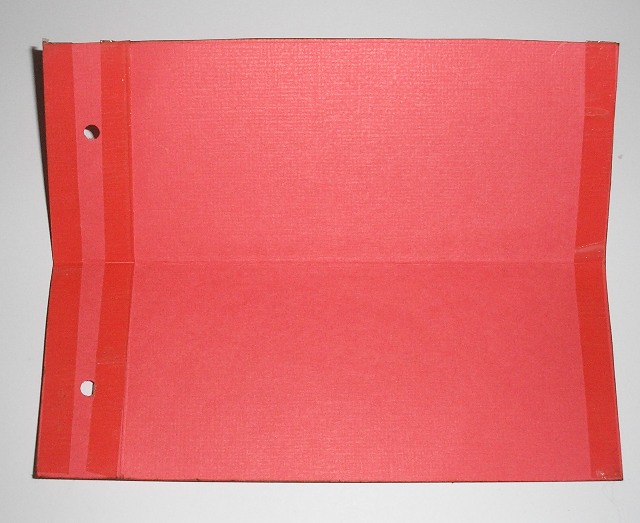
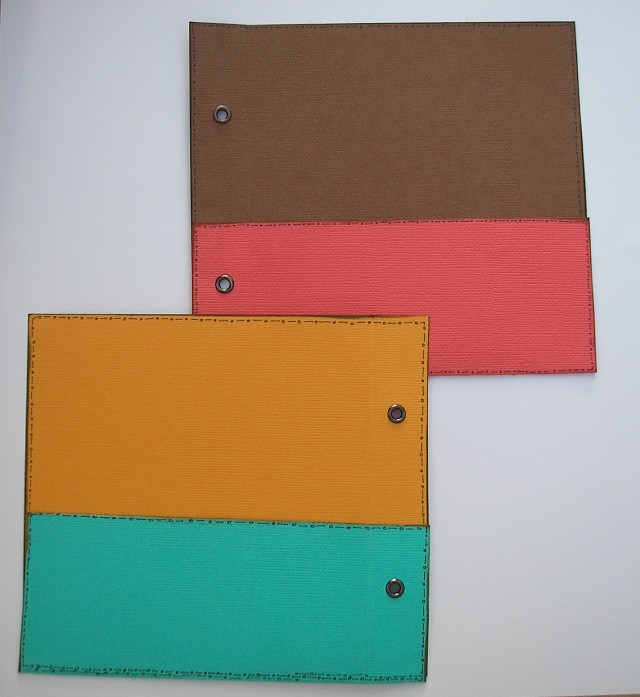
Cover them with paper of your choice, on all sides. I used a patterned distressed Basic Grey paper on the front, and a plain red cardstock on the inside. Mark two holes in the middle of the scored edge 1.5" from top and bottom, so 1/2" in. Cut holes and insert large eyelets. I used my crop-a-dile and the eyelets that came with it. Adding eyelets is crucial as the book would otherwise tear in time. Hopefully this book will see a lot of use and you want it to last for a long time. Ink edges. I used Distress Ink.
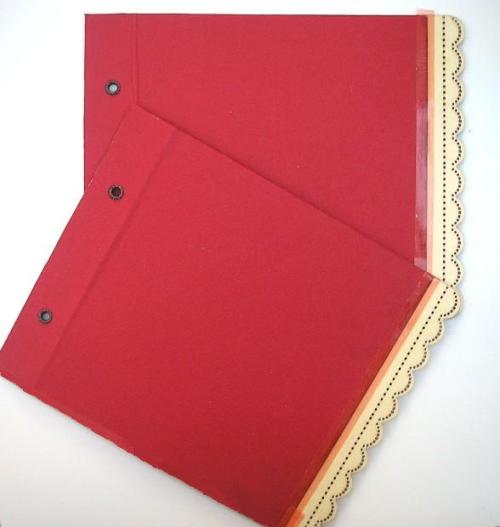
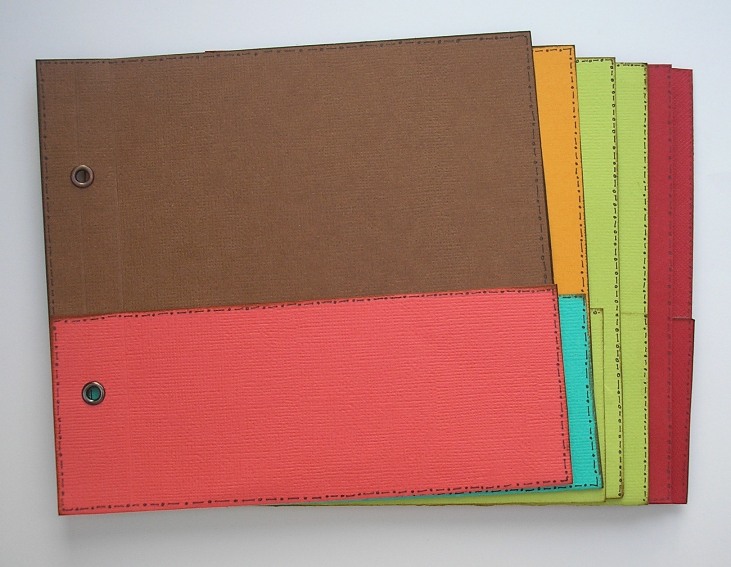
This shows front and inside the covers
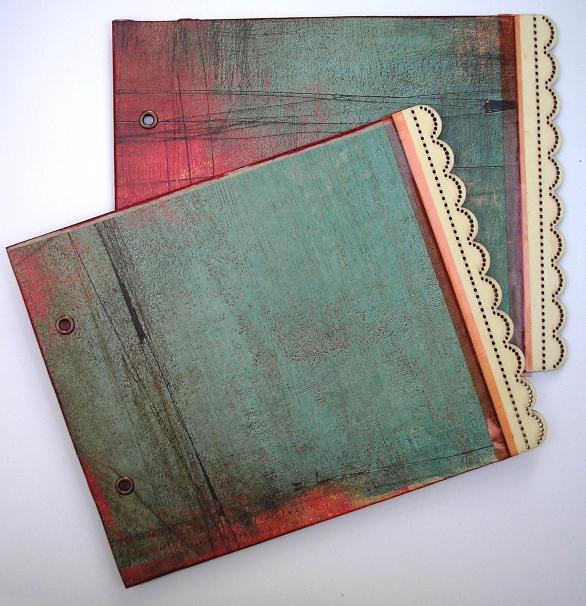
I am using Prima wooden borders for the edges here, which are just the right size. I used a strong adhesive on the edge of the wood, then butted it up tightly to the edge of my cover. I then covered all the edges, front and back, with double-sided tape, to secure the bond. I am leaving this on for the time being until the end when I am covering with ribbon.
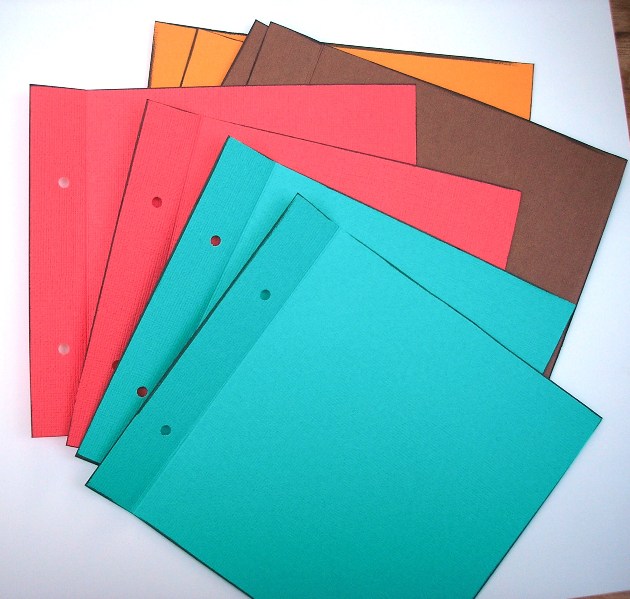
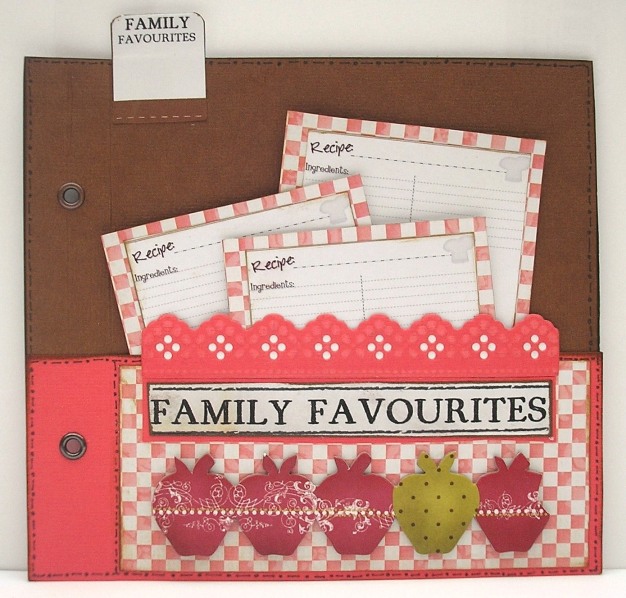
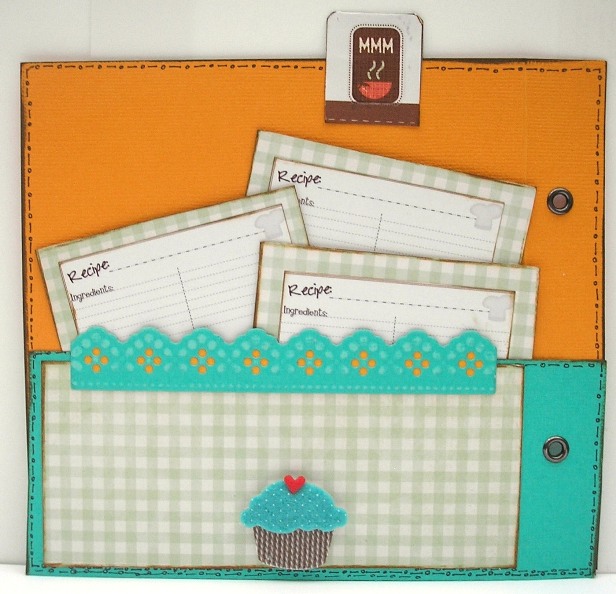
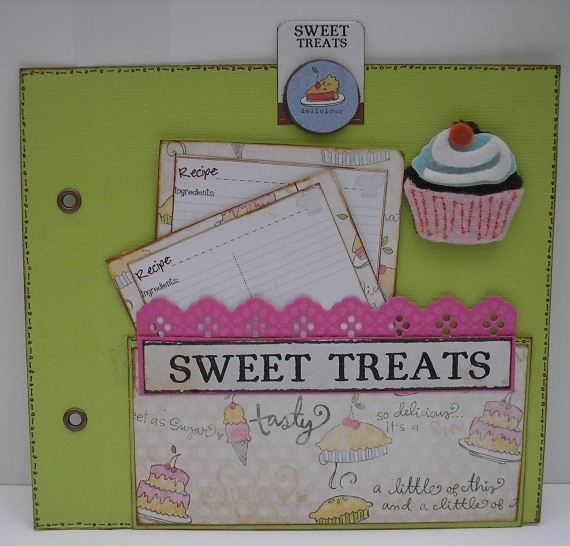
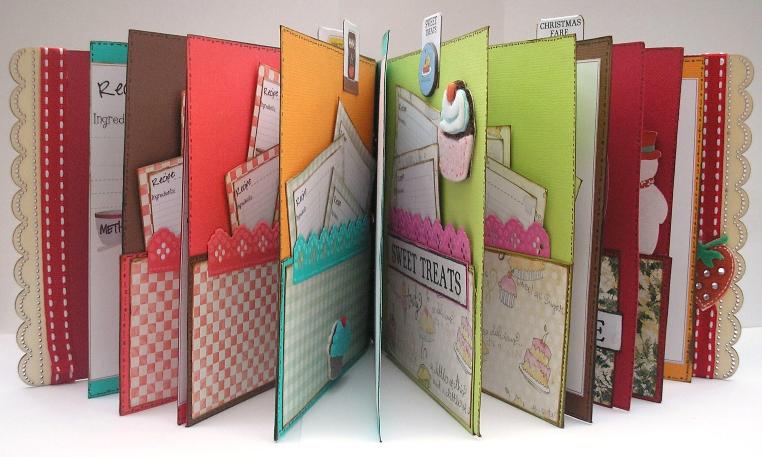
Cut a variety of plain cardstock paper into size 7" x 6". Score a 1" edge on all. Punch holes for eyelets as you did the covers. Ink edges. Just make some pages now, you can always make more later when you decide how big you want your book. I have 12 pages in my book I decided that I wanted a variety of colours, but you can go with themed colours, so one colour for Christmas, one for Family Favourites, and so on. In my book I have gone with uniform colours for the pages that hold pockets, and a variety of colours for other pages - as you will see later.
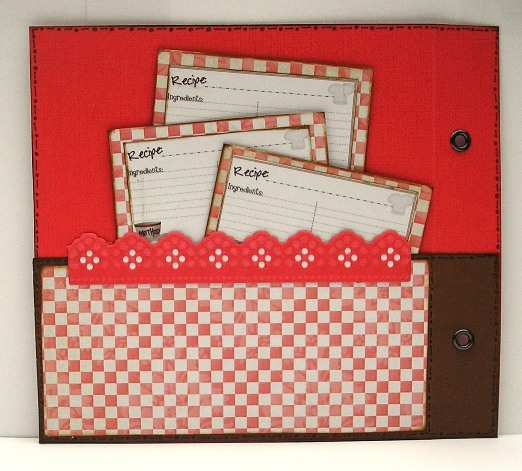
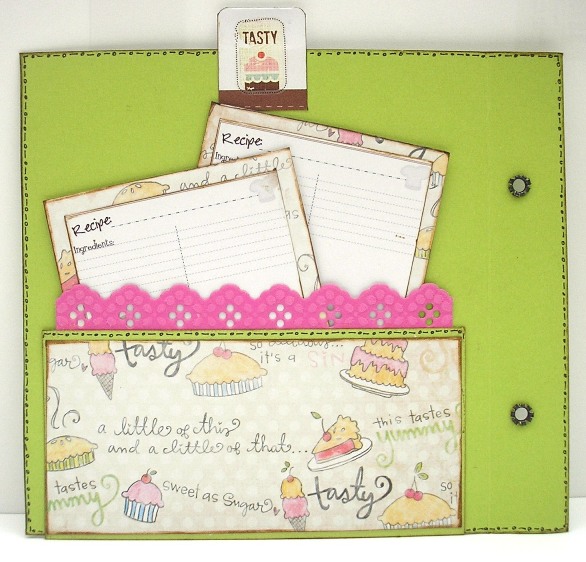
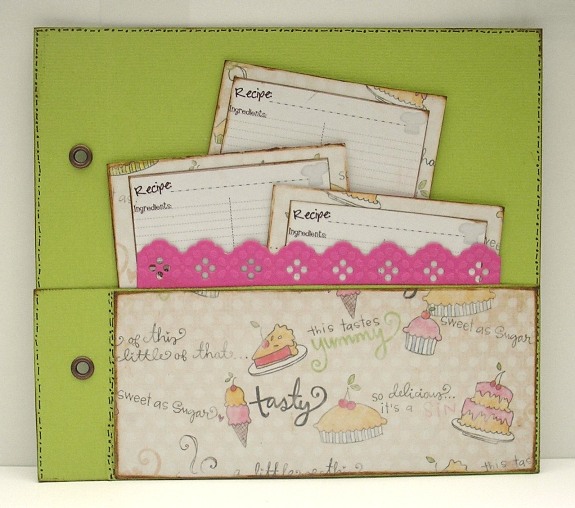
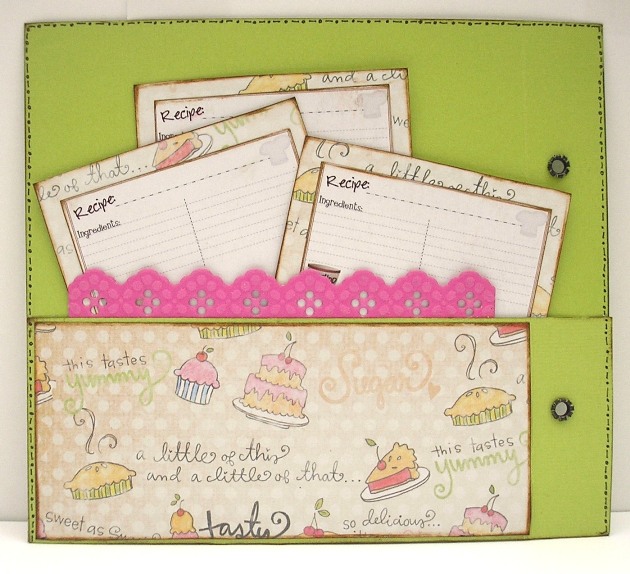
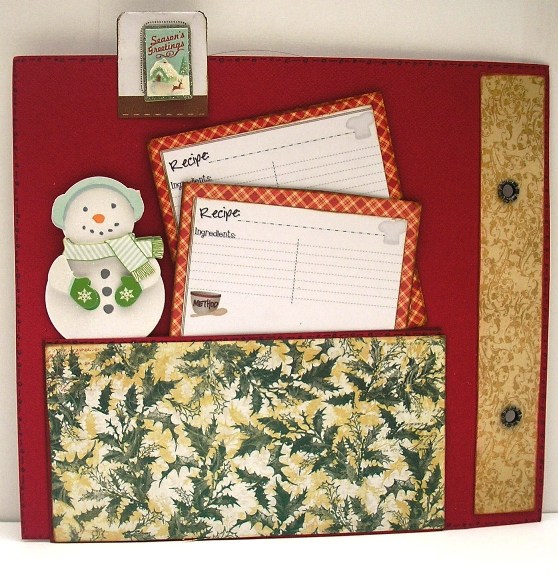
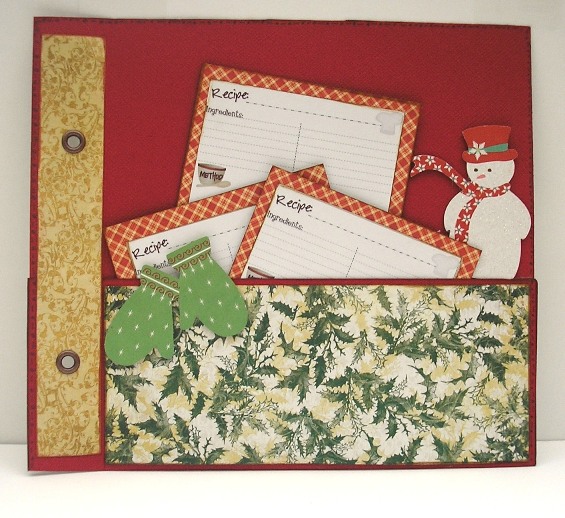
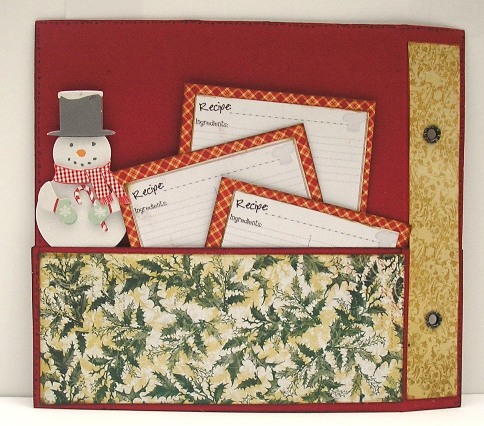
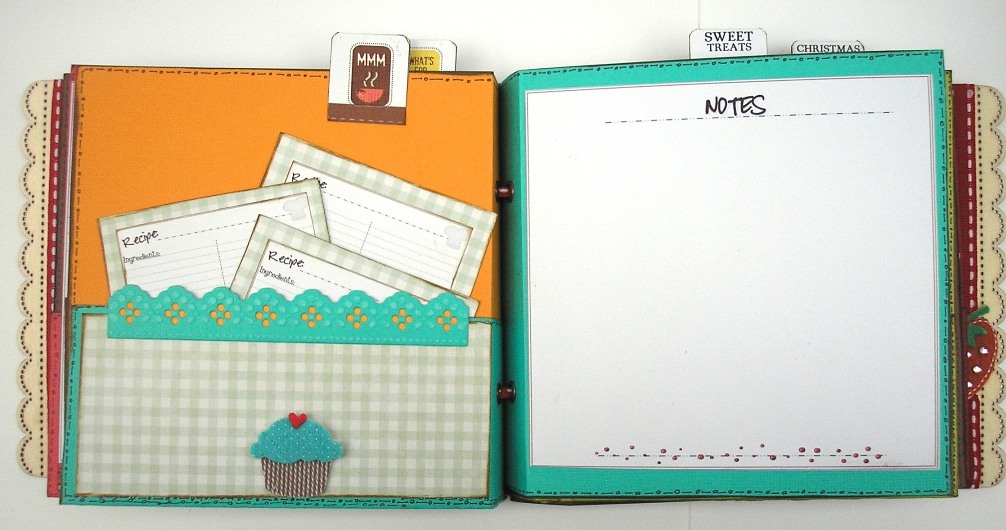
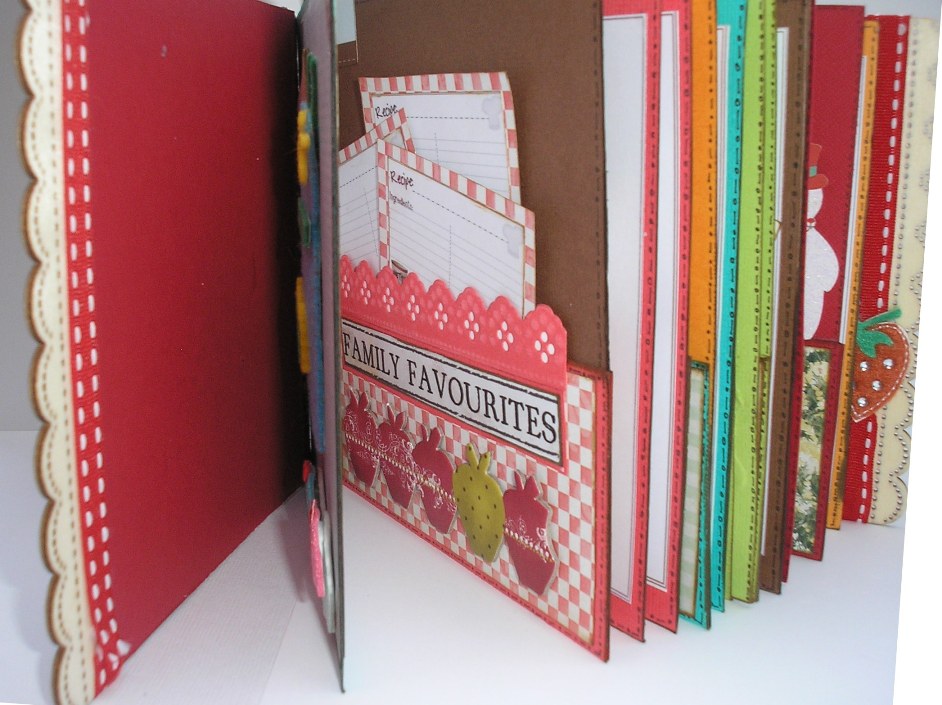
We want some of the pages to have pockets to hold recipe cards, whilst others will have only recipe cards and notes on them. Take a little look at the pictures of the finished book to see exactly what I mean. I am making small and large pockets, as you will see. Use the off-cuts from the paper you used for the pages. A 12x12 sheet of cardstock will make two 7" x 6" pages and two pockets (one large and one small), and this is what determined the sizes of my pockets, I don't like wastage. Take a piece of cardstock 6.75" x approximately 5". Score and fold it to make each side 6.75" x approximately 2.5". Determine where the lower hole is on the pages where the pockets will sit, and punch it through. Add double-sided tape to the very edge only. Don't add to the top or the bottom. The bottom will fold over to the other side so no need to add tape to the bottom:
Sit the page exactly on the fold in the middle and stick the pocket down on both sides. You now have a pocket on both sides of the page. Doodle a border around the page and insert large eyelets:
Take the last piece of cardstock left over, and form a smaller pocket in the same way on some of the pages, nothing is wasted here:
Put large eyelets on all your pages. You need the strength of the eyelets to keep the pages intact, or they will tear through use.
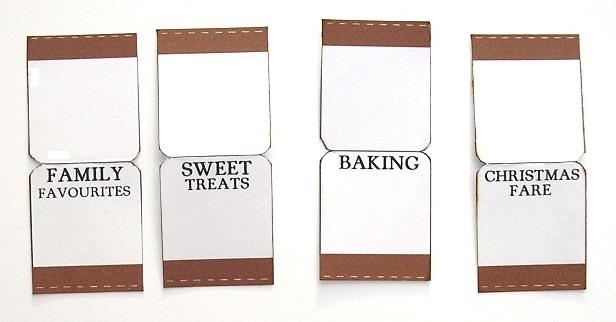
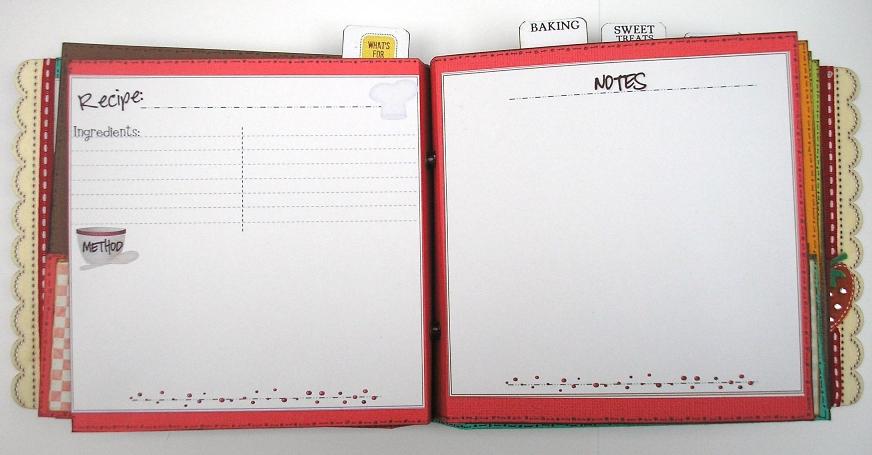
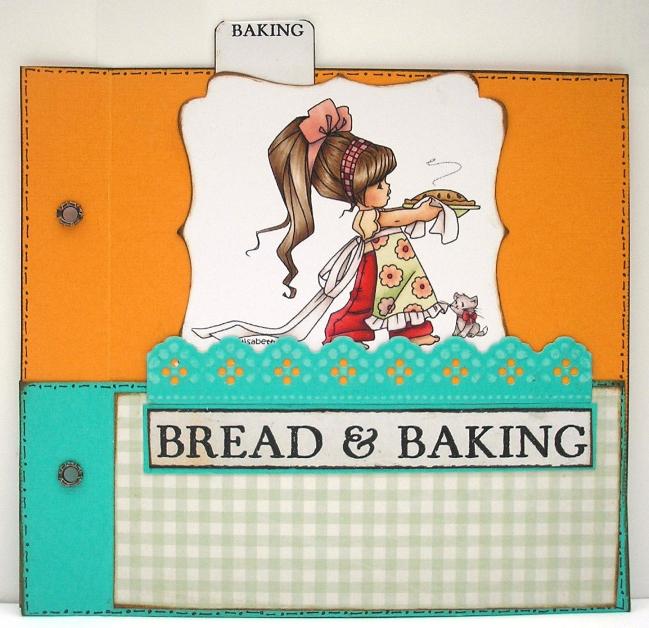
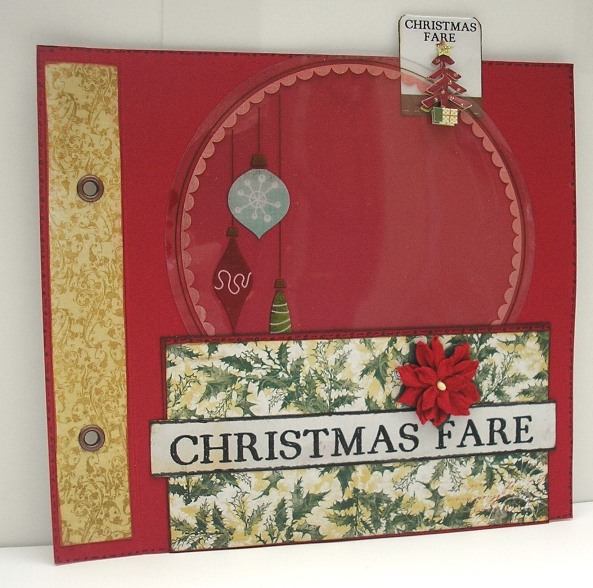
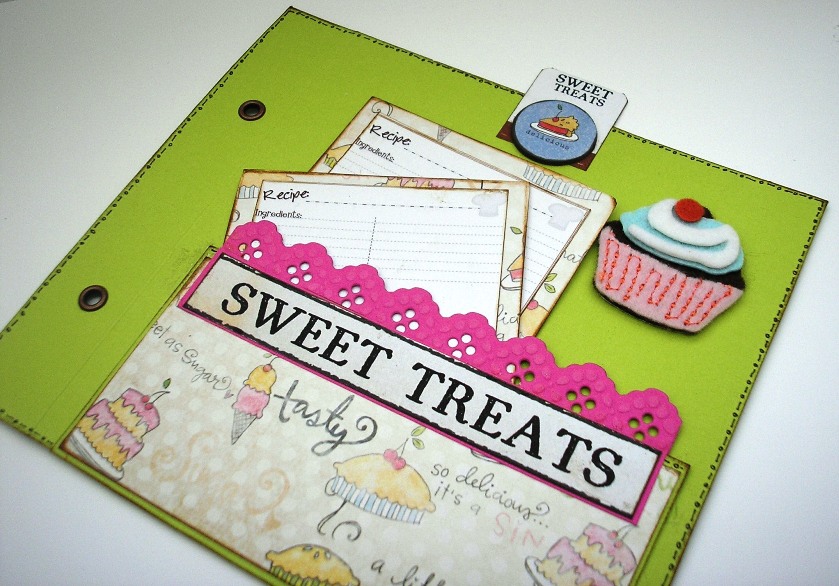
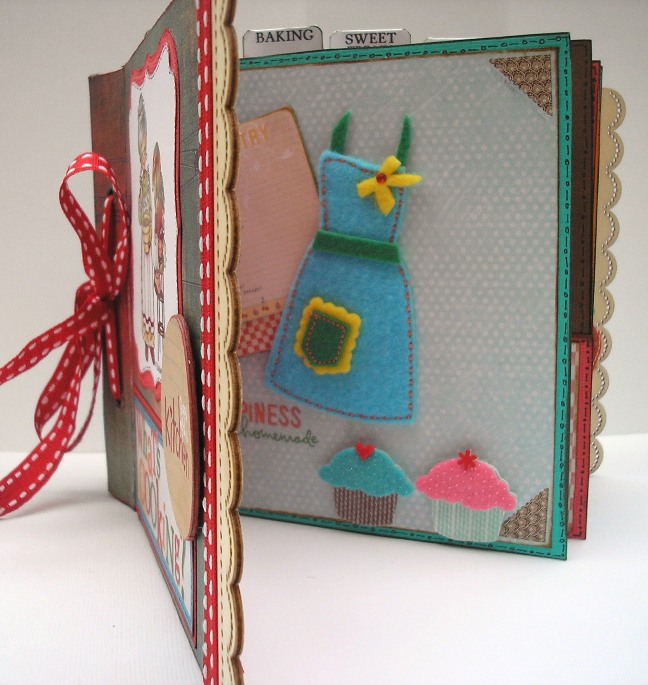
Determine your sections. Here I am doing: "Family Favourites" - "Baking" - "Sweet Treats" - "Christmas Fare". I created some tabs, which I have given you in the embellishment pack (see supply list). Print them out. I have included a blank tab for you to add other sections if you wish. The tabs are also provided in a transparent format if you wish to print on coloured card. Cut out the tabs. Ink edges, then fold in the middle:
Determine the main pages for each section and the order in which you want them to appear. Lay it out so you are sure you get the placement right, then place one tab after the other as shown in the pictures of the finished book. The tabs are simply added to the page by folding it over and sticking to both sides of the paper. Again, look at the pictures of the finished book for guidance. I added rub-ons on the back of all the tabs, these are from Basic Grey's Nook & Pantry collection:
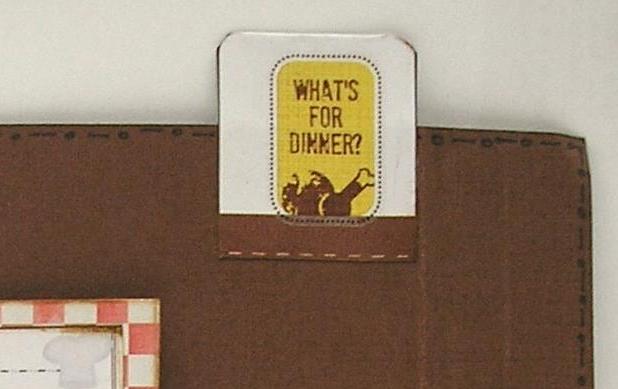
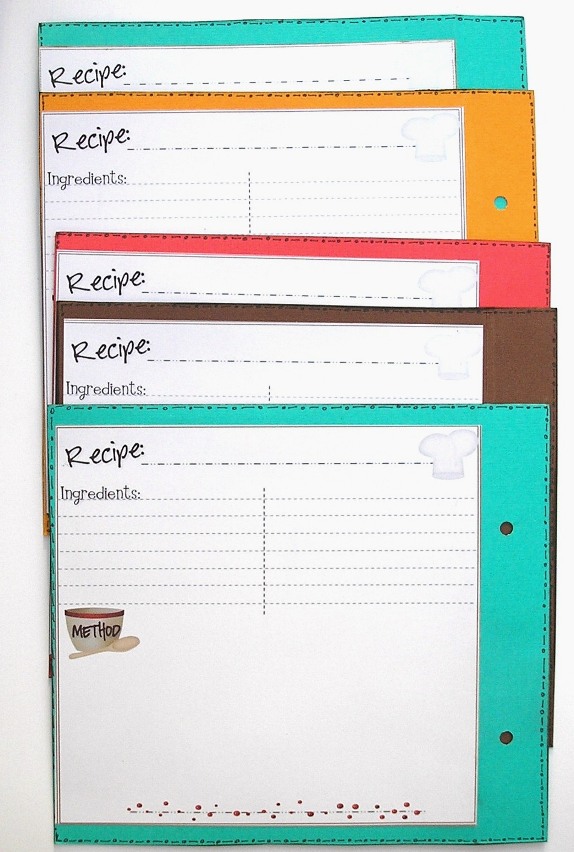
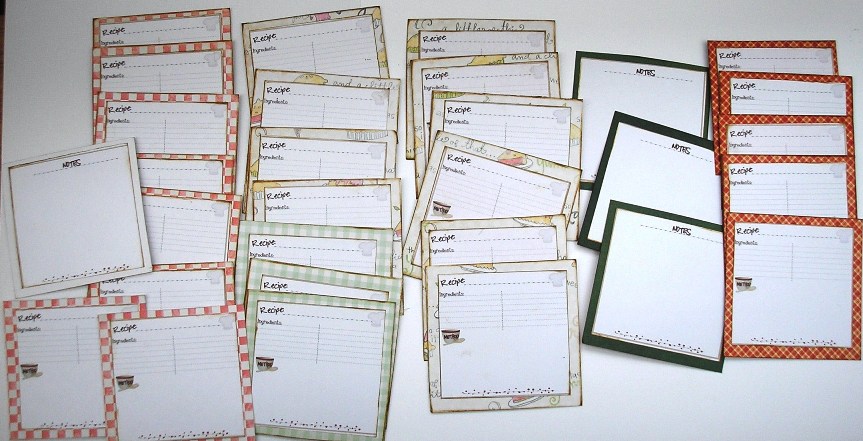
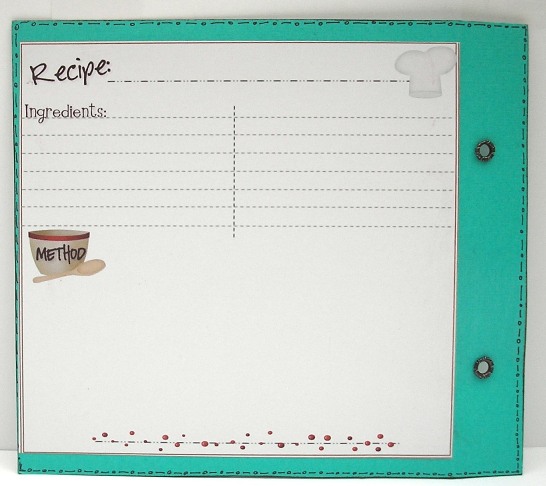
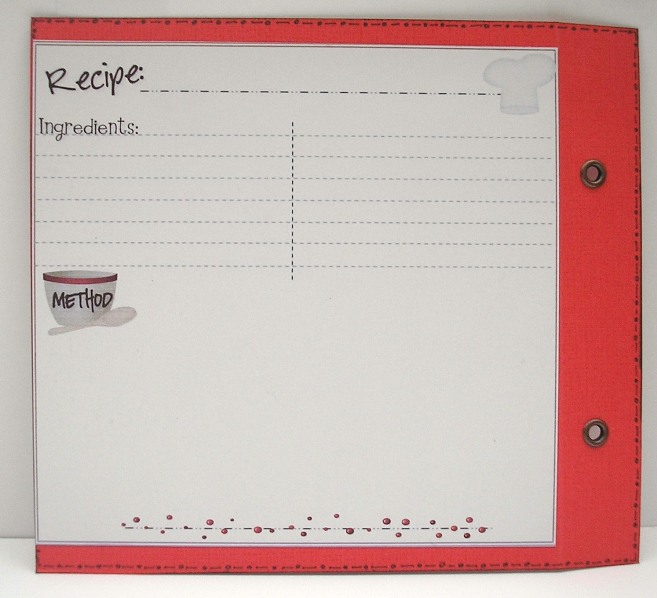
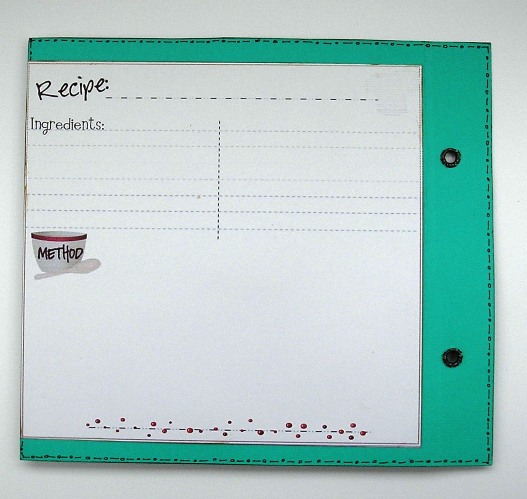
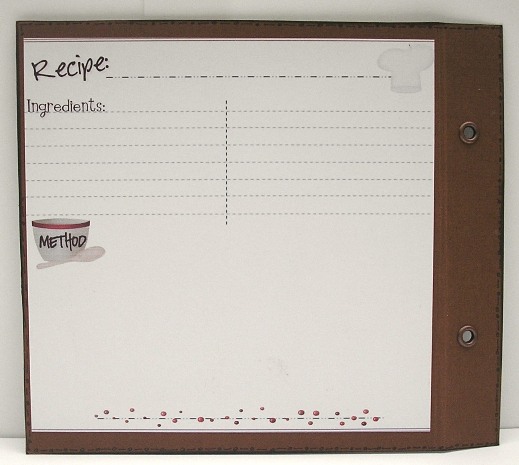
In the embellishment pack I made some recipe cards for you to use. Insert the images into a MS word document (open a document - click insert picture). To get the size double-click on the picture and set the size (mine is 14 cm wide). Print as many as you want, then cut them out and stick them on the pages where you want them. Don't do this without planning ahead, so read through the whole class before embarking on this.. I have only added a few of these pages, but you can add more if you wish. Remember to stick them up to the fold only, not beyond that.
These big ones are used throughout the album, here for example in the finished album are two pages where they are used together:
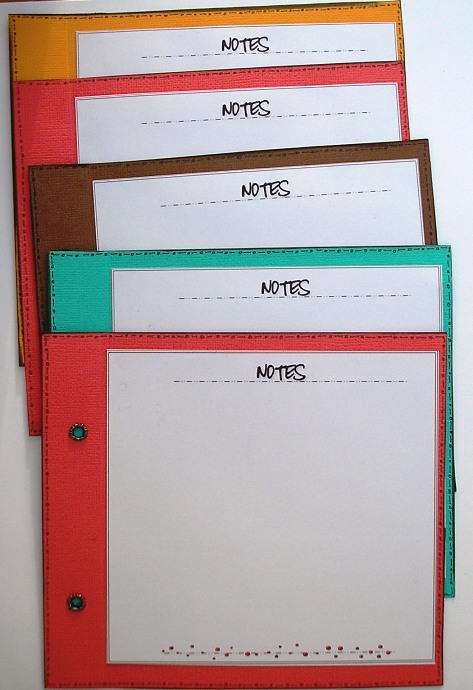
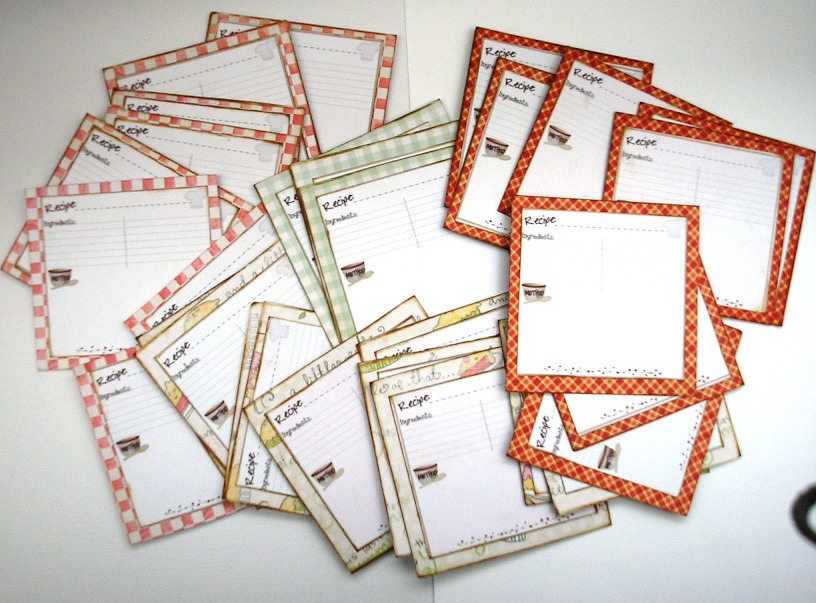
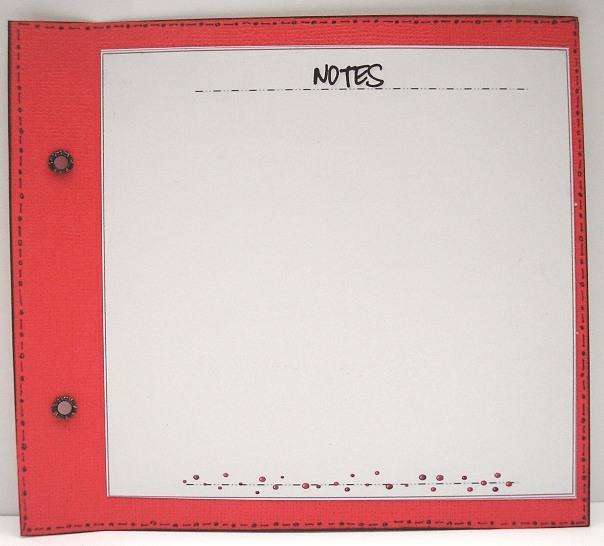
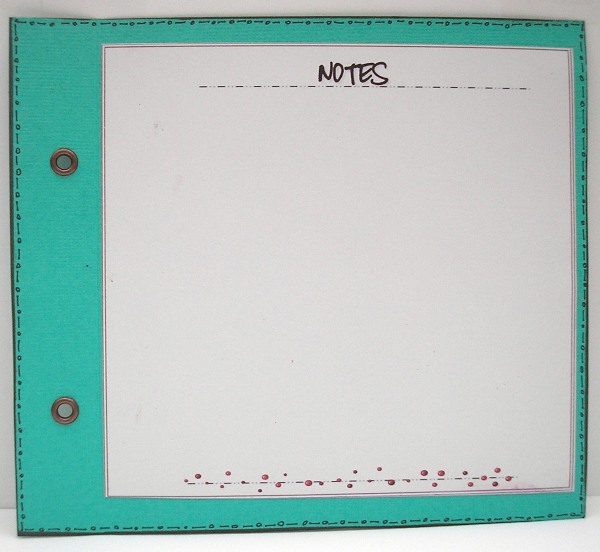
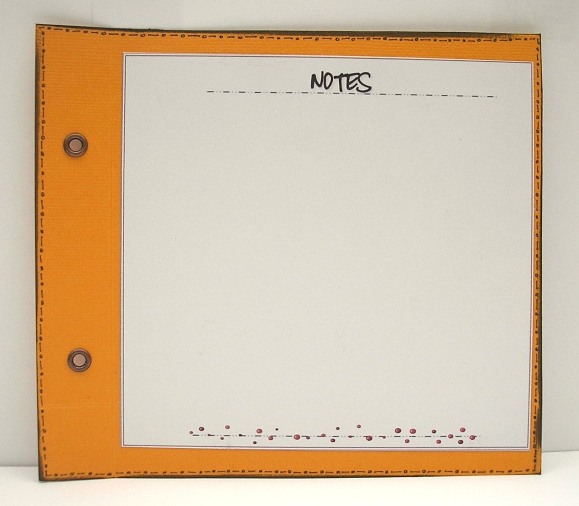
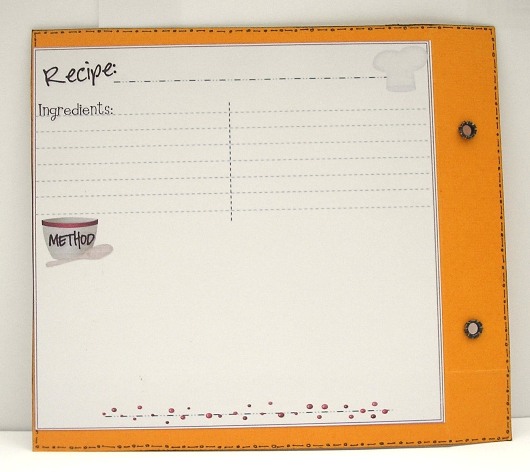
They are great when it is a more complex recipe where a little recipe card wont do. Print some more recipe cards, this time in a much smaller size. I made mine size 7cm in width. These are to sit in the pockets you made earlier: small removable recipe cards. On one side of each card you will have the "Recipe" and on the other side of each card you will have the "Notes". .On one piece of paper in MS Word I inserted six on each page, so make one page of recipe cards and one of the "Notes" card and print them as many times as required. Allow at least three cards for each large pocket, and at least two for the smaller. You can of course add as many as you like and in time I would expect the pockets to be positively bulging with wonderful recipes. Embellish the main pages. I have given you title pieces for each of the four sections in the embellishment pack, these will go on each one of the main pages. Now you have the colours and format for each section and can create the rest of the book around them. Cut out the mini recipe cards you printed out. Glue one "Recipe" card on slightly larger patterned paper, and stick the "Notes" card on the back of each. Ink edges. Use paper to coordinate with the page you are putting them on.
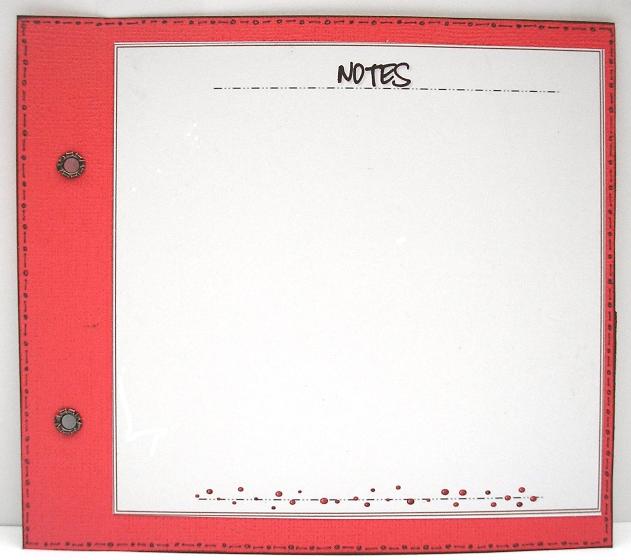
This next picture shows the back of some of the cards (they are on all the cards of course).
How you decorate each page is up to you. In the next series of pictures I will show you every page in my book. I have shown you front and back of each page. Putting them in the book page 1(back) will be next to page 2 - page 2 (back will be next to page 3 - and so on. I have 12 papers, so 24 pages in total.
Here are a few close-ups:
For the borders, I simply cut an edge with a Marianne Lace die, and stuck coordinating cardstock to the back of it to show through the holes.
Decorate the front of your book; I have giving you a banner for the front. As you can see I have added the ribbon to the edge as discussed earlier in the class.
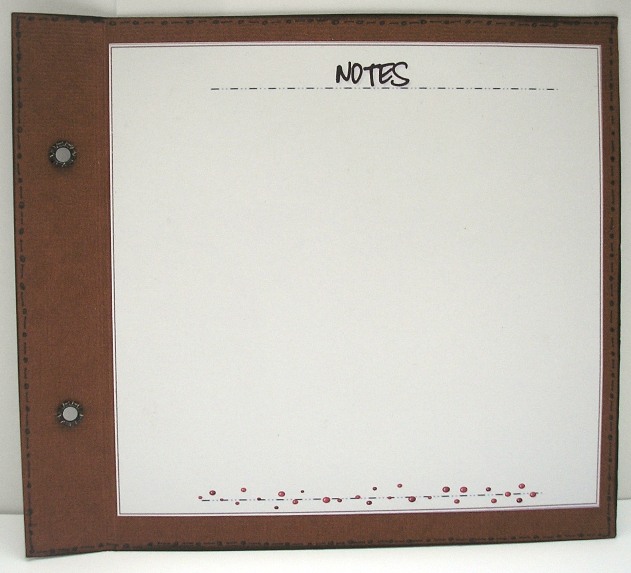
Decorate the inside of the back page:
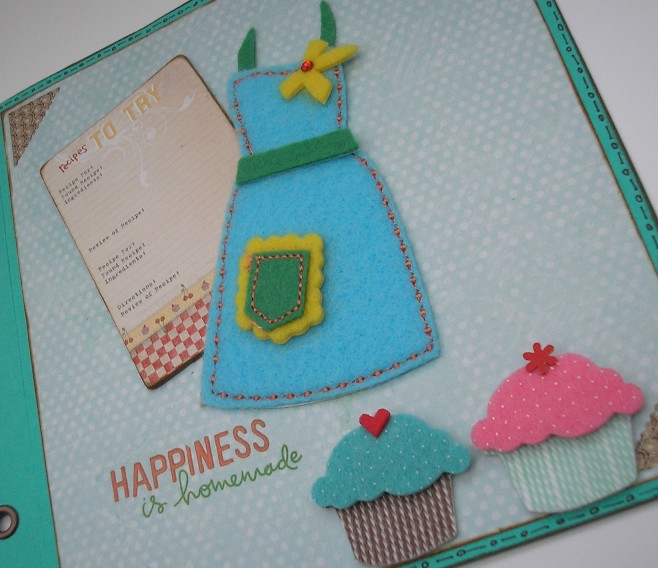
The die-cuts used on the front, inside back cover and on the Sweet Treats page, are just perfect for the book. Already coloured just pop them out and either mount them on cardstock, or use as they are with just inked edges. You can see in the picture above that I have inserted by ribbon ready to start binding the pages together. Determine the order of the pages, if you haven't already:
then start weaving the ribbon through. Don't make it too tight or you wont be able to lay the book flat like this:
You can see how it opens perfectly for your cooking sessions. TIP: A really good idea if giving this as a present is to include your favourite recipes and perhaps laminate the recipe cards, especially if it is a card that is likely to be used a lot.
I purposely left the ribbon quite long as I may want to add more pages to the book.
A beautiful keepsake that will be treasured for years to come. We hope you enjoyed the class. Click here for more ideas and classes Copyright Notice: No part of this tutorial may be reproduced or used for commercial use or shared in any way, shape or form, nor any part of it feature on any other website, social media or publication.
|
All projects copyright ® Charmed Cards & Crafts. All rights reserved.