|
Products used:
K&Co Cut 'n Paste collection
-
Further items
needed:
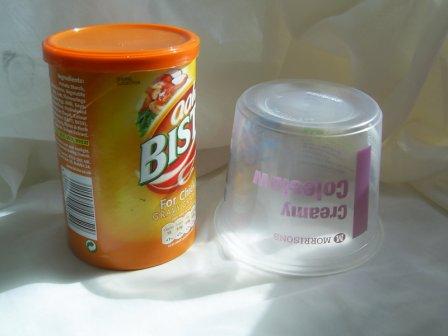
Empty gravy carton or similar pot
coleslaw pot/ cottage cheese pot (or similar , but with straight'ish
sides and big enough to go over the Bisto carton )
large die cut leaves (I used a leaf punch)
one small brad.
strong glue,
foam pads
lace
flowers
paint dabber in matching colour or acrylic paint.
chalk ink for edges.
decorative border punch.
Instructions
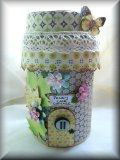
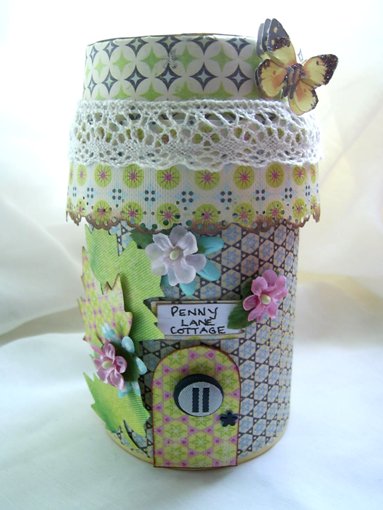
1.First clean out your gravy carton , you
can do this by blowing a hairdryer into it and brushing out any loose
bits of gravy granules.
2. Paint inside the carton and also an approx 1 cm down from the top and
the bottom on the outside, you may need a few coats of paint. Leave to
dry.
Roof top.
Discard the gravy carton lid.
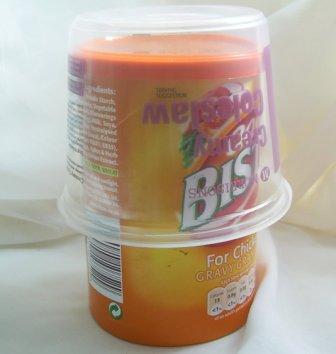
3. Place your yogurt carton over the Bisto carton - it is likely to be
too big at this stage. to make it smaller , draw around the carton and
cut around, it needs to hang approx 1 cm over the gravy carton edge,
look at my finished money box to see how it should look
4. Measure around the coleslaw carton and cut out designer paper to fit
.Glue onto the carton , if your carton is slightly slanted in shape you
can this in two pieces if it helps it to fit.
IF YOU WISH TO HAVE A SLOT AT THE TOP OF THE CARTON , CUT THE SLOT AT
THIS STAGE.
5. Next cut a piece of designer paper approx 2 cm wide and long enough
to fit all the way around the bottom of the coleslaw carton. Add 2 cm to
the length of it
6 Using a border punch , punch a decorative border along this strip .
Ink the edges Attach onto the bottom of the coleslaw carton with 3d foam
pads - this gives the appearance of the 3d trim. Cut off any excess at
the back.
7. Attach lace to the join of the trim so that it covers it neatly.
8. Add a K&Co grand adhesions butterfly to the top of the roof.
Main Gravy Carton
9.measure around the carton and cut a piece of designer paper approx
1cm wider ( - this should give you enough room to use a decorative
border punch for the sides, you may have to do some adjustment depending
on the size of your punch.
10. Using your border Punch , punch out the top and bottom of your
designer paper, attach now to the carton - you can see by my photo that
I left a gap at the bottom to show the matching paint.
11. cut out a door shape from coordinating paper , ink with chalk ink,
attach a small brad to the side so it looks like a door knob. Attach the
K&Co fabric number brad to the door.
12. Punch out / die cut large leaf shapes , ink around the edges - I
have used the K&Co paper for the leaves. Place the roof on top - do not
glue it.
13. Attach leaves and flowers to the carton and just under the trim of
the roof..
|