|
|
|
|
Charmed Cards & Crafts June17 Kit Project Instructions
These are the instructions for using our June 17 Kit. The kit is based on the Bombay Sunset collection by Kaisercraft.
There are two sets of projects by two designers: Karen Mortensen and Cal Summers. Both used the kit and you can see below what they each made from one kit.
© Charmed Cards & Crafts 2017
|
Karen Mortensen |
|||
|
|
|
|
|
|
|
|
|
|
|
|
|
|
|
|
Cal Summers |
|||
|
|
|
|
|
|
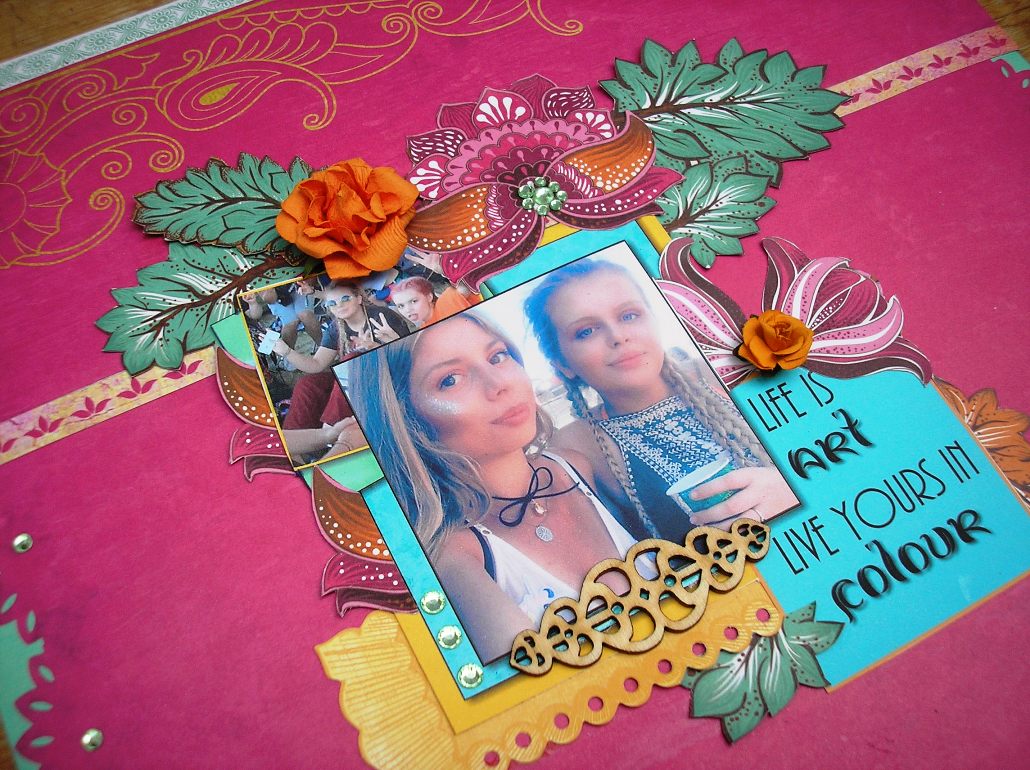
By Karen Mortensen
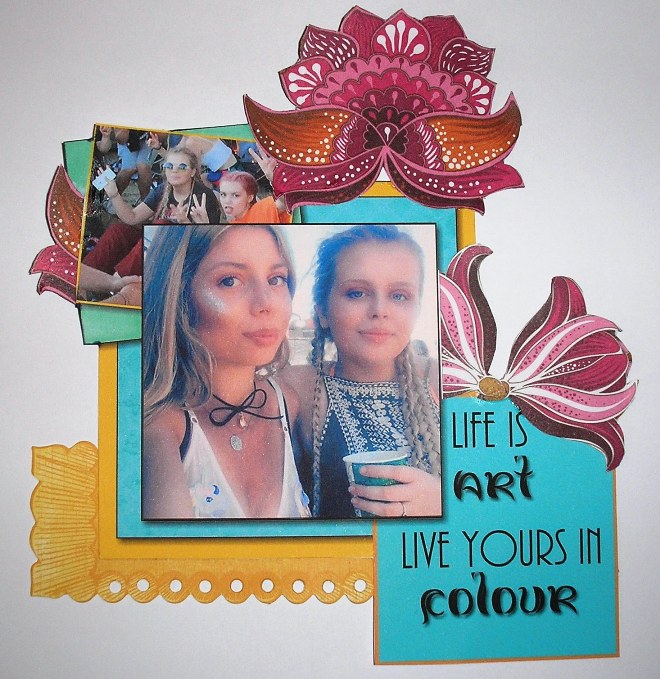
This layout was created by Karen Mortensen using the Charmed Cards & Crafts June 2017 kit.
Papers Used: "Music" - "Sari" - "Daybreak" . Plain Cardstock "Neptune". Sentiment from sentiment sheet. Embellishments from the kit. Scrap paper for matting. Optional tool: Martha Stewart Punch-Around-The-Page Tool All of the patterned sheets have a border strip at the bottom on the reverse side of the paper. If you haven't already cut all the sentiment strips off the papers - in this layout I cut the top strip from "Sari" and the middle strip from "Music". 1. If you haven't already, cut out all flowers and leaves from "Daybreak". We will only use a few elements here, but all will be used in other projects. 2. I started by creating the middle section. I am using two photographs, one measures 75mm x 75mm, the other 45mm x 50mm.
3. Use a punch-around punch and punch a border of the "Music" paper as pictured. You could just punch two edges and leave the bottom and corner, or leave the paper as it is. 4. Adhere "Music" to Neptune cardstock. This cardstock is larger than the Music paper, so have the longer length vertically so we can add a border strip at the top.
5. Add two border strips: the top strip from "Sari" and the middle strip from "Music".
6. Add your centre piece onto the layout as pictured. Add leaves and flowers as pictured.
7. Add Kaisercraft Rhinestones into a flower shape on the main flower. Add rhinestones all around the edges.
8. Finish with a Kaisercraft Wooden Flourish.
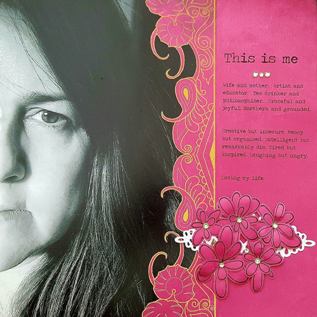
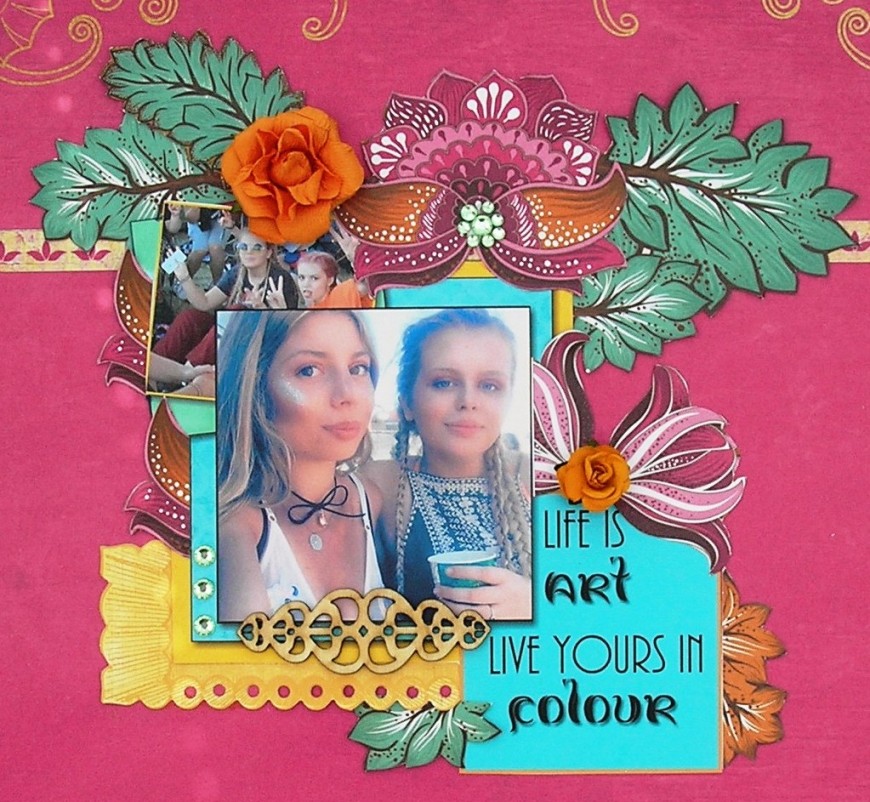
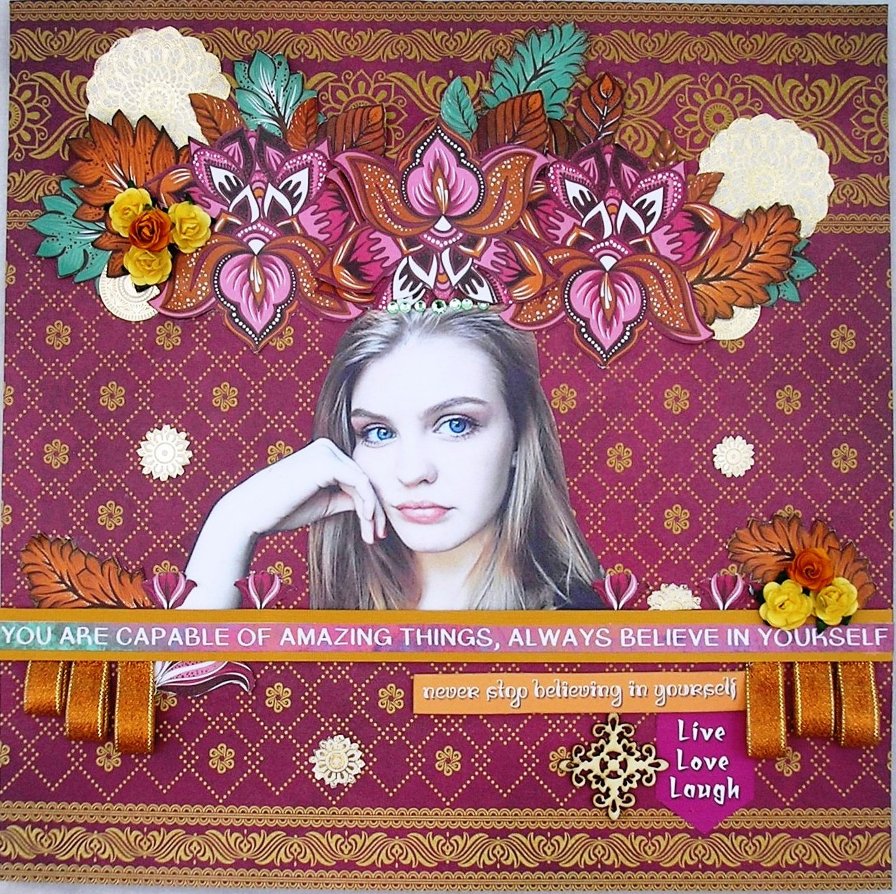
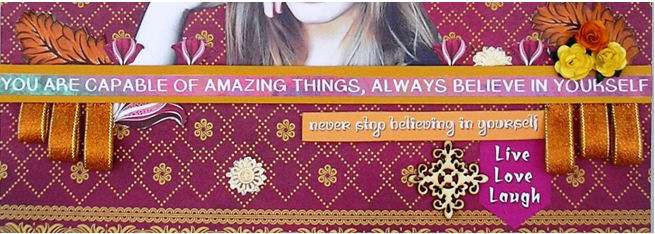
By Karen Mortensen
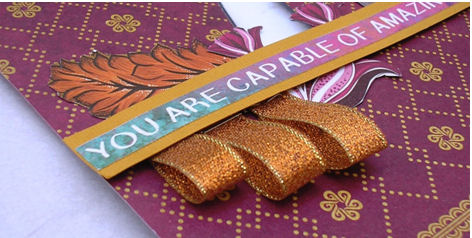
Papers Used: "Daybreak" - "Sari" - "Indian Summer" Speciality Paper. Embellishments from the kit.
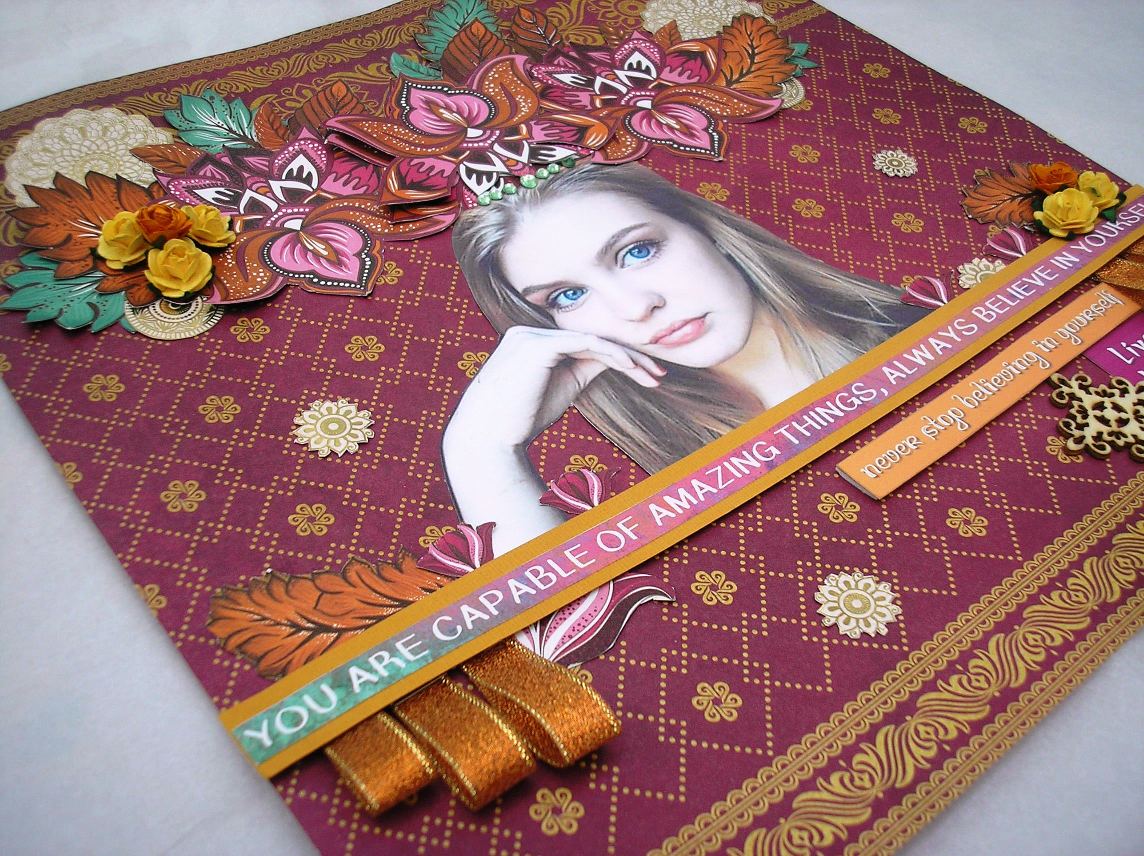
All of the patterned sheets have a border strip at the bottom on the reverse side of the paper. If you haven't already cut all the sentiment strips off the papers - in this layout I cut my strip from "Bollywood" and layered it on a piece of "Spiced Pumpkin" plain cardstock. 1. In this layout I am using a picture of my daughter measuring approximately 4.5" in height. Cut out your image and adhere to middle of the "Sari" paper. 2. Cut six strips from your metallic ribbon: two measuring 3", two measuring 2.5" and two measuring 2". Fold them in half and staple top together. Determine where you want the long word strip to appear and adhere three of the ribbon loops on either side. Mount the word strip onto foam tape and stick to layout as pictured.
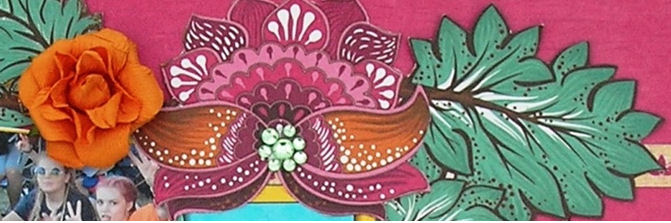
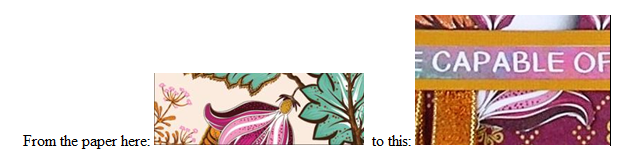
3. Cut out all the flowers and leaves from the "Daybreak" paper. Although we wont be using them all on this layout you will be using each and every piece on other projects. Cut out everything, even half flowers and leaves as they can easily be tucked under other element. 4. Use one of the orange leaves you have just cut out either side of the word strip. Add four of the smaller flowers to the top, and a larger one below the arm. This is an example of a flower that was incomplete on the design, but perfect here:
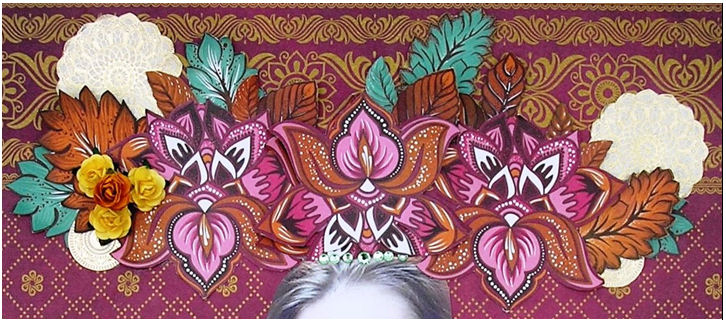
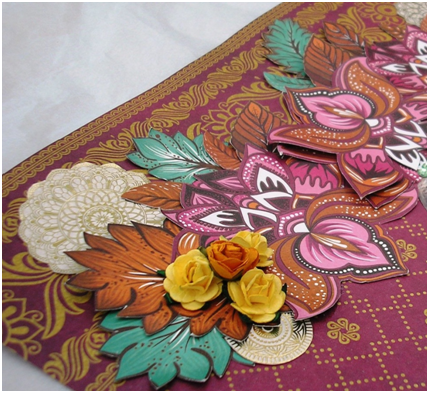
5. Build up the cut out flowers and leaves at the top of the layout as shown. Leave some edges unstuck to create a 3-dimensional effect. I mounted a second flower in the middle on foam tape to elevate from the page and lift the design.
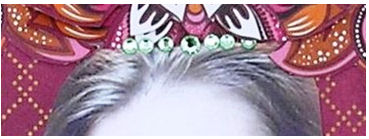
6. Cut elements from the beautiful "Indian Summer" speciality paper and attach as pictured. Add a row of Kaisercraft Rhinestones by the hair under the flowers: one big one in the middle and three smaller ones either side:
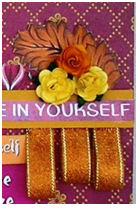
7. Arrange roses in two places as pictured.
5. Cut out the two sentiments, "Never stop believing in yourself" and "Live Love Laugh" from the separate die-cut sheet in your kit as shown and adhere to layout. "Never stop believing in yourself" is mounted on foam tape.
6. Attach a Kaisercraft Wooden Flourish as shown above.
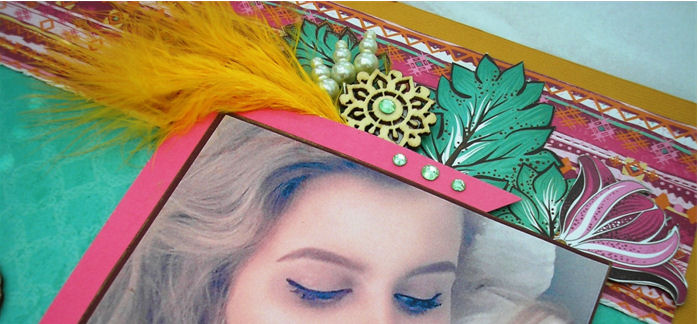
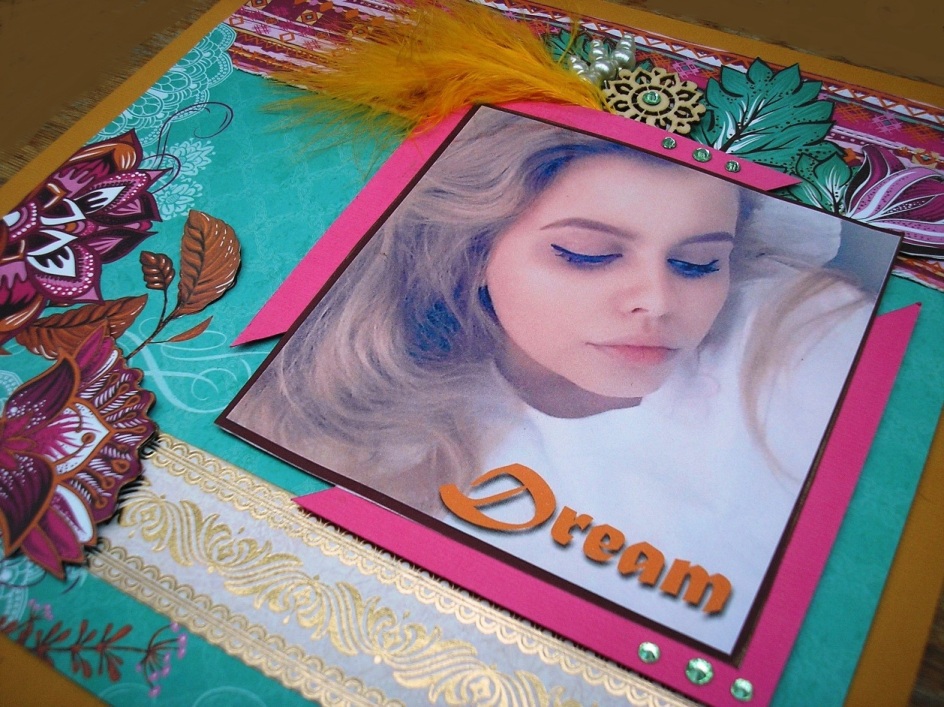
By Karen Mortensen
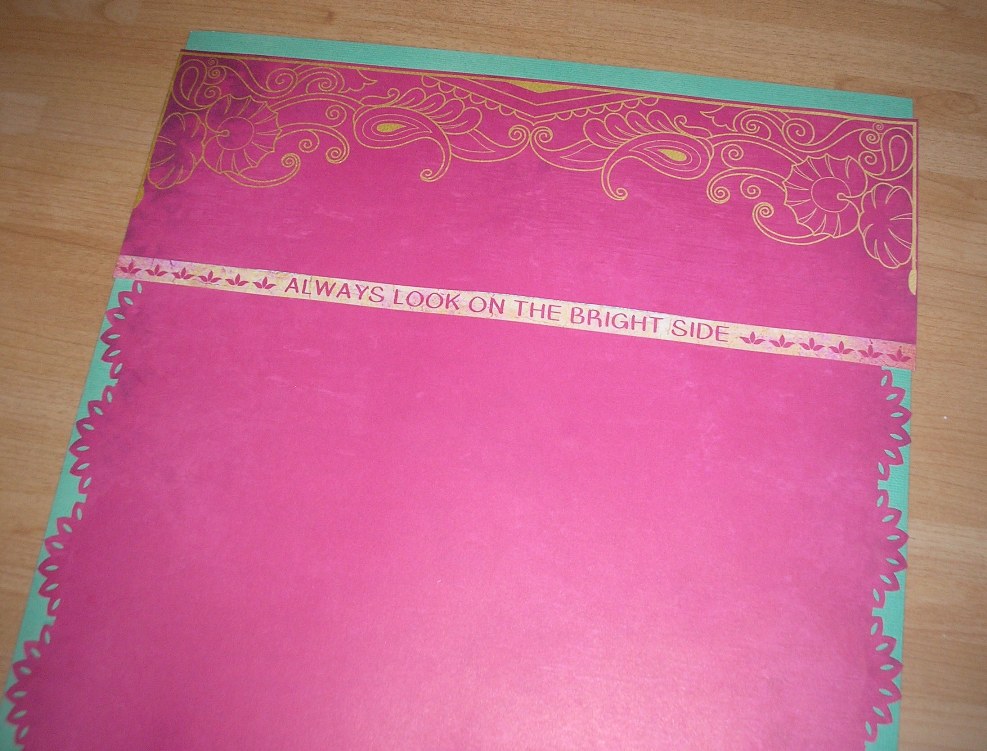
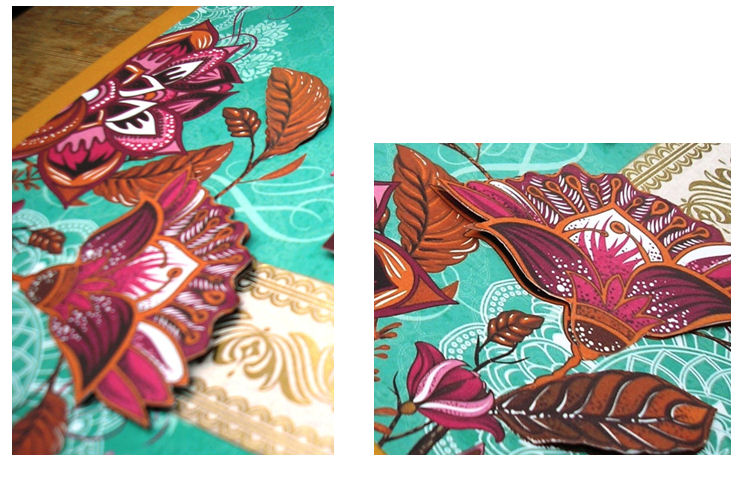
Papers Used: Mumbai" - "Daybreak" - "Indian Summer" Speciality Paper. Plain cardstock: "Spiced Pumpkin", "Flamingo" and "Coffee Bean". Embellishments from the kit. All of the patterned sheets have a border strip at the bottom on the reverse side of the paper. If you haven't already cut all the sentiment strips off the papers . 1. If you haven't already cut out all flowers and leaves from "Daybreak". We will only use a few elements here, but all will be used in other projects. 2. The base of my layout uses the paper "Mumbai". I turned it around so that the flower design was in the opposite corner. Using a craft knife cut around the top of the white doily on the paper. 3. Distress the top edge by using a paper distresser, or a nail file to lightly rub the edge. Fold the paper down at the top so that the reverse design is showing. I didn't measure really, just wanted the triangle pattern to show at the top, but the fold measures 68mm. Tuck the fold behind the doily pattern you just cut out.,
4. Cut the left hand side of the paper down so it is the same in width as it now is in height: 23.5 x 23.5cm
4. Using a craft knife cut around the bottom flower in the design as shown. Cut the border from the gold speciality paper "Indian Summer" and adhere to layout as shown, tucking it under the flower. Use the identical flower you cut out of the paper "Daybreak" and mount on top of the cut flower for a 3-D effect. I stuck the flower down firmly at the base of the stem, then mounted the top of the flower on foam tape to lift it off the page. Do the same to a couple of the leaves.
5. Mount layout onto "Spiced Pumpkin" plain cardstock measuring 25.5cm x 25.5cm 6. The photograph of my daughter measures 11.5cm x 11.5cm. I added the word "Dream" on the computer prior to printing it out, but you could use a rub-on or sticker. Mount the picture on "Coffee Bean" plain cardstock with a narrow margin. 7. Cut two triangles from "Flamingo" cardstock, measuring 10.8cm on the sides, and mount the photograph on these with a 1cm margin on all sides. Mount on foam tape and adhere to layout.
8. Add feather to the top of the photo. Add leaves and one of the flowers you cut out from "Daybreak" to the top, tucking them behind the picture. Add Kaisercraft Rhinestones, Wooden Flourish, and embellishment pins. Please see pictures for guidance.
by Karen Mortensen
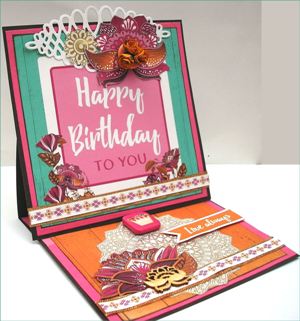
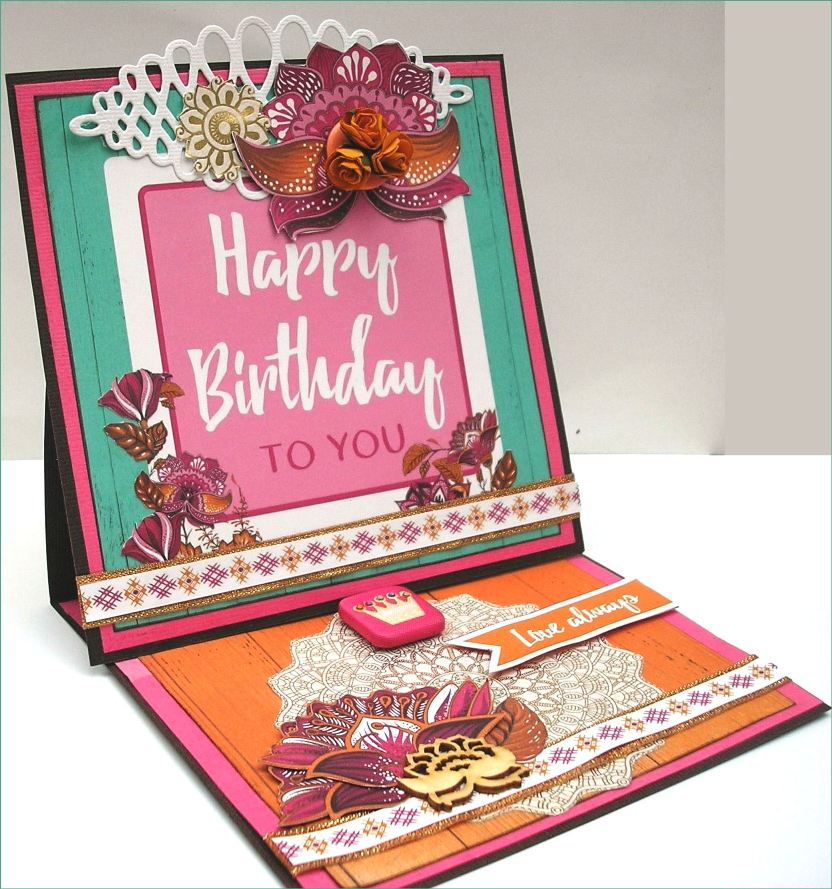
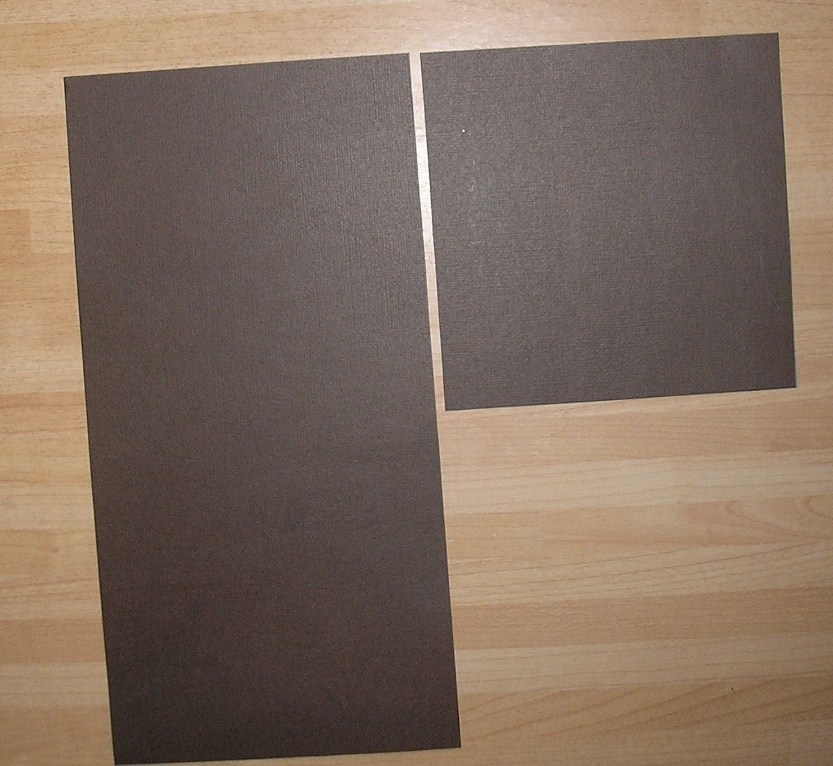
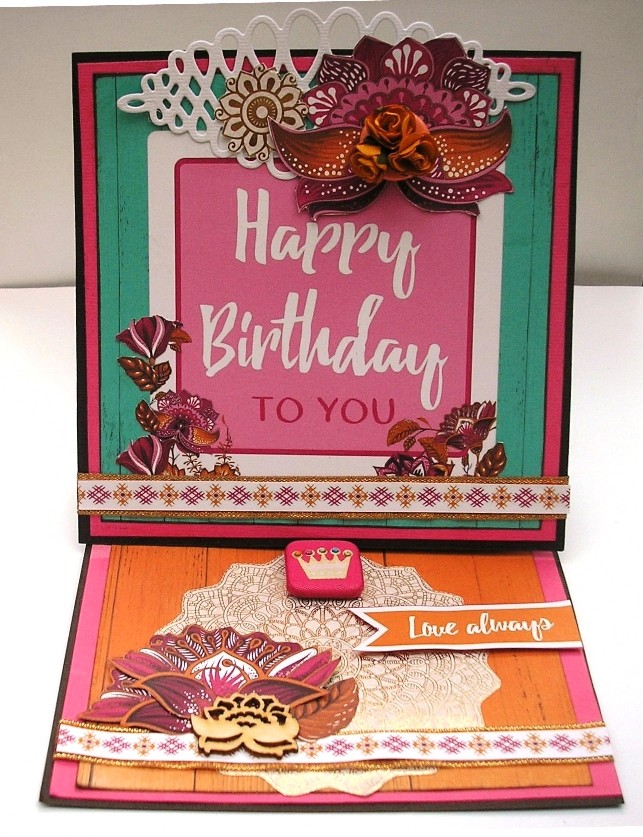
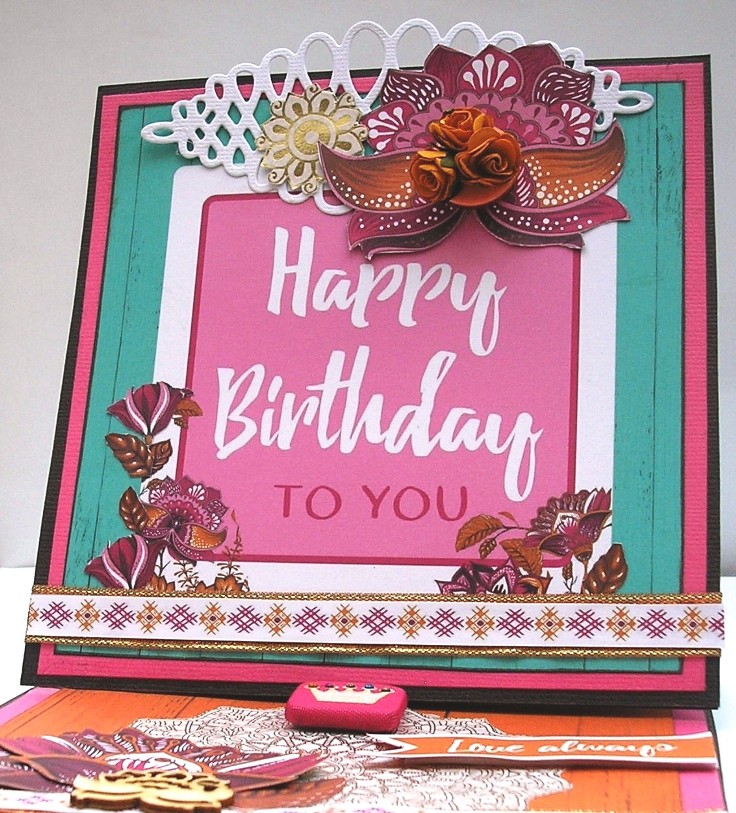
Papers Used: "Daybreak" - "Party" - "Bollywood" - "Indian Summer" Speciality Paper. "Coffee Bean" and "Flamingo" Plain Cardstock. Embellishment form kit. Optional tools: Brown ink 1. The base of the card is 3/4 of a 12" x 12" sheet of cardstock. You use one quarter for the front of the card and the other 2/4 (1/2 of the sheet) is used for the frame. Cut the Kaisercraft Cardstock "Coffee Bean" into size 12x12 first (it is a little larger on one length so cut the bottom strip off). Then cut one side 12" x 6", and one 6" x 6":
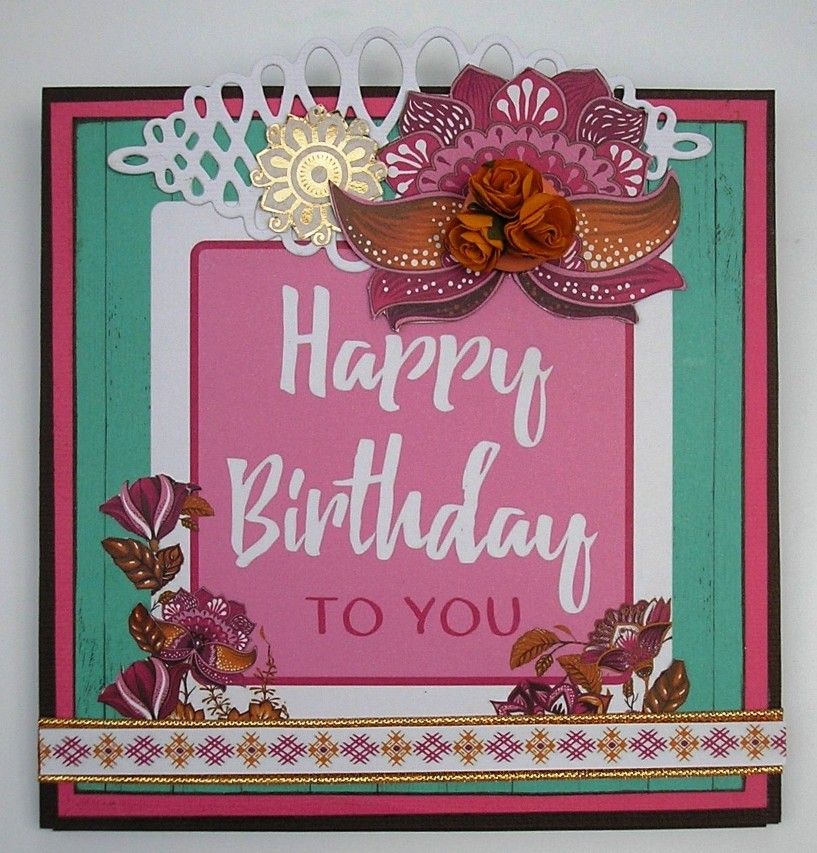
2. Decorate the card front first so take the 1/4 (measuring 6" x 6") of "Coffee Bean" , then add a slightly smaller piece of the "Flamingo" cardstock, measuring 5.75" square, leaving a margin around the edge to show the brown card - cut out another square of the pink "Flamingo" cardstock same size as we will need one for later and put this to one side.- Cut out the "Happy Birthday" greeting from "Party", ink edges with brown ink, then stick onto your card front.
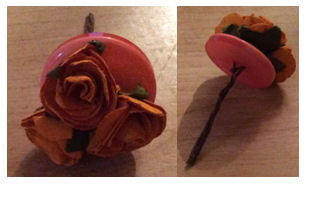
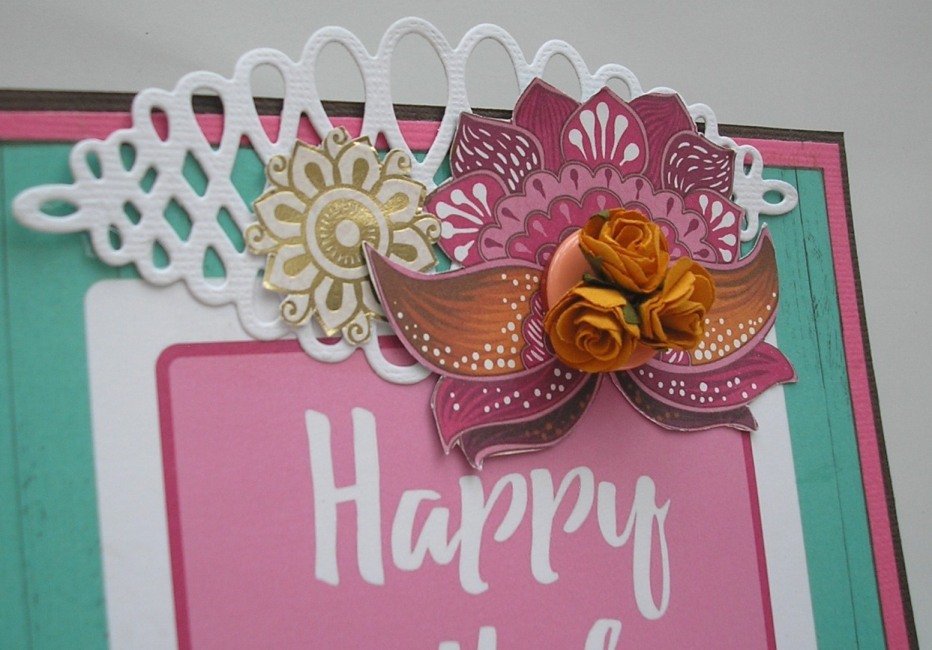
3. Finish decorating the front: · Adhere the die-cut from the kit to the top of the card · Cut out a small gold doily from the "Sunset" speciality paper and adhere next to a flower cut from the "Daybreak" paper. · Thread three of the gold roses through one of the larger buttons in your kit, then stick to the front of the flower, I used Glossy Accent to ensure a strong bond:
· Add a few smaller cut-outs from "Daybreak" to the bottom · Wrap a piece of the metallic ribbon in your kit around the bottom, going round the back to ensure a neat finish. Use a piece of the bottom strip from the "Party" paper, and stick on top of the metallic ribbon.
This is your card front completed. Now on to the rest of the card.
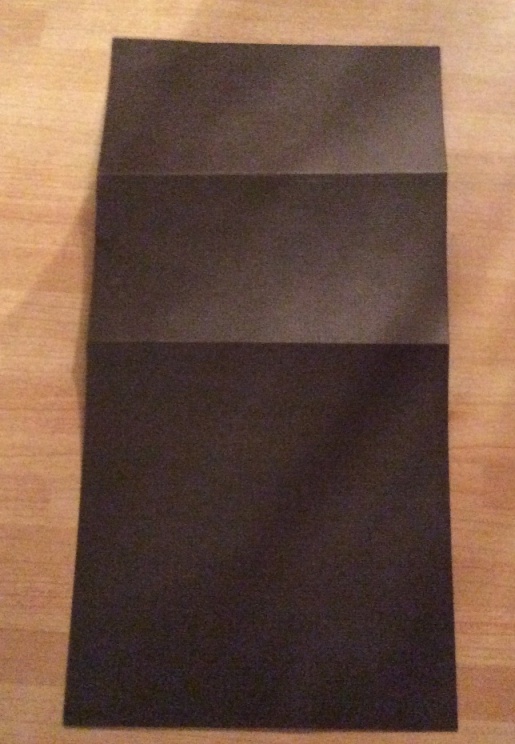
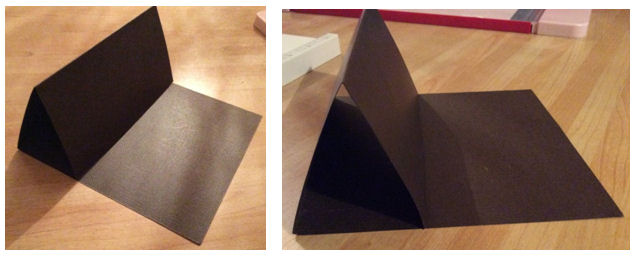
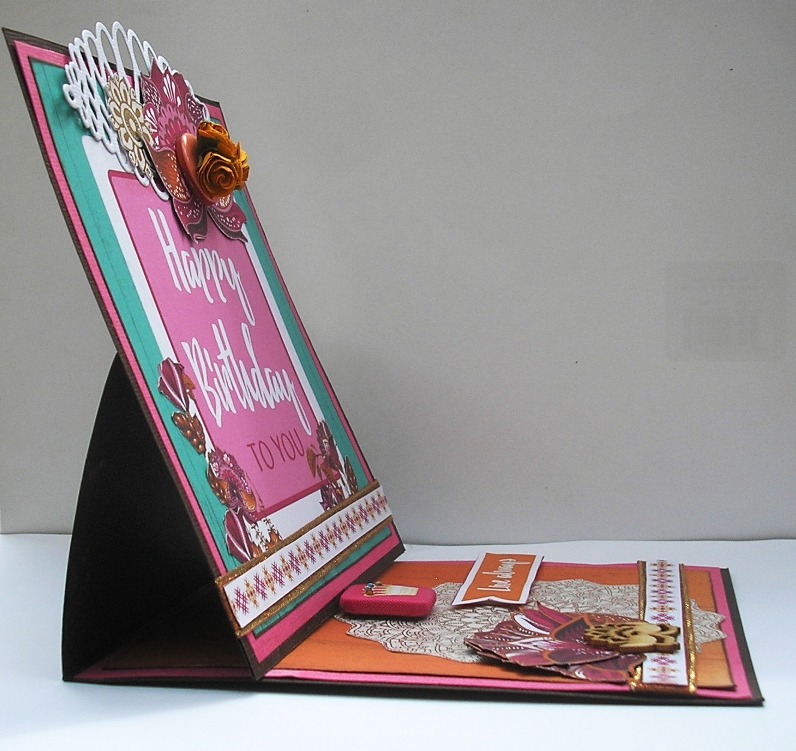
4. Go back to the 1/2 sheet you cut form the 12" x 12" paper, this now measures 12" x 6". Make two folds in the top half - one at 3" and the other at 6", like this:
This is how it folds:
5. On the BACK of the top fold add double-sided tape, cover it completely as it needs to be strong to take the weight of your card. Stick the BOTTOM half of your decorated card front to this area so that when it folds the front will show.
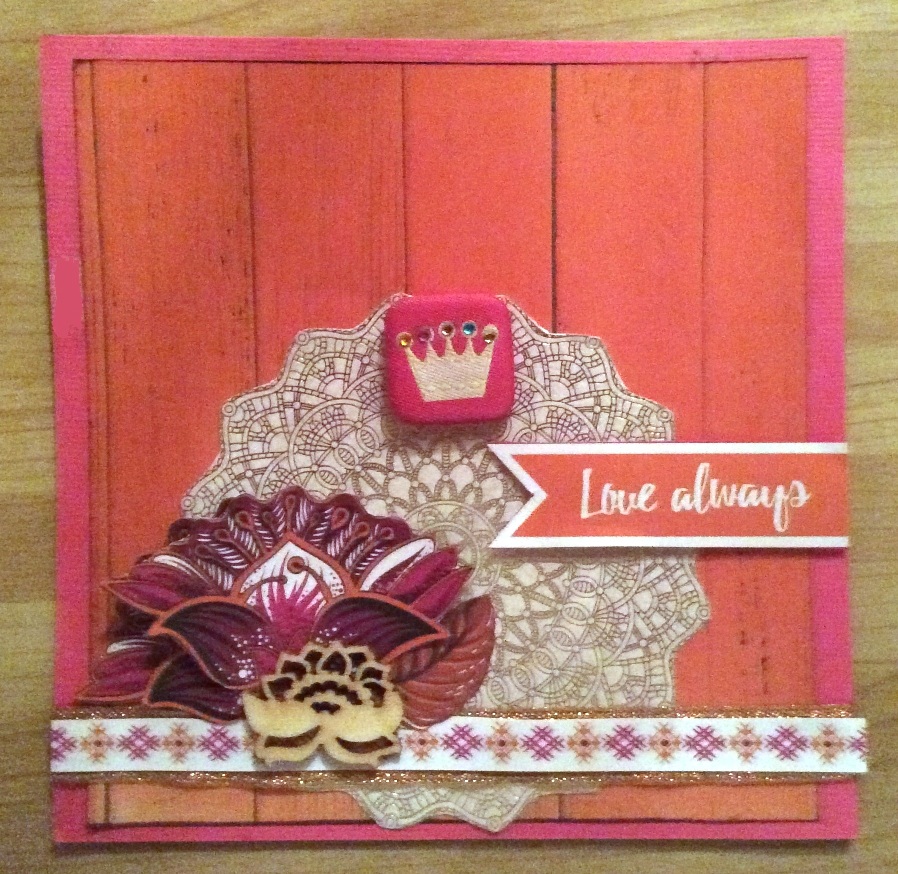
6. Decorate the unfolded piece (the last 6" x 6" panel): · Take the extra piece of Flamingo you cut out earlier. Cut a square from the "Bollywood" paper, measuring 5.5" x 5.5". Ink edges of the Bollywood paper and stick onto the "Flamingo" cardstock. · Cut out a larger doily form the speciality paper. · Adhere a strip of metallic ribbon to the bottom. Top with a piece of the bottom strip from the "Party" paper, as you did to the top section.
· Determine where you want the card to stop sliding when open, and add one of the large fabric brads in your kit to act as a stopper.
· Complete decorating this panel, I added a "Love Always" from the "Party" paper. A large flower cut out from "Daybreak" and a Kaisercraft Wooden Flourish:
7. Stick your panel securely onto the card:
Your card is now complete. See following pictures.
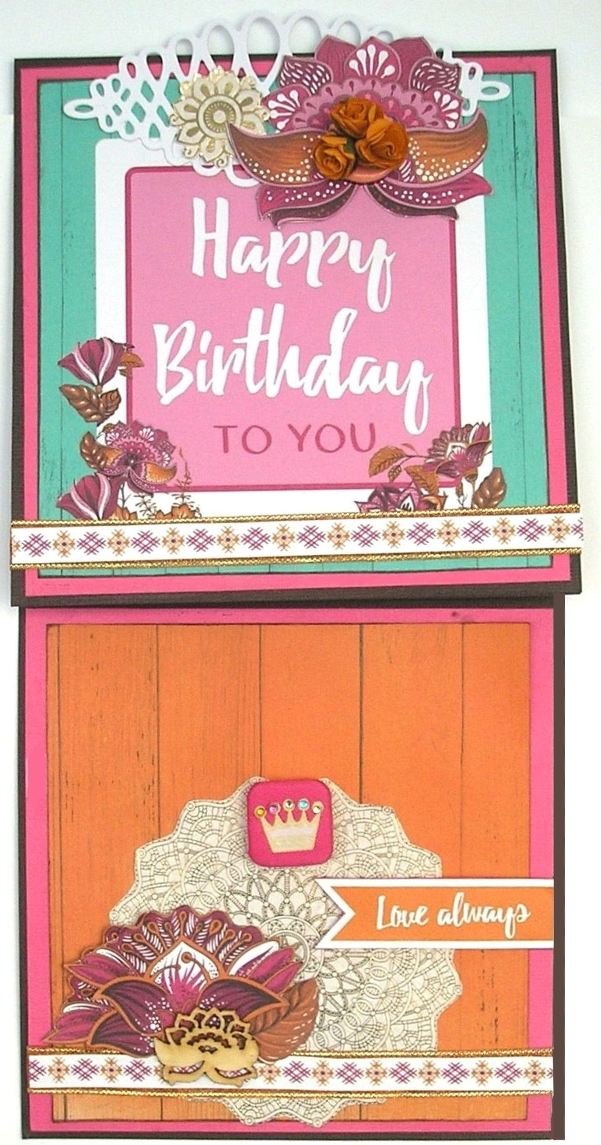
This is a picture of the finished card and how it looks when folded, it is very neat and fits snugly into a square envelope:
Open:
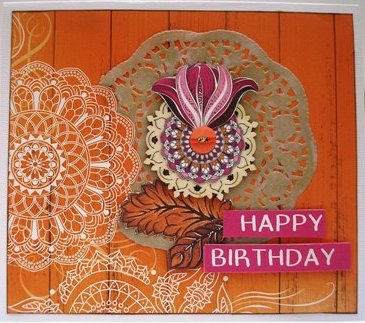
by Karen Mortensen
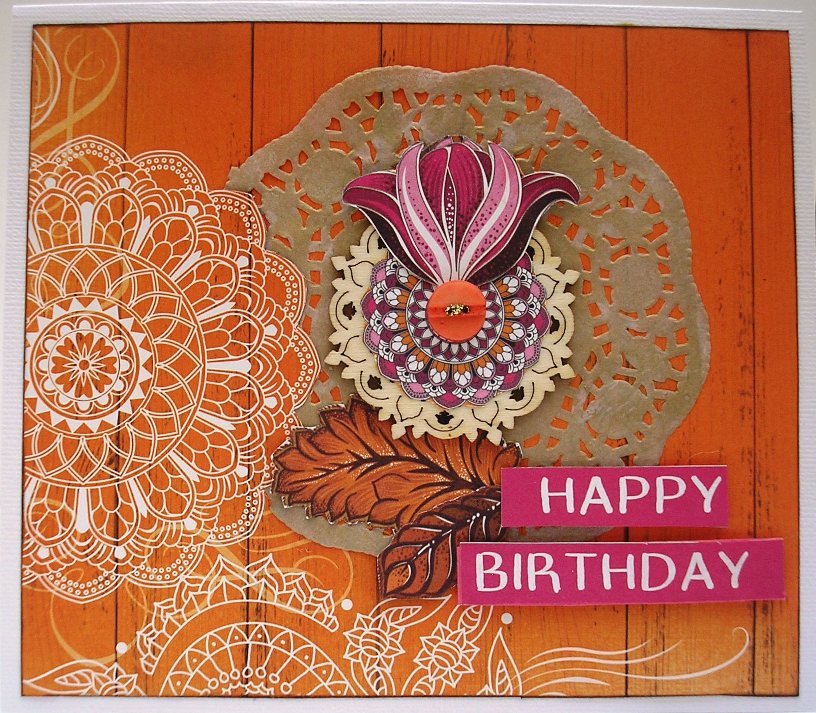
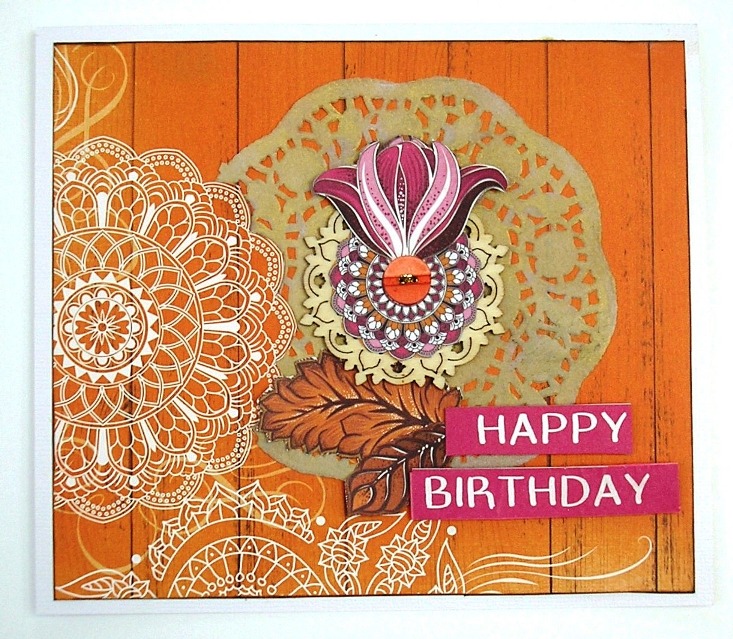
This is a larger size square card. Papers Used: "Daybreak" - "Party" - "Bollywood" . "Coffee Bean" and "Coconut" Plain Cardstock. Embellishments from kit. Optional: Ink for edges. Gold glitter glue.
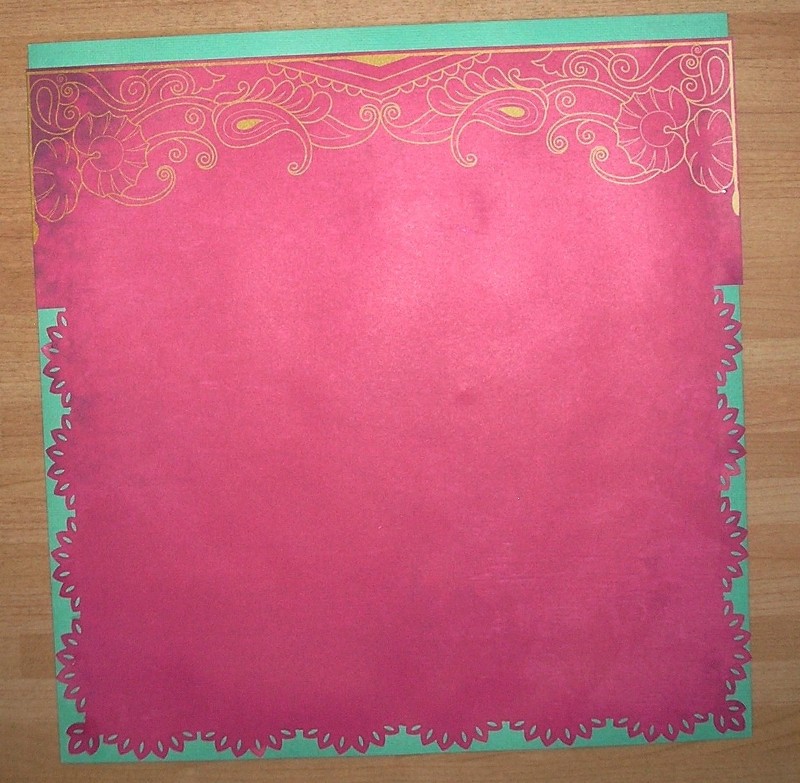
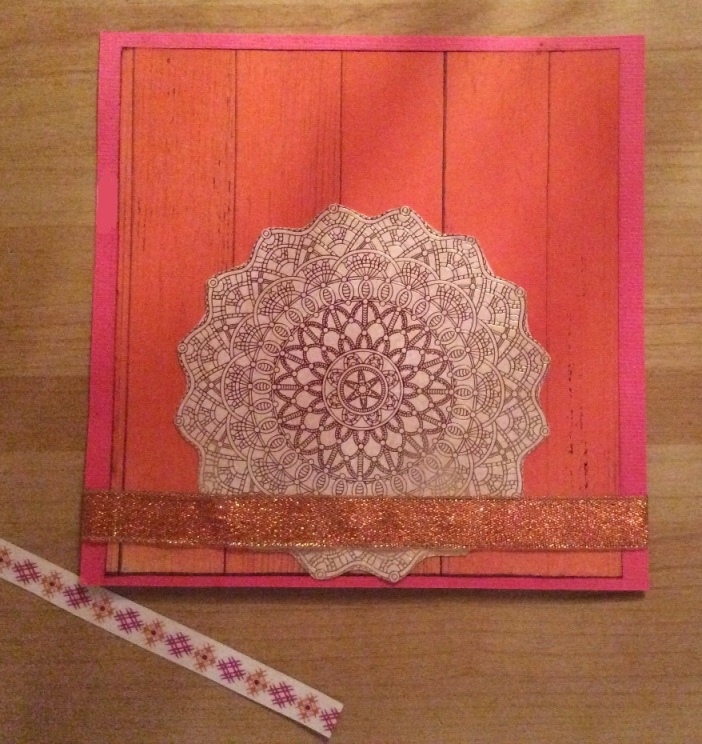
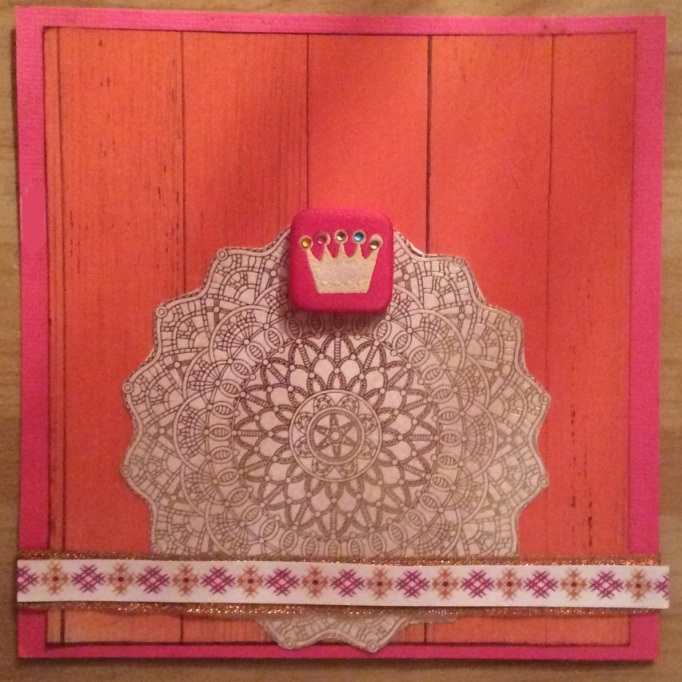
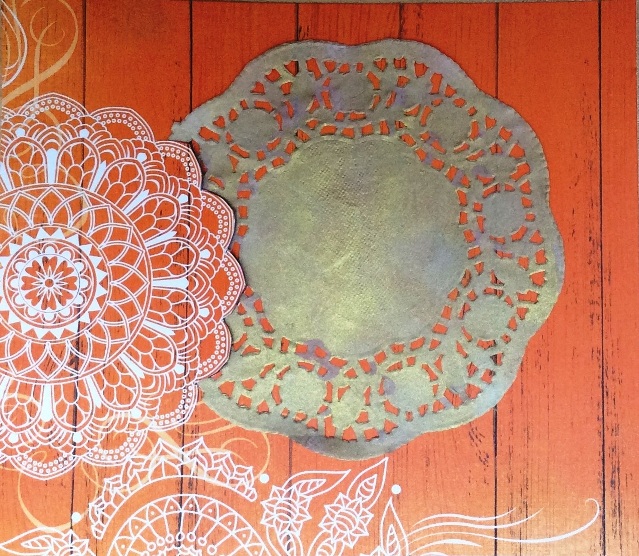
1. Cut the plain white cardstock into size 18cm x 31cm and fold into a card sized 18cm (width) x 15.5cm (height) 2. We are using the reverse side of "Bollywood" for this card, and want the piece with the white doilies on it (see pictures). Cut this piece of "Bollywood" into size 17cm (width) and 15cm (height). Ink edges with brown ink. 3. Using a craft knife cut around the white doily pattern on the paper so you can tuck the doily from the kit under it. I inked my doily using gold ink, but you can leave in plain if you prefer. Stick your doily onto the paper:
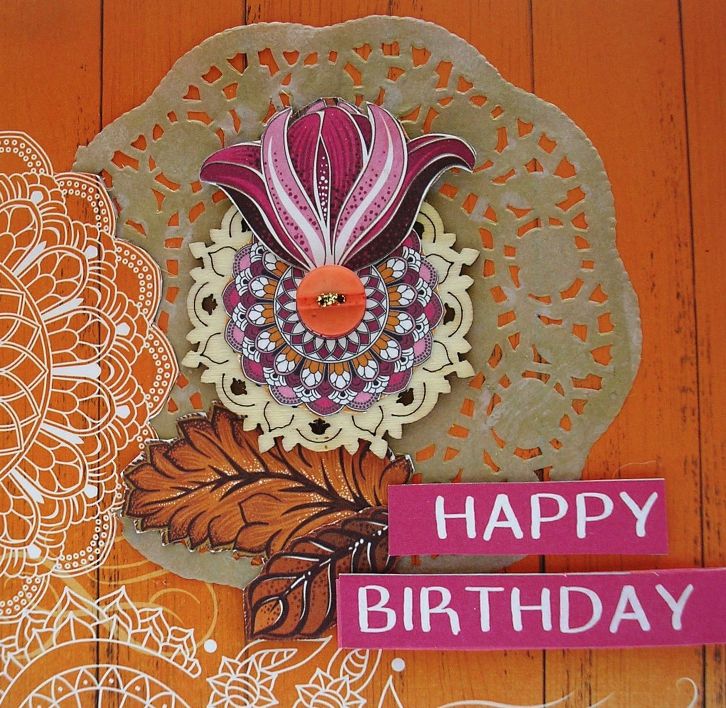
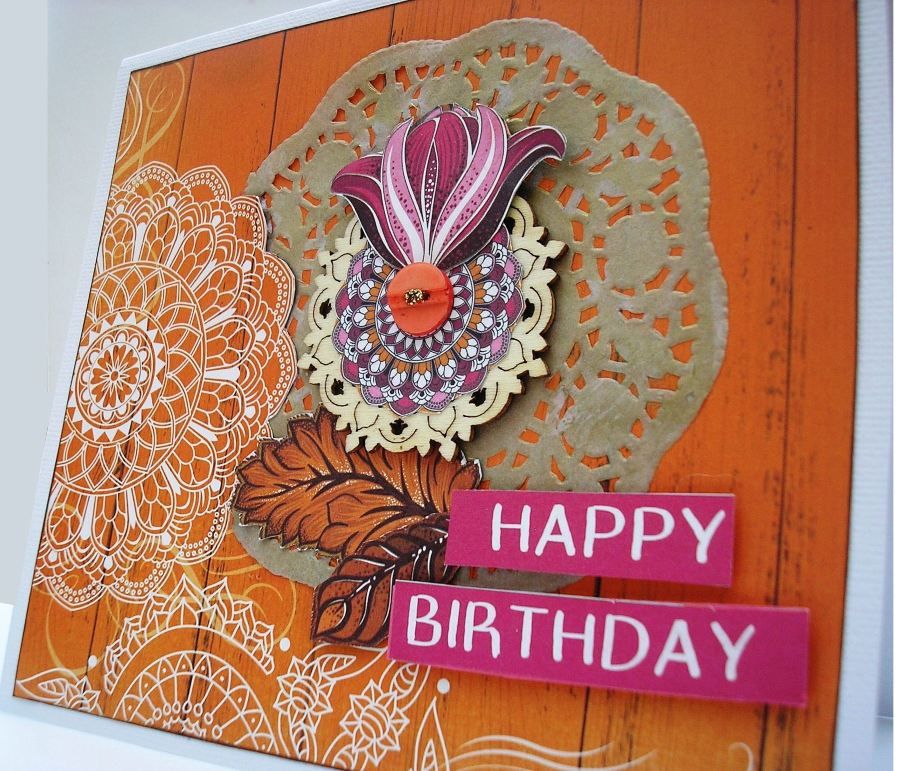
4. Stick this front to the card. 5. Add the largest mandala of the Kaisercraft Wooden flourishes onto the middle of the doily. I used Glossy Accents and just put a fair bit in the middle, leaving the outer edges free for me to tuck the leaves under later. 6. Cut out the little coloured doily from the paper "Party" and stick onto the middle of the mandala flourish. 7. Cut out a flower from the "Daybreak" paper. Stick onto the mandala as pictured. 8. Top with one of the buttons in your kit and add a little gold Stickles on the button as a golden thread. 9. Cut out two leaves from the Daybreak Paper. Cut our "Happy Birthday" from the "Party" paper. Mount "Happy Birthday" on foam tape and arrange the sentiments and leaves as shown.
Decorate the inside as you wish.
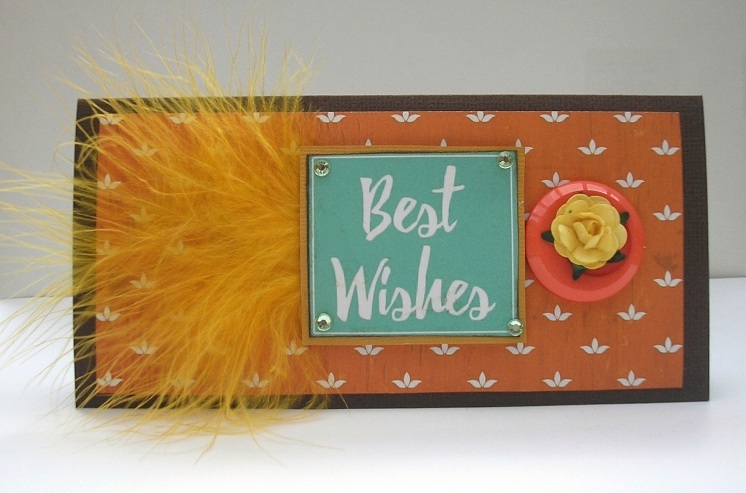
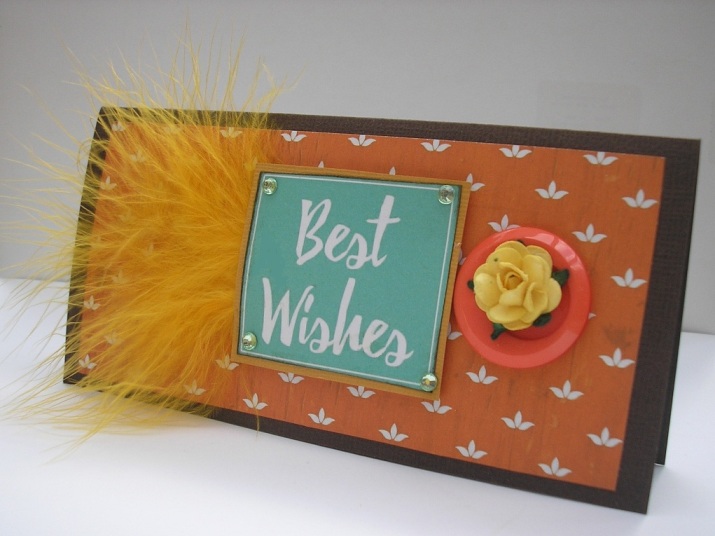
by Karen Mortensen This is a super quick little card. Papers Used: "Party". "Coffee Bean" and "Spiced Pumpkin" Plain Cardstock. Embellishments from kit.
1. Fold a 15.5cm x 15cm piece of "Coffee Bean" cardstock into a card size 15.5cm x 7.5cm. 2. Cut a piece of "Party" into size 14cm x 6.8cm, This is a sentiment sheet and we are using a little of the reverse. Ensure you are not cutting into something you want to use elsewhere. Stick piece onto front of card. 3. Cut out the "Best Wishes" sentiment from the "Party" paper. Ink edges with brown ink, then mat onto a slightly larger piece of "Spiced Pumpkin" cardstock. Mount on foam tape. 4. Tuck feather behind the sentiment. and arrange on the front. Add four Kaisercraft rhinestones to the corners. 5. Add the largest of the buttons from the kit next to the sentiment. Top with a yellow rose. Decorate the inside as you wish.
by Karen Mortensen
Papers Used: "Daybreak" - "Party" - "Bollywood" - "Mumbai" . "Flamingo" and "Coconut" Plain Cardstock. Embellishments from kit. Optional: Ink for edges.
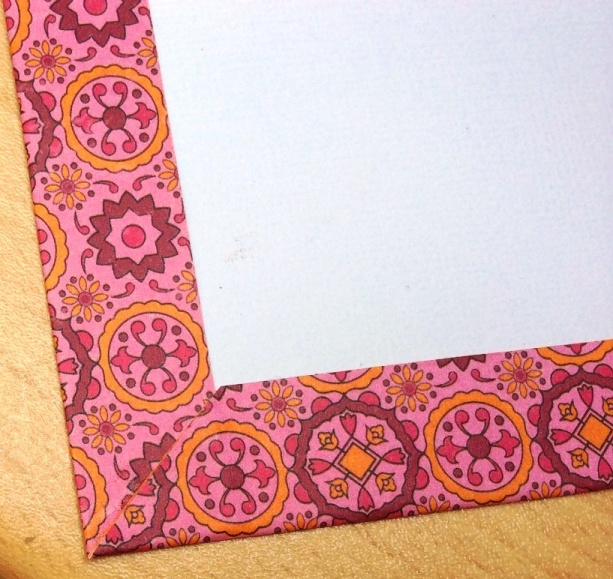
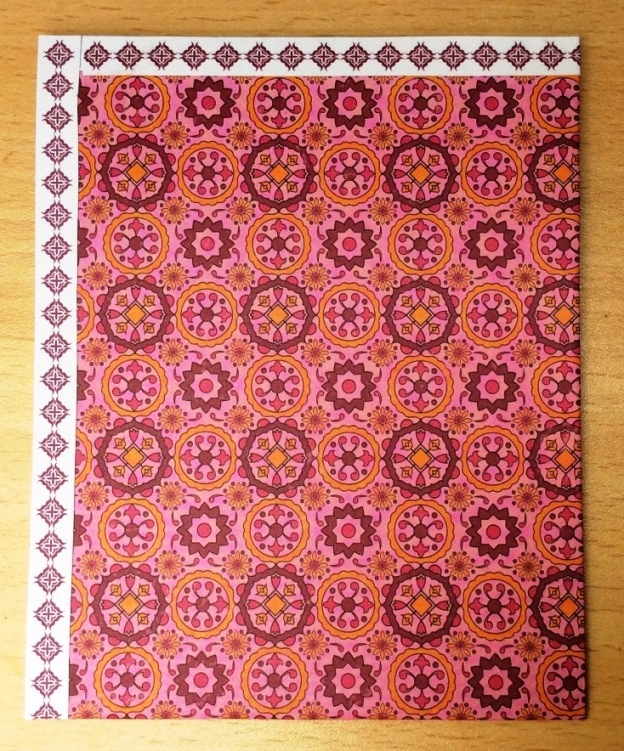
1. Take a piece of white cardstock measuring 31cm x 12.3cm and fold it into a card measuring 15.5cm x 12.3cm. 2. Wrap a piece of "Bollywood around the card, leaving an edge. Wrap it over edges and mitre corner on reverse side.
3. Cut the bottom strip off the paper "Daybreak" and use it as a border as shown:
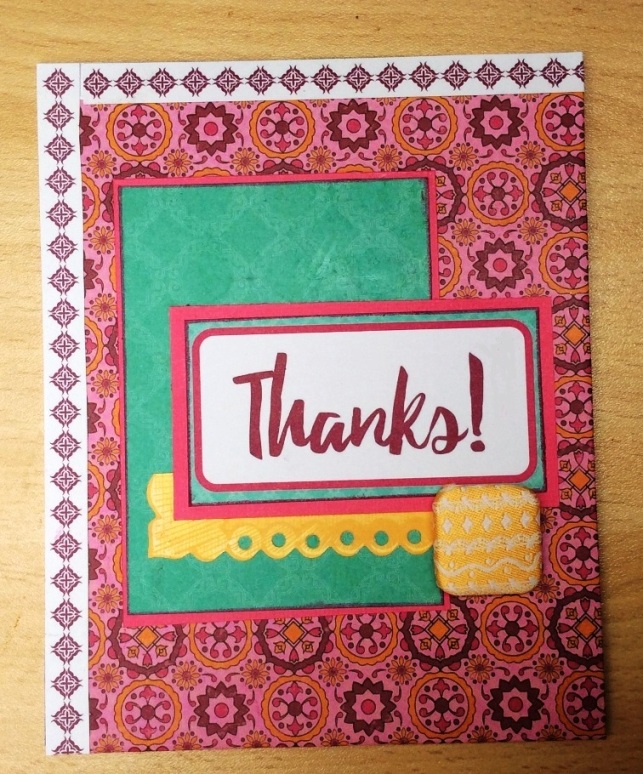
4. Cut a piece of Flamingo cardstock into size 7cm x 10cm
5. Cut a leftover piece of Mumbai into size 7.4cm x 9.5cm. Ink edges with brown ink then mat onto the pink Flamingo cardstock. Stick onto card as depicted on pictures.
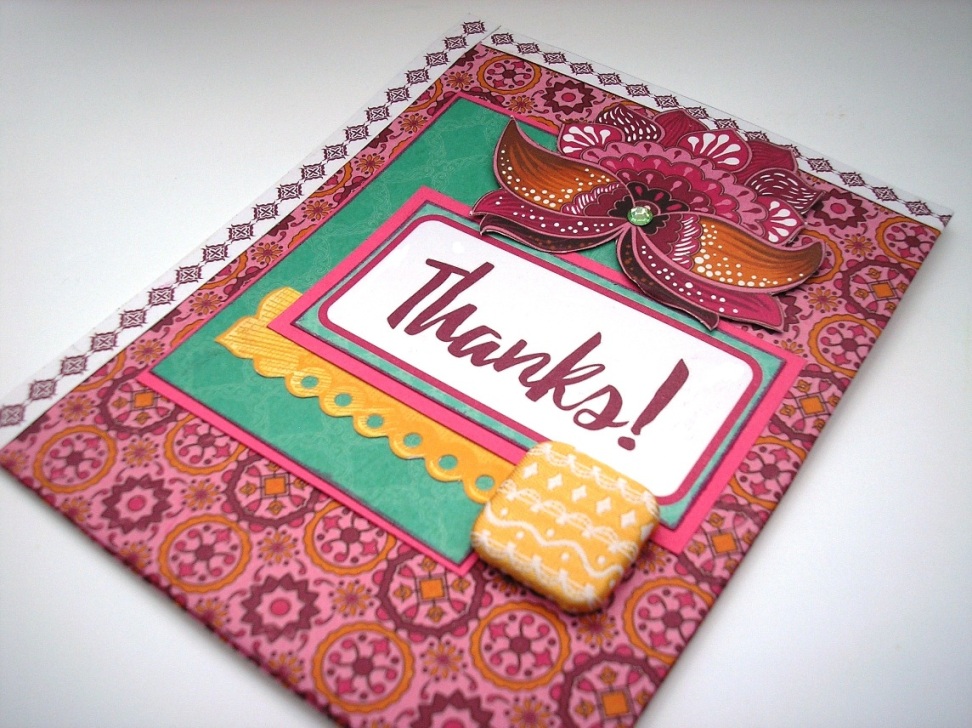
6. Cut the "Thanks" sentiments from the "Party" paper. Cut it down to size 7.9cm x 4.1cm. Ink edges then mat onto a piece of 8.5cm x 4.8cm pink Flamingo cardstock. Cut a piece of the yellow tag from your kit as shown. Arrange on front of card as depicted.
7. Attach a large yellow fabric brad from your kit in the large hole on the yellow tag (see pictures.
8. Cut out a large flower from "Daybreak" and stick to card. Top with a Kaisercraft rhinestone.
Decorate the inside as you wish.
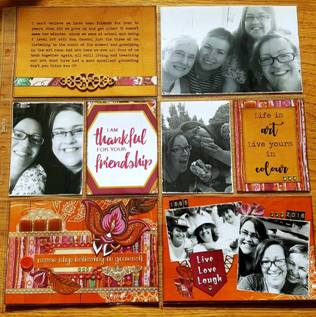
"Thank you for your Friendship" Project Life Layout Spread by Cal Summers
Papers Used: "Mumbai" “Party” “Bollywood” “Daybreak” - speciality paper – “Indian Summer” – bonus sentiments paper - cardstock “Pumpkin Spice”. Embellishments from the kit.
If you haven't already, cut all the sentiment strips off the papers (at the bottom on the reverse side)
1. The pocket page protector I used had four 6x4 inch pockets and four 3x2 inch pockets.
The first thing I did was cut one 6x4 piece of the “Pumpkin Spice” cardstock and print out my journaling. Under the printed journaling I added a 0.5 inch strip of “Daybreak” paper and added a wooden flourish to the middle.
2. The next pocket had a 6x4 inch photo I printed in black and white. I used a nail file to distress the edges of the photo to give it some definition.
3. The first 3x2 inch pocket had another black and photo with distressed edges as above.
4. The next pocket had the “Thankful for your friendship” sentiment cut out from the “Party” paper.
5. The next pocket had a 3x4 inch black and white photo, edges distressed as above.
6. For the next pocket I cut a piece of the “Mumbai” paper (stripy back) at 3x2 inches and inked the edges. Onto a smaller piece of “Pumpkin Spice” cardstock I printed a sentiment I had put together on my PC. I stuck this on top of the stripy paper and added some gems for interest.
7. The next 6x4 pocket houses a layered card I made using the kit. Start with a base of “Bollywood” paper and cut a strip of the “Mumbai” paper (stripy side) at 6 x 4 inches. Edge this strip with cut-outs from the “Indian Summer” foiled paper.
Stick this on top of the “Bollywood” paper about one half inch from the bottom. You can then start to layer your pocket layout up.
Add some the ribbon and half circle cut-outs from the “Indian Summer” paper. Layer up with the journalling spot from the kit and cut out some flowers from the “Daybreak” paper. Use one of the sentiments from the bonus sentiment sheet across the centre of the piece. Add a button for definition and some gems. 8. For the final 6x4 pocket I cut a 6x4 piece of the “Bollywood” paper. I added two more smaller black and white photos and cut outs from the bonus sheet. I finished the layout off with cut out flowers from the “Daybreak” paper, some gems and a half foiled circle from the “Indian Summer” paper. Finally I added some dates with some spare numbers I had in my stash.
by Cal Summers
Papers Used: "Music"
If you haven't already, cut all the sentiment strips off the papers (at the bottom on the reverse side)
1. Cut the “Music ” paper in half to 6 x 12 inches. Carefully cut out the edge of the paper where the swirls are. For my journaling I wrote the words on my PC and then printed it in an ordinary printer – print a test piece first so you can make sure your journaling is in the right place. I had my photo developed at 8x12 inches – my local Asda did it whilst I waited but there are many photo developer places that will do this for you if you don’t have the facility to do it at home. I then layered up my photo onto the paper with the printed journaling and added the swirls along one side of my photo.
2. Next we need to make the flowers. There are five in total. To make them you need to roughly draw a flower shape onto the back of the remainder of the pink paper. I made four large, five middle sized and two smaller. When you have drawn the flowers cut them out.
Carefully draw around the petals to add definition. Then shape the petals – I used a foam brush and an embossing tool – if you use small circular motions with the embossing tool on the reverse side of the flowers leaning on the foam brush, the petals will become rounded. Glue the flower shapes on top of each other so you have five layered flowers. Add gems to the centre.
3. Arrange these on the layout on top of the white die cut.
by Cal Summers
Papers Used: "Sari" - "Daybreak – “Party” - Speciality foiled paper – “Indian Summer”. Plain cardstock “Spiced Pumpkin”
If you haven't already, cut all the sentiment strips off the papers (at the bottom on the reverse side. The main sentiment on this page is from the “Bollywood” paper.
1. Cut the sentiment strip off the “Sari” paper and adhere to the back (the stripy side) at the very bottom of the page. Mat your photo (6x4) onto the “Spiced Pumpkin” cardstock leaving a narrow border of about 1/8” all the way around.
2. Cut out some of the flowers and leaves from the “Daybreak” paper. Also cut out some of the foiled circles and a strip from the speciality paper “Indian Summer” and the “I love you” “hello” and “love always” sentiments from the “Party” paper. Layer up your page as in the photo guide below.
3. Add the finishing touches. I added buttons, gems, wooden flourish and the hat pins. Don’t forget to add the sentiment strip from the “Bollywood” paper.
|
ALL PROJECTS © Charmed Cards & Crafts 2017.. All rights reserved.


.JPG)
.JPG)
.JPG)


.JPG)


.JPG)


.jpg)
.jpg)
.jpg)
.jpg)
.jpg)
.jpg)
.jpg)
.jpg)
.jpg)
.jpg)
.jpg)
.jpg)
.jpg)
.jpg)
.jpg)


.jpg)
.jpg)
.jpg)
.jpg)
.jpg)
.jpg)
.jpg)
.jpg)