|
Step 1
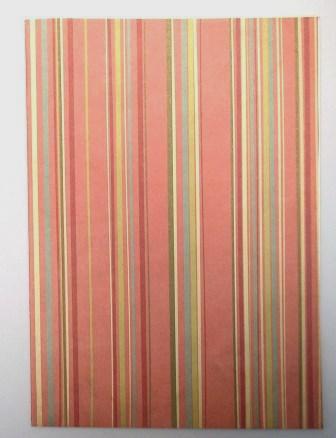
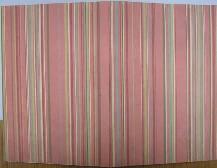
Wrap the card in the
Vintage Brass Thread cardstock. Keep the strip of paper
left over, we are using that in the next step.
Open
Step 2
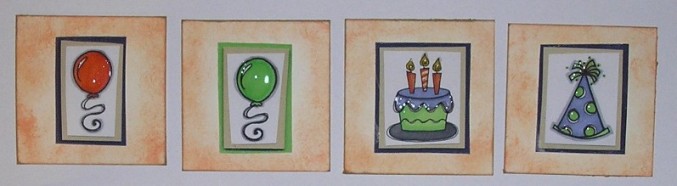
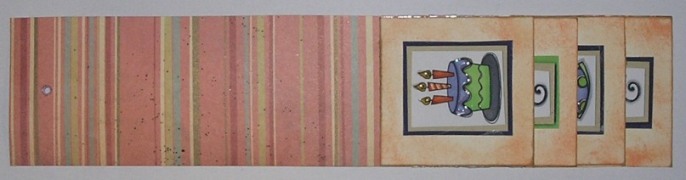
Cut 4 small squares
from ivory card, each measuring 6cm x 6cm. Decorate each square as you
please. Keep it flat, use stamps, stickers and so on;
anything remotely bulky will interfere with the
waterfall.
Step 3
Cut the strip of
cardstock leftover from wrapping the card into size 6cm
x 27cm. The paper is double-sided and we are
showing the reverse side for the waterfall. If you want a sturdier strip (i.e. for a
small child) then use heavier cardstock.
Score the strip to
make fold-lines as indicated below. You can use an
embossing tool to score the folds.
|

27cm
|
Step 4

Write or stamp a
greeting on the 15cm long side of the strip making sure
you do not go into the last 3cm at the end of the strip.
Alternatively you can leave the strip blank if you prefer.
Step 4
Insert an eyelet in
the centre at the bottom of the strip. I used a
Crop-A-Dile which makes eyelet insertion a breeze. It
punches the hole and sets the eyelet with no effort
whatsoever.
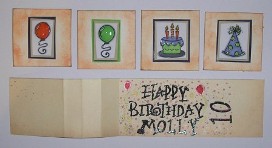
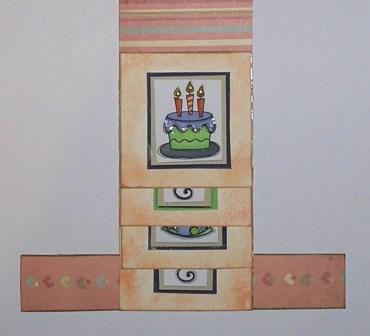
Now we need to position the squares on
the strip. Glue the first square onto the strip
from fold D as shown below. Use adhesive or double-sided
tape. I recommend adhesive for the first square that is
fully stuck down, and double-sided tape for the
remainder of the squares.

Next square is glued onto the area
between fold C and D. Remember that we want only the top
part of the square glued on, therefore glue the entire
area between C and D and stick the top part of the
square on that (or use double-sided tape (recommended)).

Carry on in this fashion until all the
squares are on the strip - square 3 between fold B and C
and square 4 between A and B. Square 4 is the square you
want to be uppermost and initially fully visible.
Step 5
Cut a 2-3cm wide strip
of card with the length of the width of your
card. Cover it with the Heartstrings paper and ink the
edges with green ink (optional). Attach the strip
by the first square to the middle of the new card strip
as below (with double-sided tape). This is the only
place that you are attaching the strip with the squares,
do not glue anything else down.
 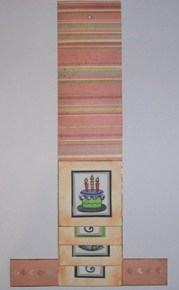
Step 6
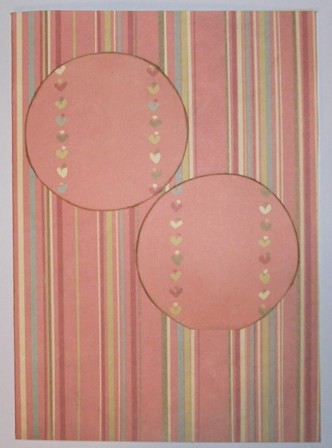
Cut two round circles
from the Heartstrings paper. Mine has a diameter
of 3". Ink edges with green ink (optional).
Glue the circles onto the card so that they will lay
behind the strip.
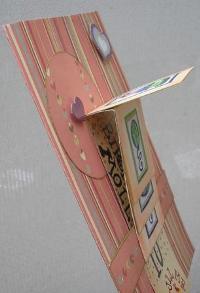
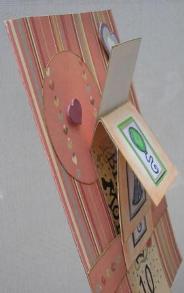
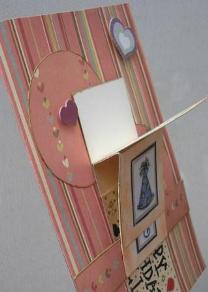
Step 7
Fold the long strip.
Glue each end of the Heartstrings strip and stick onto
card. Glue only the very ends, do
NOT put any adhesive in the middle! The waterfall needs to be able to move freely. I glued approx
1" in either side. You can attach an eyelet either side
for added strength (not done here). Tie some ribbon to
the eyelet at the end of the strip.
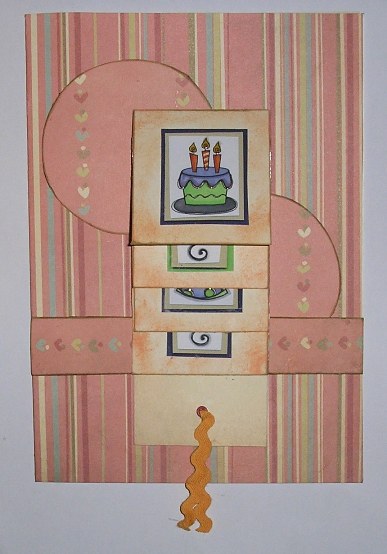
When the ribbon is
pulled the squares fold like a pack of cards, revealing
each square in turn as well as the hidden message inside
the strip. See the next step for pictures.
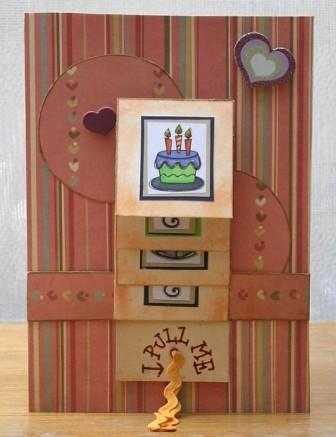
Step 8
You can now add any
finishes touches you may like. I added wording around
the pull and a few hearts from the MAMBI Glitter
Chipboard pack. Leave the space above the waterfall
clear.

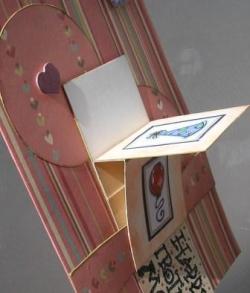
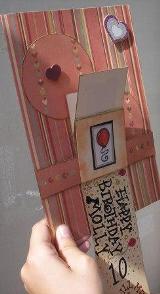
The following sequence
of pictures shows the waterfall in action.
Variations.
You can use the same
size waterfall on a smaller card. If you don't want the
band you can make two slits below the waterfall and glue
the strip onto the space between the two slits - use a
double-folded card for this method. You can add
more squares to make a longer waterfall.
The page below using
the waterfall to depict a wedding poem dedicated to the
happy couple. The page size is
A4, each of the five squares measure 8cmx8cm and the space between the
squares is 1.5cm. (the dark area to the right of the
waterfall is just a shadow.)
.jpg) 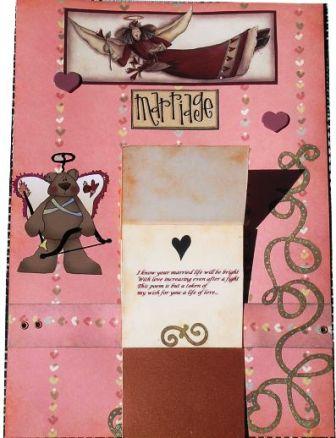 |