|
|
|

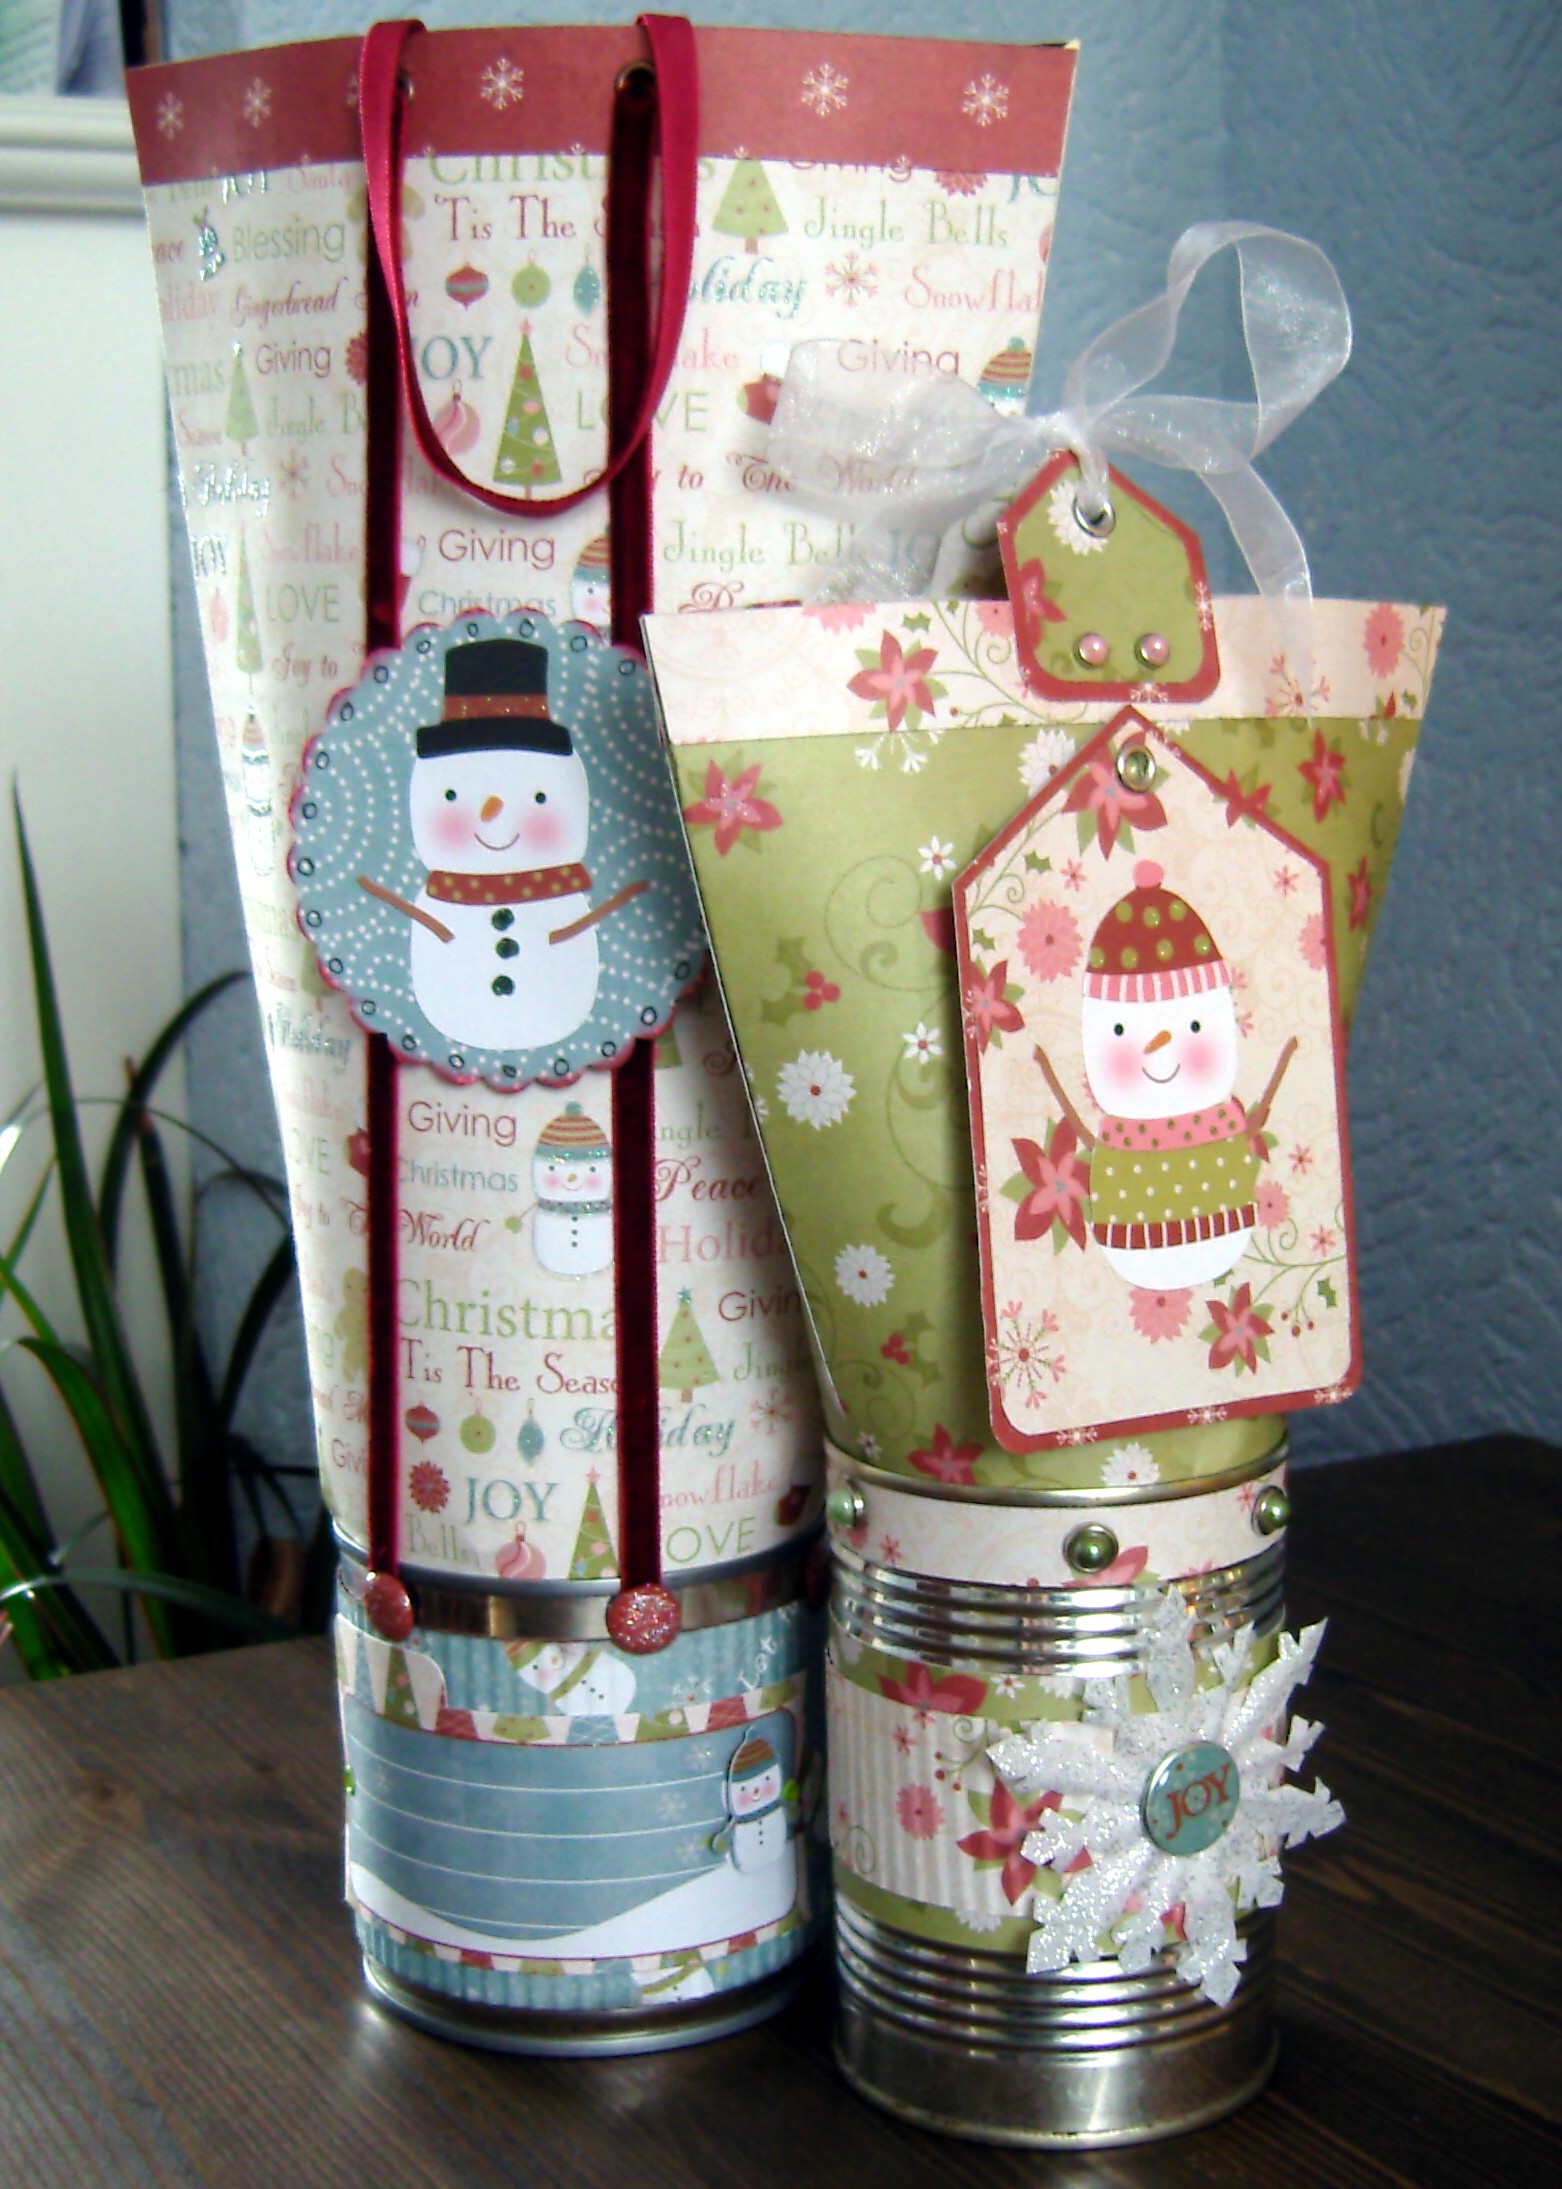
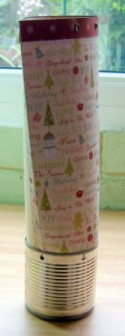
Tin Gift Bag Class
Class created and designed by Louise Brigden for Charmed Cards & Crafts
The class showcases the Imaginisce Snowy Jo range of products.
|
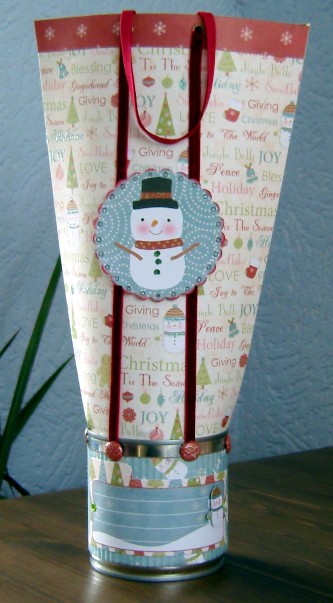
For this class I have used the wine bottle bag template and a wide sweet corn can but it can be adapted to fit different cans and made at different heights. The choice is yours!
Class supply List: Imaginisce Snowy Jo Papers and Stickers 2x 75cm lengths of strong ribbon 1 82mm diameter x 84mm high Can (mine held sweetcorn)
Tools: Ruler
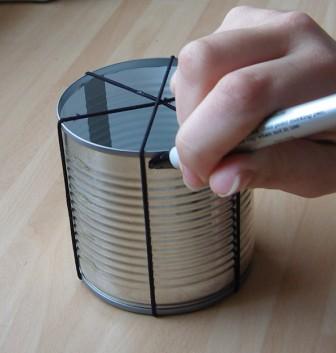
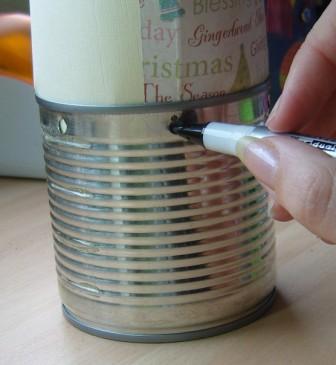
Step 1
Make sure that the tin opener you use does not leave any sharp edges (as some old designs do). Clean the tin thoroughly and mark out 6 equally spaced hole points around the diameter. I’ve found that the easiest way to gauge this is to put three elastic bands around the tin and manoeuvre until the spacing looks right – then mark the positions.
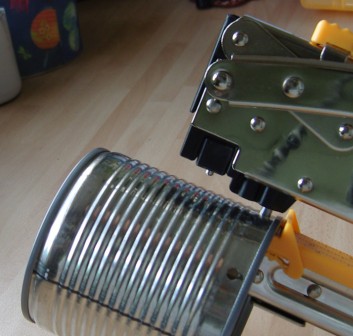
Step 2
Remove the bands and punch holes on your marked points. I’ve used my Big Bite but a Crop-A-Dile will do the job just as well.
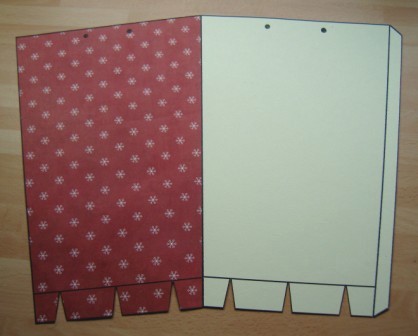
Step 3 Print out the wine bottle tin bag template twice onto the reverse of your chosen paper. Cut them out, score the tab fold lines and stick together using one of the tabs.
CLICK HERE FOR THE WINE BOTTLE BAG TEMPLATE
Step 4
At this point you can add a decorative strip along the top of the right side your bag. Next, using your Big Bite or Crop-A-Dile punch holes and add eyelets in the position indicated by dots on the template then fold and fix the bag together at the tab.
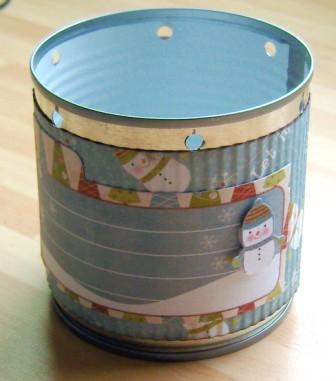
Step 5 Pop your bag into position in the tin, lining up the 2 fold lines with 2 of the holes on the tin. Make sure it looks straight from all angles.
Next mark the hole positions on the paper by poking a pen through the holes in the tin. IMPORTANT! Before you remove the bag from the tin take note of which part of the bag was positioned next to which part of the tin so that when you come to put it back you know which holes line up correctly.
Remove the bag and punch small holes in the places you have marked on the paper. Put aside for later.
Step 6
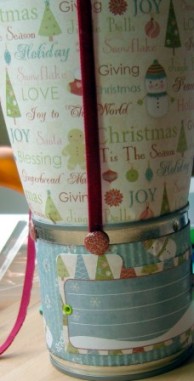
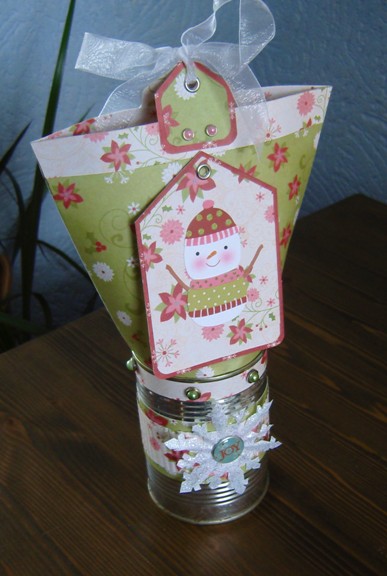
Decorate your can. I’ve used Snowy Jo paper and a Snowy Jo Sticker
Step 7
Pop your bag back in position (as shown in step 5) lining up the holes. Secure it with two brads at the fold points. .
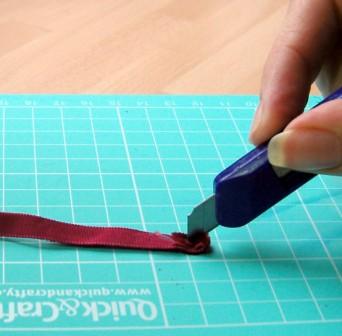
Step 8
Now you need to attach the ribbon for the handles. Take a 75cm length of strong ribbon, fold over one end and make a small slit in it with a craft knife.
Poke a medium sized brad through the slit in the ribbon and then through one of the remaining holes in your tin.
Put your hand inside and fold the back of the brad into position.
Now take the other end of ribbon up to the eyelet adjacent to your brad at the top of the bag. Thread it through the eyelet then out through the eyelet next to it. Bring it back down to the hole below it and fix in place with a brad like before. Repeat on the other side. Don’t fix the ribbon to the paper because you need to allow for movement.
Step 9 Finish off with decoration of your choice. I’ve made a little tag with a scalloped circle and a Build a Jo snowman.
Here’s another variation using the regular can template CLICK HERE FOR THE REGULAR BAG TEMPLATE
We hope you enjoyed the class |
All projects copyright ® Charmed Cards & Crafts. All rights reserved.