|
Step 1
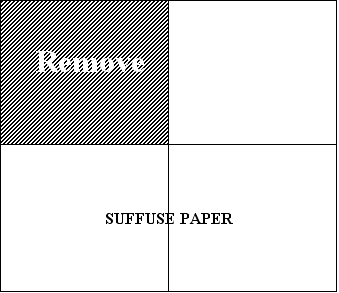
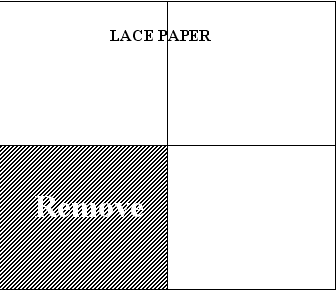
Fold both sheet of
Basic Grey Infuse "Lace" and "Suffuse" papers into four squares. Cut
out one of the squares from the paper. It doesn't matter
which one on the Suffuse paper as it's plain, but
what we are aiming for is shown below with patterned
sides showing). If you use a different patterned paper
then use the guide. Keep the 6x6 squares, we will use
those later.
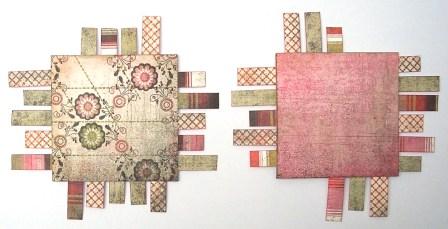
They are cut so when
they lay together back to back the printed side is
facing outwards both sides.
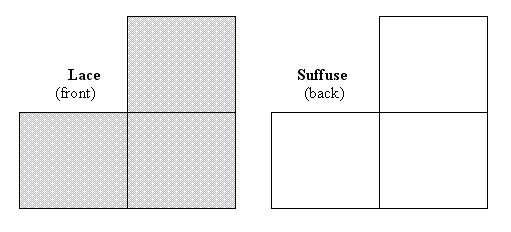
Ink the cut edges of
both the papers.
Step 2
Cut the two 6" x 6" squares left over
from papers and trim them to 3" x 3", taking 3" of two
of the sides. Ink the edges. We will now work with these
squares in turn.
Take 3 sheets from the Infuse 6x6 pad and
cut two 1cm strips from each. You can also use any other
coordinating scrap paper you may have. Ink the white
edges (only the very edge). Cut each strip into a
variety of 3cm and 2cm strips. Ink one of the newly cut
edges only, the other one is not going to be seen.
Glue the strips onto the two 3" squares leaving a few
strips off on the Suffuse square.
Step 3
Cut the following:
-
"3 things I about you"
using different fonts and sizes
-
the words "you are" three times. Keep
the paper you cut them from as we are using that
later.
-
two
hearts
-
if you have the QuicKutz Silhouette, cut out
the L with the word "Love" inside it.
-
three rings each measuring approx 5cm in
diameter. Keep the inside of the rings as we will need
those also.
-
"Happy Birthday" words.
-
Three small flowers that will fit
onto the circles left over from cutting the rings.
I used the Silhouette to cut out all the text
and designs. See finished card for colour guidance.
Mat the "3 things I about you" words and number
separately onto "Salt"
cardstock from the Infuse 6x6 pad. Cut them out
and ink the edges. See the finished card for
guidance.
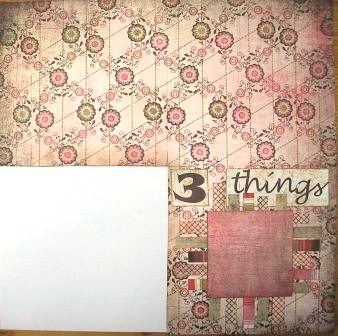
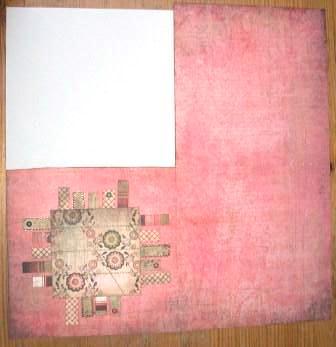
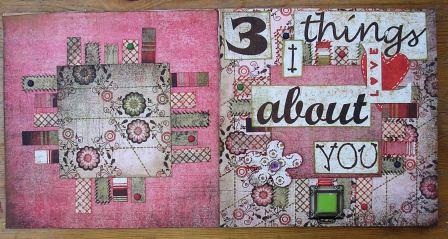
Step 4
Place the "Suffuse" square you cut
out onto what will be the front of the card but do not
stick it down yet. Position the "3" and "things"
appropriately. See where you may need to trim or add
more strips from the 3" square to go onto "things", then glue all
three in place. See pictures below for guidance.

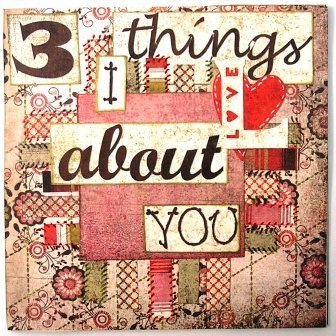
Step 5
Add the rest of the words. Draw lines
around the red heart with a white Glaze pen. "Stitch"
around some of the paper strips with a Sepia Sakura
Gelly Roll Glaze Pen and around others with a green
Glaze pen.
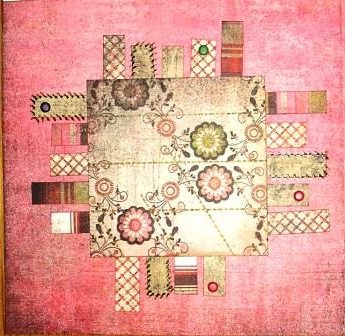
Step 6
Cover a flower from the Basic Grey
Undressed Chipboard pack in paper from the 6x6 pad. To
do this trace around the flower, cut out and glue on.
File down and ink the edges. Pop a crystal brad in the
centre and glue onto card. Glue the top ornate magnet to
the bottom centre. Finally add a brad at the end of a
few of the paper strips.
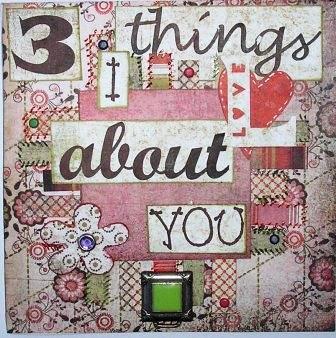
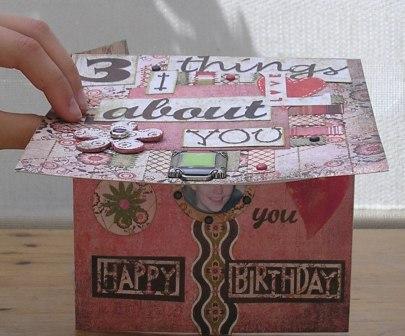
The front of the card is now complete so
lets turn our attention to the back of the card.
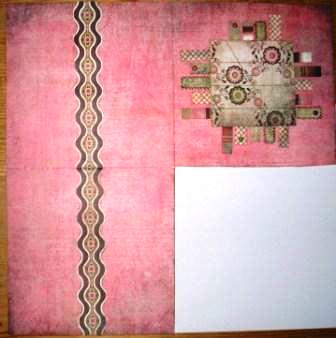
Step 7
Glue the second square to the back of the
card (see picture for correct placement).
Draw stitches on a few of the
strips with the green Glaze pen. Add a few brads here
and there on the end of the strips. You can add one of
our "Made with Love" or "Made for you" charms if you
like.
Step 8
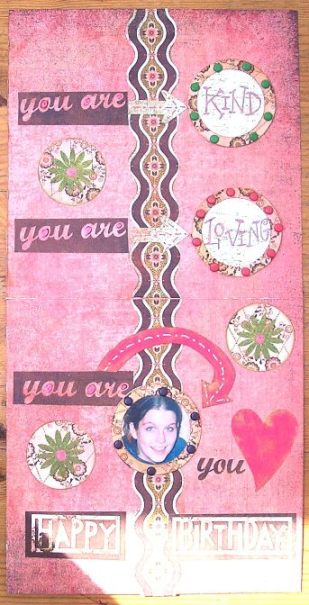
Now let's do the inside of the fold.
Cut two strips from the Infuse Instill
paper from the 6x6 pad. Glue the strips down the
centre of the two squares.
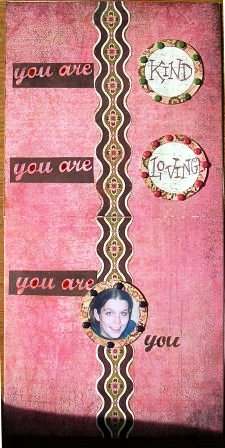
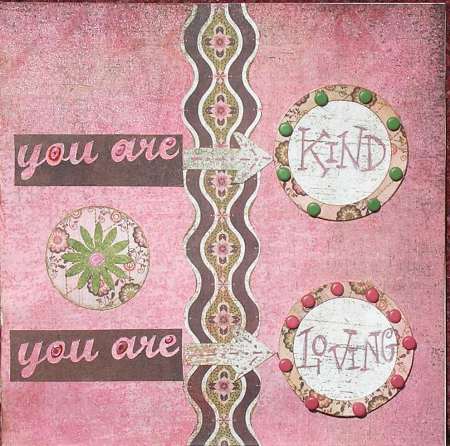
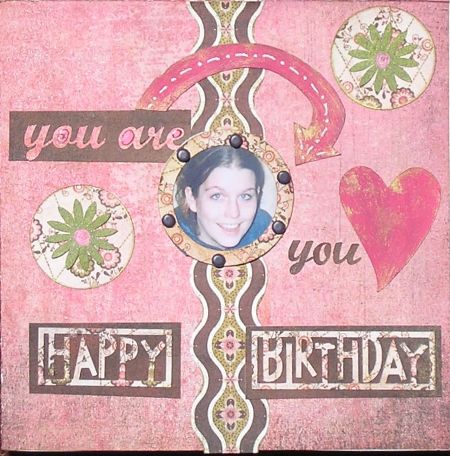
Ink the three 5cm rings you cut
earlier. Use one to frame a picture of the
recipient. Mat the other two on Infuse "Salt"
paper and write a word in each one. The words relate to
something you love about the recipient. Attach brads
around the circles then glue them on. Add the outside
of the "you are" words you cut and one set of "you
are" as picture below.
Step 9
Lets complete the inside:
-
Draw and cut out
arrows to go between the words and the
words/picture. I used Infuse "Salt" for the
two smaller arrows and painted the rounded arrow.
Ink the edges with gold ink and draw lines and dots
with Glaze pens.
-
Mount the "Happy
Birthday" on brown cardstock and add to the card.
-
Ink the edges of
the round circles left over from cutting out the
rings with gold ink and place onto card with a
flower on each. Top with a green brad.
-
Add the second
heart. I painted this one the same colour as the
rounded arrow (Paint Dabbers "Watermelon")
and brushed it lightly with gold ink.
Top
Bottom
Step 10
Time to put the card together!
Attach the second magnet between the two
papers at the bottom so that the position corresponds to
the top magnet. Glue the papers together and brush any
visible white edges with gold or red ink. Use a cream
insert for the inside of the card.
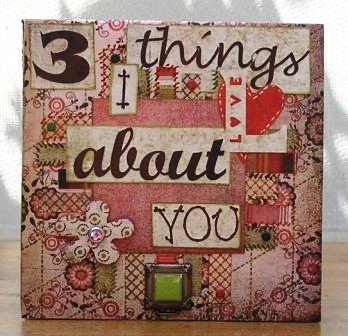
Front and back of card
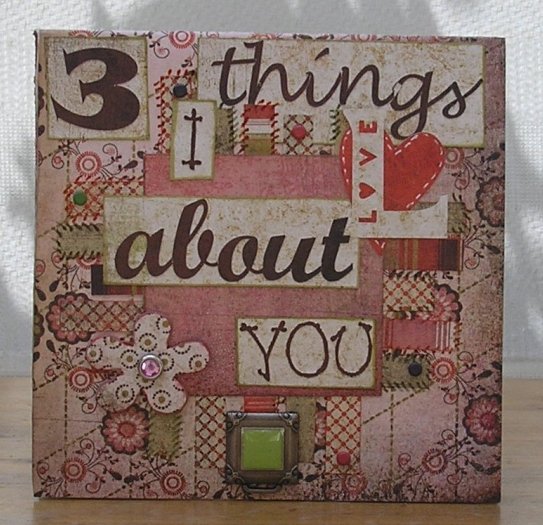
The front now open up
to reveal the three things you love about the recipient.
|