|
Step 1
The Tree
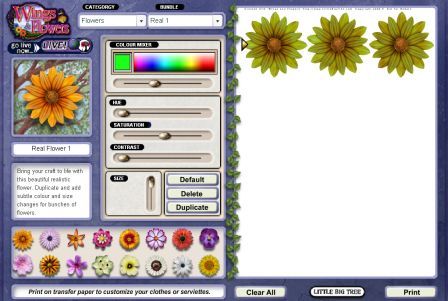
Open the Wings and Flowers software and select the
yellow
daisy (three will appear)
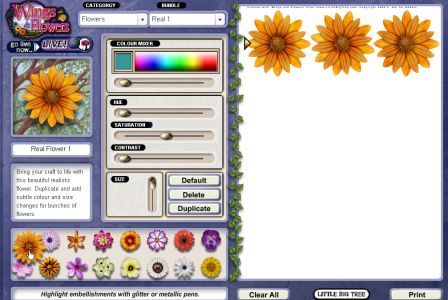
On the colour mixer
select the darkest green you can find and drag the
colour mixer bar to the right.
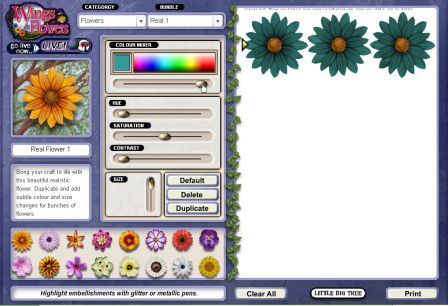
Click
duplicate, this will give you a second row of flowers.
Very slightly reduce the size of the flowers on the
second row.

Using the
colour mixer choose a slightly lighter green for your
new flowers (you can also play around with the
Hue/Saturation/Contrast bars to get your desired shade)
Click duplicate to duplicate the second row of flowers.
Continue in this way (getting smaller and paler) until
you cannot make the flowers any smaller. The screenshot
shows the transformation from large to tiny, you will
need to make it a more gradual process over two pages.
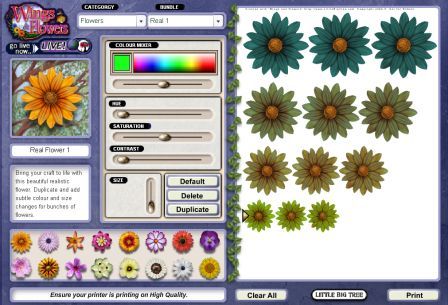
Duplicate your smallest/lightest row and enlarge it to
the biggest size (you'll need this for the clever bit at
the end).
You should
end up with 7 or 8 rows of flowers (enough for three
trees)
Cut out one
flower from each row (keep the big, light row of flowers
for later)

Layer and
stick the flowers together using foam pads, starting
from the biggest and ending with the smallest flower on
top.
It won’t
look like a tree because you’ll have a yellow centre so
here’s the clever bit: use your
daisy punch to cut a flower out of green part of the
big, light flower that you kept to the side. Depending
on the size of your punch you might need to do two
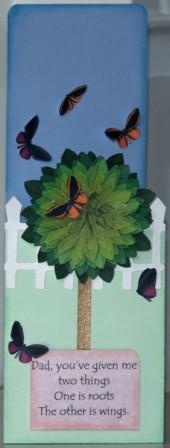
halves and stick them together. Now stick
your small, all green flower over the central circle of
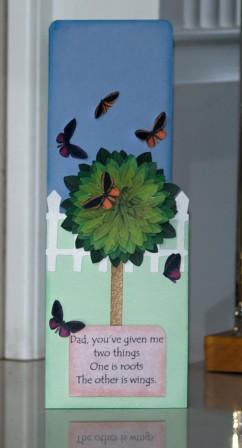
pollen. (Picture below is from the finished card).
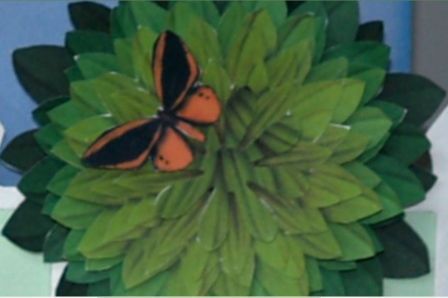
You now
have the main part of your tree.
Step 3
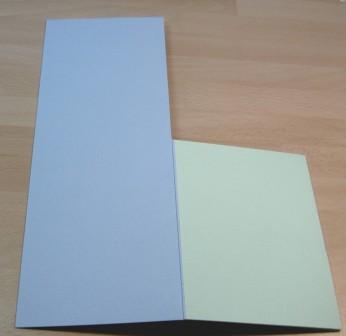
The Card
Fold and score the blue
cardstock. The card size when folded is
77mm wide and 210mm in height.
Cut a piece of green
paper or card and attach to the bottom of the card. You
know have the sky and grass base for the card.
Open your card and cut
off the sky section from the front of your card.
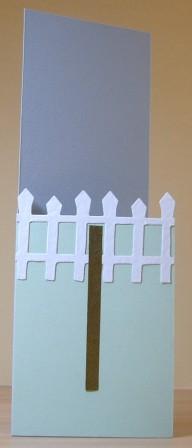
Step 4
Attach a white fence so that the tops are just poking
over the top of the grass. (optional)
This card uses a Sizzex cut fence.

Cut a strip of brown paper 80mm x 7mm and stick it in
position, this is the tree trunk.
Glue on top of the trunk and sprinkle with bronze ultra
fine glitter. Pat down and leave to dry. Instead of glue
and glitter and you can use a suitable Stickles glitter
glue.
On the back of your tree/flower apply an even layer of
glue to the bottom half. Stick in position with the unglued part above
the grass.
Now make the pot from 50mm x 38mm of cardstock and
attach it with foam pads for a 3D effect. I printed a
verse on mine before cutting it out. (picture below from
finished card). A corner rounder punch has been used to
round the two top corners before attaching to the card.

Step 5
Finally, you can do the
fun part, ‘Glamming it up’. I rounded the corners and
chalked around the edges of the card
for depth.
You can use ink instead of
chalk.
Next add the
butterflies; these are also from the Wings and Flowers
demo.
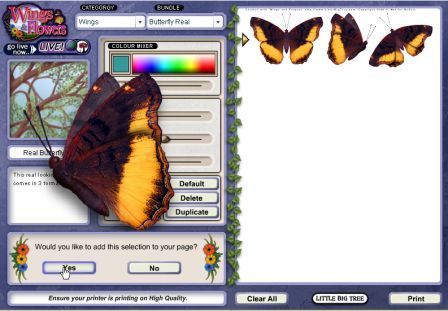
I wanted the butterflies smaller than the demo
could do so I printed some, scanned them, resized them
then printed them again! Sounds crazy I know but I just
thought they looked better that size. Another way
round it is to do a screenshot of the butterflies and
resize that. You can try resizing to the smallest size
within the software, you may prefer them that size.

Attach the butterflies
to your card and your card is complete.
|