|
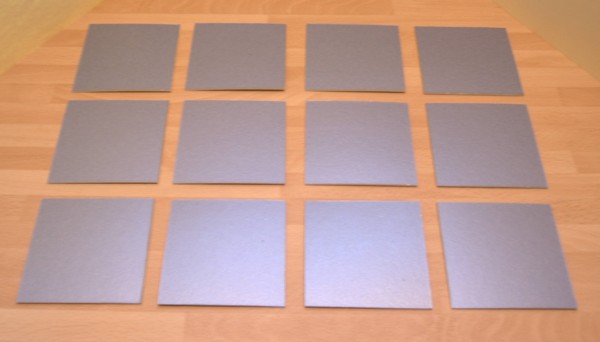
Step 1
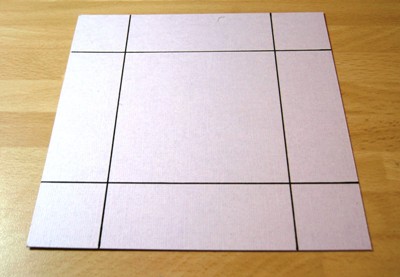
Using your craft knife and ruler, cut twelve 8.2cm x
8.2cm squares out of the mounting board.
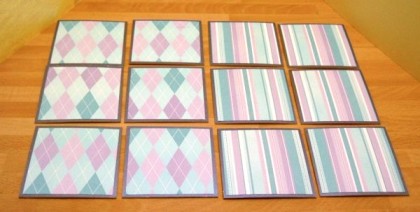
Step 2
Cut twelve 7.6cm x 7.6cm paper squares and attach
them centrally onto the twelve square boards using the
PVA glue
Step 3
Take six boards (if you are using two papers like me
make sure you get six the same) turn them back side
uppermost.
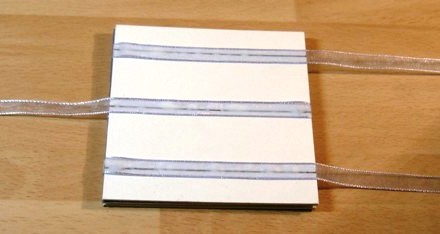
On each board…………..
-
Measure
1.3cm from one edge and draw a line across.
-
Measure
1.3cm from the opposite edge and draw a line across.
-
Draw a
third line across the centre.
It should look like this:
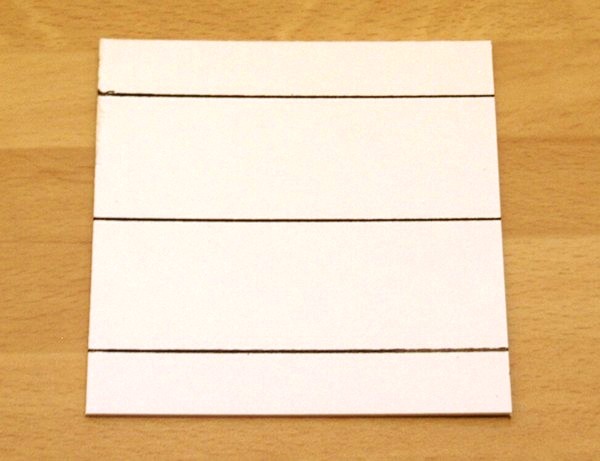
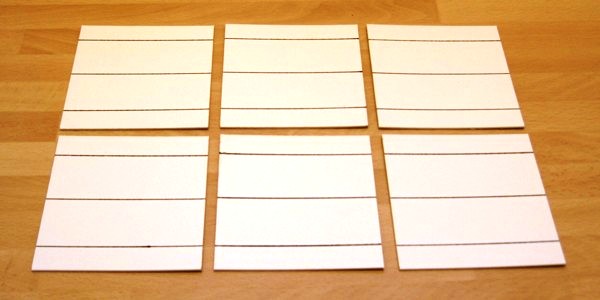
Repeat this process until you have six.
Step 4
-
Take a
marked board and apply a thin layer of glue along
the three guide lines.
-
Take a
length of ribbon and attach it across the top line,
letting the spare ribbon trail off to the right.
-
Do the
same on the bottom line, again trailing off to the
right.
-
On the
central line attach your ribbon along the line but
this time in the other direction, letting the spare
ribbon trail off to the left.
Leave it in front of you in this position ready for the
next step.
Step 5
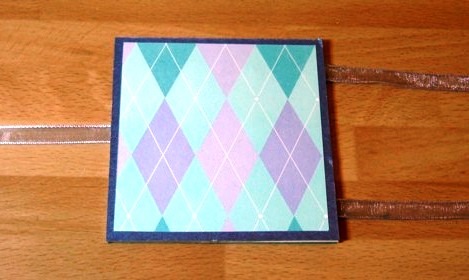
Now take an unmarked card, apply a generous layer
of glue to the back and sandwich it on top of your
previous card (best side up)
Step 6
-
Now, with
each ribbon you need to lay it over the top of the
card so that it is trailing in the opposite
direction (DO NOT GLUE).
-
Again,
leave it in position for the next step.
Step 7
-
Take a
marked board and lay it on top, like before with the
guidelines facing up in a horizontal direction.
-
Glue
along the guide lines and bring the ribbon over
again so that it faces the opposite way
-
Make sure
you keep it neat and tidy as you go, the ribbons
must lay over the guidelines.
Step 8
As before,
take an unmarked board, apply glue and sandwich it on
top (right side up)
Repeat steps 6 and 7 until you have one unmarked board
remaining.
Step 9
When you are
left with one unmarked board, trim away the excess
ribbon then glue and sandwich the final board.
At this stage
it would be a good idea to put something heavy on top to
make sure it’s completely stuck.
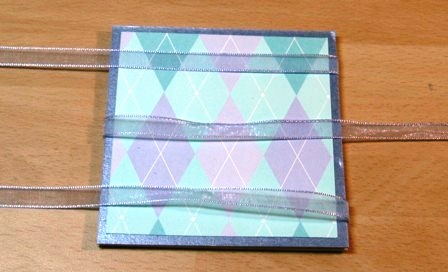
When you open it out it should look like this:

Step 10
Now it’s time
to attach your photos. Lay your ladder vertically (this
is the way your pictures will be viewed. My diagram is
horizontal don’t let it confuse you!).
-
Apply
glue to the back of your photo and slide it onto the
card under the ribbon. Take care not
to get any glue on the ribbon.
-
Repeat
with the other five. Remember to keep them all the
same way up with the ladder vertical.
-
Flip your
ladder over to do the other side but before you
begin turn it upside down so that your photos will
be the opposite way up to the ones on the other
side.
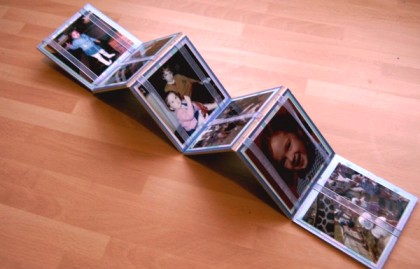
Voila! Your Jacob’s Ladder is complete.
To make it work, hold by the top square with one hand so
it hangs freely. Turn the piece downwards (either
backwards or forwards, it will only work one way) you
will see each picture flip over as if by magic. You
might need to do it a few times to loosen it up.
Making the Box
The Box Base
-
Using
your craft knife and ruler, cut a piece of cardstock
15.1cm X15.1cm.
-
Draw a
fold line 3.2cm from each edge (on the wrong side).
-
Score
along each line, fold each side and smooth down with
a bone folder.
-
Unfold
and turn it over
-
Score
diagonally from each corner of the inner square to
each outer corner.
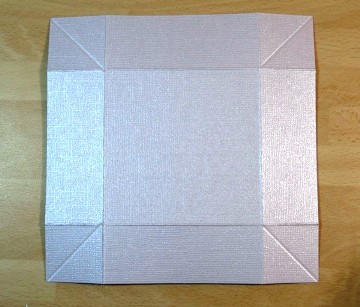
-
Fold up
the sides again, this time pushing in the corners at
the score lines.
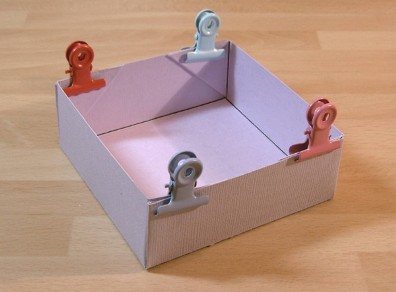
-
Now all
you have to do is glue the inner flaps neatly
against the inside of the box.
- Hold
the flaps in place with bull dog clips or paper
clips while the glue dries.
The Box Lid
-
Using
your craft knife and ruler, cut a piece of cardstock
12.4cm X 12.4cm
-
Draw a
fold line 1.7cm from each edge (on the wrong side).
-
Continue
in the same way as the box base
Now your box is complete.
Let your creativity flow and decorate it.
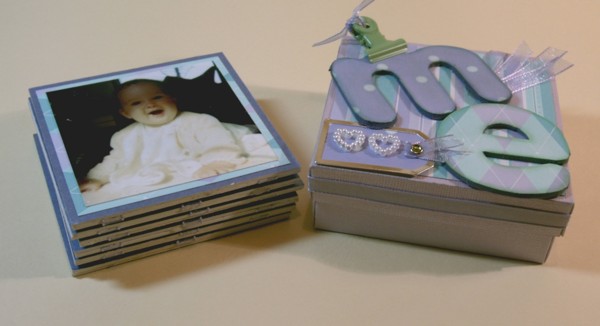
We hope you enjoyed the class.
|

