|
|
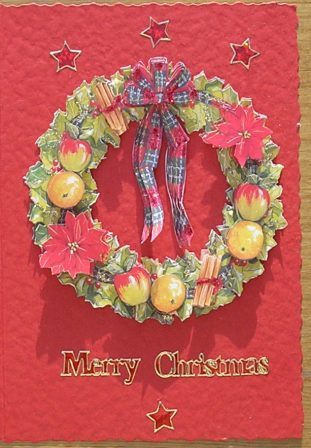
Card 1
Card size: A6
You can almost smell the lovely
scents of Christmas! Laden with fruit, cinnamon bundles and poinsettias the
layered decoupage wreath adds depth and warmth to the card.
-
Cut out the wreath shape and
build up the layers in a natural way. Finish with separate pieces of all the
fruit, cinnamon bundles, ribbon, and poinsettia. Use foam pads or silicon to
separate each layer then stick the finished piece onto the card.
-
Highlight the bow with red
Stickles glitter glue and dab gold Stickles Glitter glue all around the
wreath.
- Finish with red hologram Christmas peel-off
stickers.
|
|
|
|
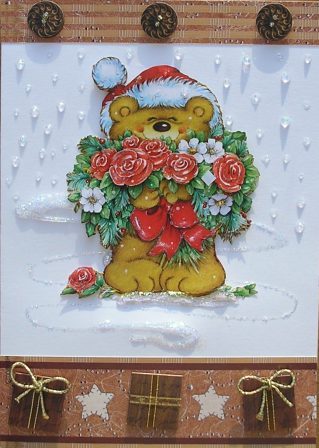
Card 2
Christmas Bear.
You can't help but smile! Decoupaged
centrepiece with present & button borders.
- Create the decoupage design
separating the layers with foam pads of silicon. Finish with the
most prominent designs, such as the bubble on bear's hat, the
flowers foremost in the bouquet and the rose on the ground.
Highlight the design with Gold, Pink & Red Stickles glitter
glue.
- Cut two 12" border stickers,
from the Brown Presents Border sticker set, in half and decorate
the top and bottom borders. Dot the button holes with Gold
Stickles Glitter Glue.
- Decorate the card with a swirly
snow pattern using Icicle Stickles Glitter glue. Leave to dry
then position the decoupaged centrepiece in the centre.
- Finish with dots of Icicle
Stickles glitter glue to emulate snow.
|
|
|
|
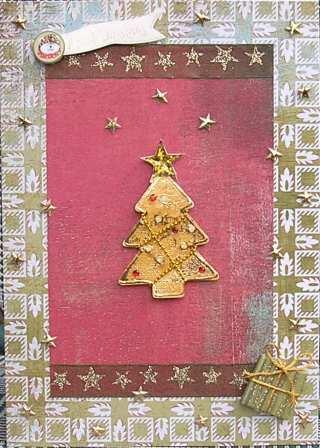
Card 3
A lovely Christmas
Card in the traditional Christmas colours. Card size: A5
-
Cut a piece of Blitzen Mistletoe
cardstock the size of the folded card and stick it on the front of
the card. Measuring carefully cut a rectangle of the Blitzen
Cranberry cardstock leaving a margin the same size all the way
around. Now stick the Cranberry cardstock onto the centre of the card.
-
Cut two strips of Green/Gold Stars
sheer Christmas ribbon and stick them on the top and bottom of the
Cranberry cardstock, I used our disappearing glue stick as it dries
clear and wont show through the ribbon. You could add ribbon to the
sides also if you like.
-
Now embellish your card to your liking.
I used CraftyBitz DS42 and padded fabric gold stars. I placed a
"Merry Christmas" banner in the top left corner of the Cranberry and
a glittering green Christmas present in the opposite corner. I then
dotted padded gold stars on the Mistletoe margin and another 3 stars
above a beautiful Golden Christmas tree from the CraftyBitz pack.
You could make the
card even more personal and include the names of the recipient in
the space below the tree.
|
|
|

|
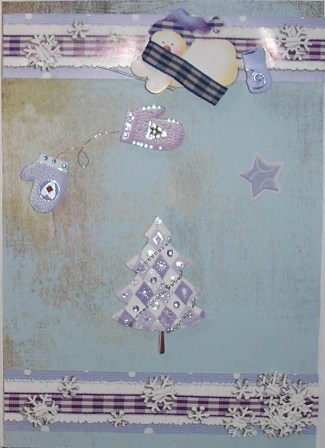
Card 4
A beautiful card in lovely blue hues.
Card size: A5
- Cover the front of the card in
Basic Grey Blitzen Ice Blue heavyweight paper
- Cut one of the borders from a
3D Blue Country Christmas Border Strip in half and stick a half
on the top and bottom of the card (see next card for the second
border from this pack).
- Draw a centrepiece shape on
Basic Grey Blitzen Fresh Snow paper and cut it out. Using
Blitzen letters stick on the words and position the centrepiece
on the card.
- Decorate the card with 3D
Christmas ornaments from the CraftyBItz DS46
|
|
|
|
Card 5
This card uses embellishments from the
same packs as card 2. Card size: A5
- Cover the front of the card in
Basic Grey Blitzen Ice Blue heavyweight paper
- Cut the second borders from the
3D Blue Country Christmas Border pack used for card 2 in half
and stick one half on the top of the card and the other half on
the bottom of the card.
- Decorate the card with 3D
Christmas ornaments from the CraftyBItz DS46
I have to say that these cards are
far more beautiful in real life than in the pictures!
|
|
| |
|
|
|
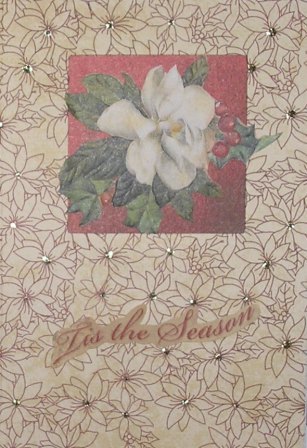
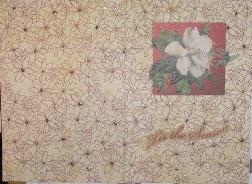
Card 6
A nostalgic card with a hint of
Christmas past. Card size: A6.
- Wrap a square aperture card in
Hot Off The Press Ivory Poinsettia paper. This is a light weight
paper so wrap it back and front (see picture below). Cut out the
square for the aperture and wrap it inside the aperture so that
no white edges from the card are visible.
- Glue on the background paper -
I used Blitzen Cranberry paper - and stick down the fold for the
aperture.
- Decorate with K & Company
Embossed Holiday Flowers Stickers.
- Finally dot Gold Stickles glue
in the centre of each poinsettia on the HOTP paper and leave to
dry.
|
|
|
|
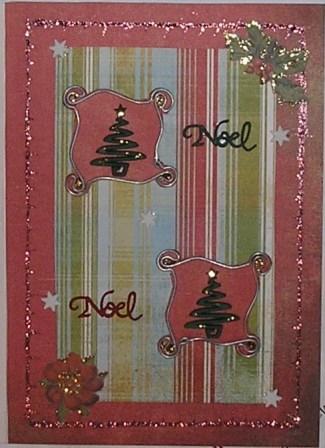
Card 7
A stunning Christmas card in
traditional Christmas colours. Card size: A5
- Cover an A5 card in Basic Grey
Blitzen Cranberry. Pipe a border of red Stickles glitter
glue all around the card. Whilst still wet draw a pin through
the Stickles towards the centre of the card. repeatedly all
around the border Leave to dry.
- Cut a rectangle of Blitzen
Ribbon Candy and glue it to the centre of the card.
- Back two Eco Africa metal
frames with Blitzen Cranberry. Position a Christmas Tree from
the Dress It Up Joy To The World button pack in each of the two
frames. Dot baubles on each tree with Gold Stickles Glitter glue
and dot the glue also in the centre of the corner swirls on the
frames.. Leave to dry then position onto card and stick into
place.
- Use two embossed stickers from
K & Company Holiday flowers and stick them on two opposite
corners. Highlight with gold Stickles glue and leave to dry.
- Position Dress It Up seasonal
wording buttons and white star buttons and glue on with Glue
Dots.
|
|
|
|
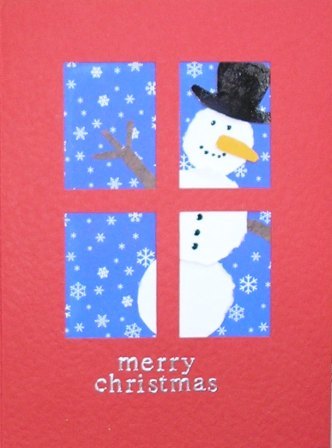
Card 8
A fun Christmas card for the young at
hearts. card size: A5.
-
Tear three
circles from white cardstock for the snowman. Draw a top hat
free hand and colour it black, I used a black Sakura Gelly Roll
Glaze pen to give the hat a 3D and glossy appearance.. On Blue
Snowflake background paper arrange how you want the snowman to
appear behind the aperture and glue on the snowman with his hat.
Position the blue background paper with the snowman behind the
aperture and glue it into place. Fold over the extra fold behind
the aperture and glue it down.
-
Draw a carrot
for the nose and colour it orange. Cut out stick arms, I used a
bit of scrap paper from Masculine Leather paper. Stick the nose
and the arms on the snowman. Using a black Sakura Gelly Roll
Glaze pen draw the snowman's eyes, mouth and buttons.
-
Stick on "Merry
Christmas" letters below the aperture.
|
|
|
|
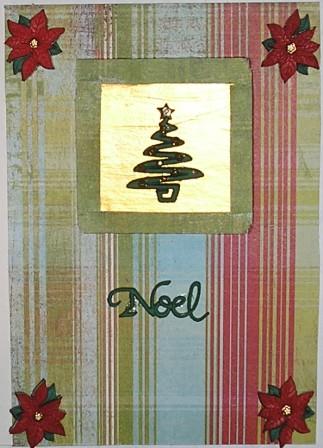
Card 9
A lovely golden card. Card size: A6
- Use a square aperture card and
cover the front with Basic Grey Blitzen Ribbon Candy. Cut
out where the aperture is and fold the edge under the aperture
to eliminate white edges.
- Cover the square behind the
aperture with Vintage Gold Paper Effects and leave to dry.
- Cut a strip of green from the
Ribbon Candy paper and glue onto the Vintage Gold Paper
Effects ensuring the layout as depicted in the picture. Glue
down the back panel of the aperture.
- Position a Dress It Up
Christmas Tree in the aperture window and dot baubles all over
the tree with Gold Stickles Glitter Glue.
- Stick down Dress It Up
Poinsettia Buttons in each corner and a Dress It Up "Noel"
button.
|
|
|
|
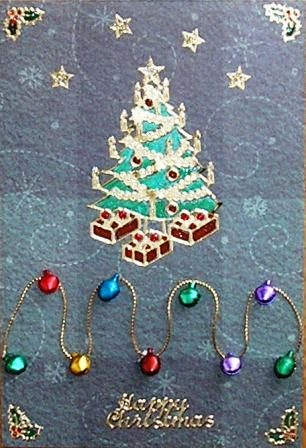
Card 10
Christmas Tree & Bells.
- Stick gold metallic string on
the card in undulating lines. At each peak attach a multi
coloured Christmas bell.
- Stick on a gold Christmas tree
peel off sticker and colour it in with Sakura Gelly Roll Glaze
pens. Stick peel-off stars around the tree. Dot gold glitter
glue on the stars, including the star on top of the tree, and
silver glitter glue on the flame on each of the Christmas tree
candles.
- Stick on holly peel-offs in
each corner and colour them in. Finish with a Happy Christmas
peel-off.
|
|
|
|
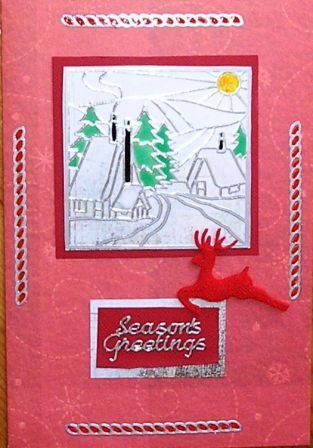
Card 11
Christmas Scene.
- Stick a Christmas Scene
peel-off on a piece of Basic Grey Blitzen Fresh Snow and
colour in the trees, chimneys and sun with Sakura Gelly Roll
Glaze pens.
- Stick onto a dark red
background (Doodlebug Bazzill Kisses) and position on card.
- Cut a small rectangle of
Blitzen Fresh Snow and layer it on top of a larger rectangle of
Bazzill Kisses Top with a seasonal peel-off greeting.
- Stick four borders from the
Christmas Scene peel-off sticker sheet onto the card and colour
in with a red Gelly Roll Glaze pen.
- Finish with a padded fabric
reindeer.
|
|
|
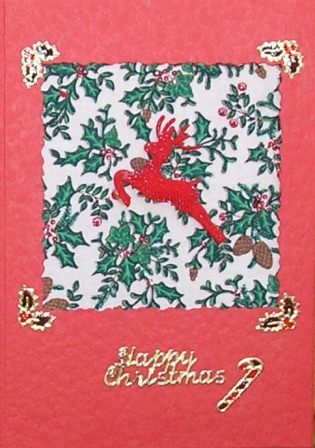 |
Card 12
Quick and easy Christmas card. Card
size: A6.
- Place Christmas fabric behind a
square deckle aperture card and glue down the back panel.
- Stick on a red fabric reindeer
in the centre. Highlight berries and reindeer with red glitter
glue.
- Stick peel-off holly in each
corner outside the aperture. Colour in with Sakura Gelly Roll
Glaze pens. Stick on a seasonal greeting and a stocking
peel-off. Colour in the stocking.
|
|
|
|
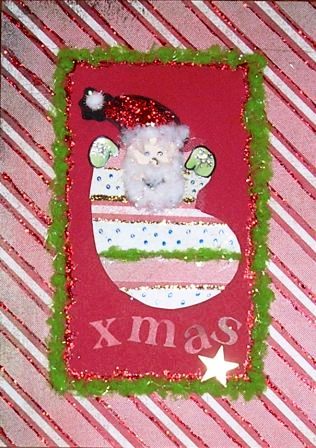
Card 13
Santa's Stocking. Card size: A5
- Draw a stocking shape and cut
it out. Draw Santa's head with hat and cut it out - make the
chin long as you will need to glue on a beard later. I used
Doodlebug Bazzill Sandcastle for Santa's face and black scrap
card for the rest.
- Glue strips of paper on the
stocking (Blitzen Fresh Snow and Blitzen Candy
Cane). Glue Santa's head on the top end of the stocking.
- Cover Santa's hat in red
glitter glue. Draw Santa's eyes, nose and smiling mouth. Cut up
a white iridescent pom pom and tear it into fine bits.
Stick onto Santa as a beard, and around the rim of the hat.
Finish with a white multi iridescent pom pom at the end of
Santa's hat.
- Pipe gold glitter glue on the
stocking. Dot the Blitzen Fresh Snow with a blue Sakura Gelly
Roll Glaze pen. Leave to dry. Cut up a green iridescent
pom pom and glue it on the stocking in a line. Draw and cut out
green mittens for Santa. Stick them on the top of the stocking,
one either side of Santa's face.
- Cover the card in Blitzen Candy
Cane. Leaving a wide margin cover the centre of the card with
Doodlebug Bazzill Kisses.
- Cut up several glittery green
iridescent pom poms and glue it onto the line that separates the
two layers. Pipe red glitter glue inside the green rectangle and
draw the two together gently with a pin. Stick the stocking onto
the middle of the card.
- Pipe red glitter glue on the
lines of the Candy Cane.
- Stick on fun seasonal wording.
I used "xmas" from the Blitzen letters.
|
|
|
|
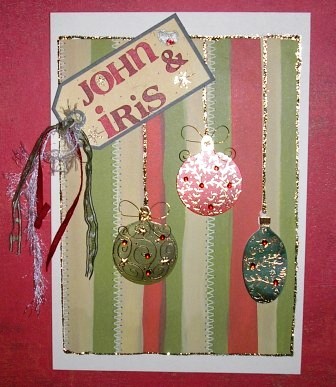
Card 14
A personalised card. Card size: A5
- Cut a rectangle from a sheet of
Junkitz Holiday Stripes paper and glue it on the front of an
ivory card. Pipe gold Stickles glitter glue all around the edge.
- Take three 3D baubles and stick
them in appropriate places on the card. Pipe a line of gold
Stickles from the top of the centrepiece to each bauble.
- Decorate a tag with recipients
name(s) and embellish with Christmas fibres. Attach to card.
|
|
|
|
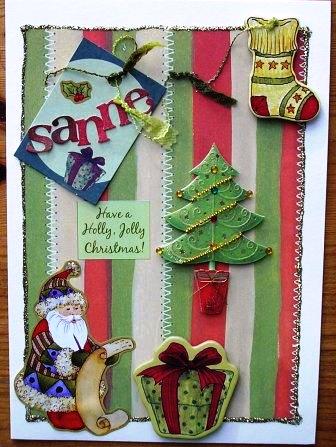
Card 15
Another personalised card filled with
Christmas cheer. Card size: A5
- Cut a rectangle from a sheet of
Junkitz Holiday Stripes paper and glue it on the front of an
ivory card. Pipe gold Stickles glitter glue all around the edge.
- Stick a Santa sticker in the
bottom corner and embellish with Gold and Icicle Glitter glue.
- Decorate a tag with recipients
name(s) and embellish with Christmas fibres. Attach to card and
glue the end of the fibre/ribbon to a stocking embellishment.
- Decorate with the remaining
embellishments
|
|
|
|
|
|
|
|
|
|
|

