Card & Box Class
When we make our cards we take great care and put much effort into our creations. Complete the presentation with a beautiful coordinated box in which to house your work. Karen Mortensen shows you how with two beautiful examples. This class is copyrighted and must not be reproduced on any other website.
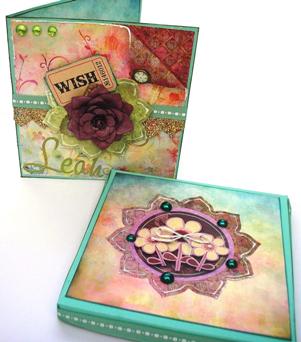
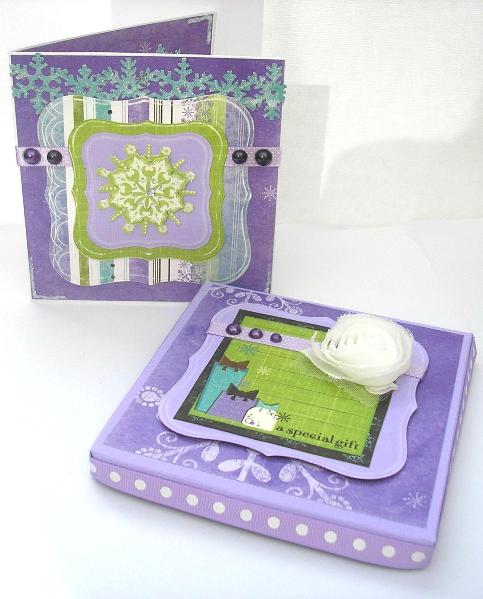
Products used: A Special Gift Christmas Set
"Wish" Birthday Set
Tools used:
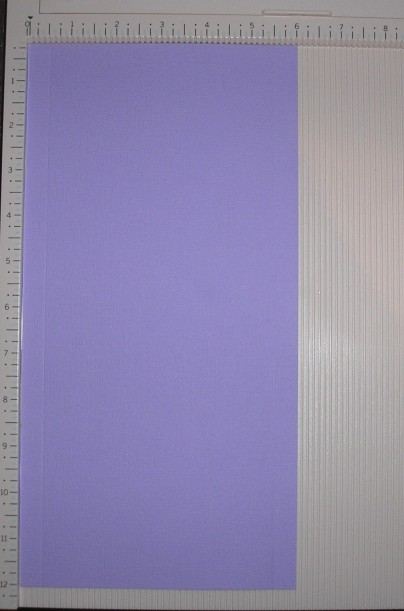
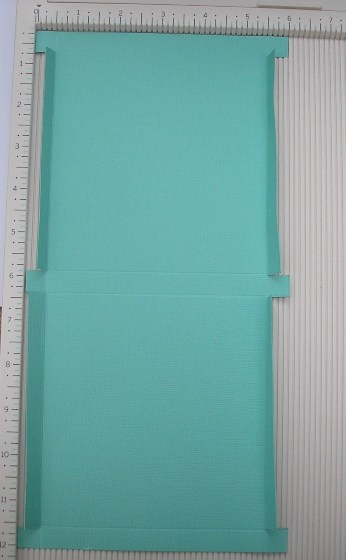
I am using a 12" x 12" piece of cardstock here, and the sizes I am giving will allow you to make two boxes from one sheet. It means that the cards will not exceed size 5" x 4.75". If you want a larger box then just make it in two parts, so you have a lid that can be taken off. This box is a pizza style box so the lid is integrated into the design. If you want a deeper box then increase the size of the sides: instead of 1/2" make it 1". The completed box there will take a card size 4" x 4". Making the Box Cut a piece of cardstock for your box 12" x 6" Score the 6" side at points 1/2" and 5.5" leaving an 1/2 margin each side.
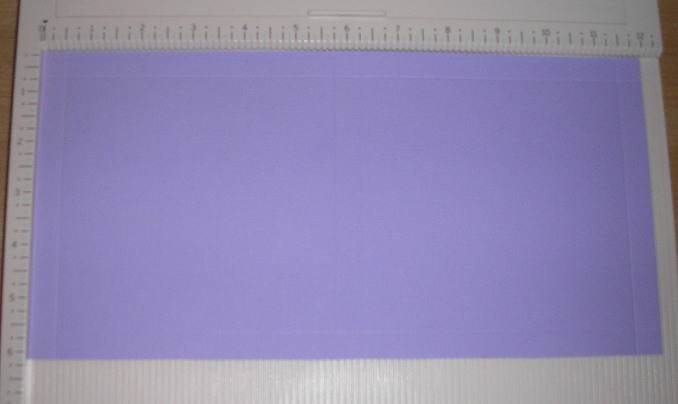
Score the long side at points 1/2" and 11.5", again leaving a 1/2 margin each side. This time also score in the middle at point 5.75" and 6.25".
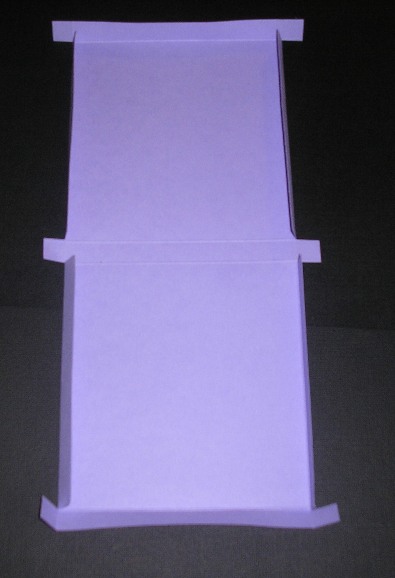
Cut into the folds as shown on this picture. You can see the score lines better here too:
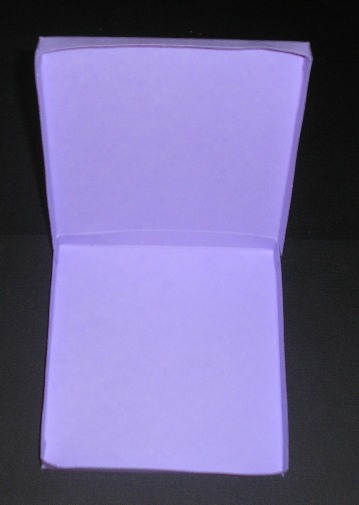
Fold into the box and tape down the edges as shown. I used double-sided sticky tape.
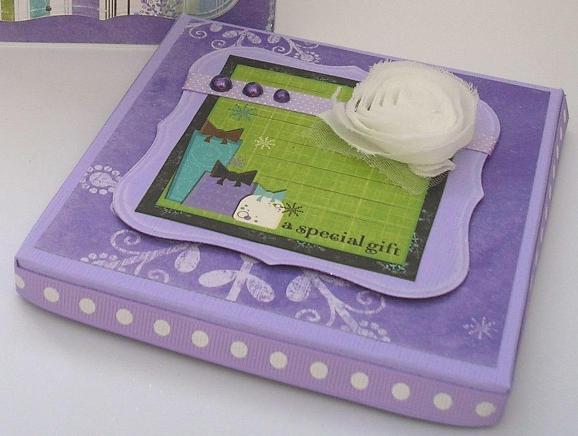
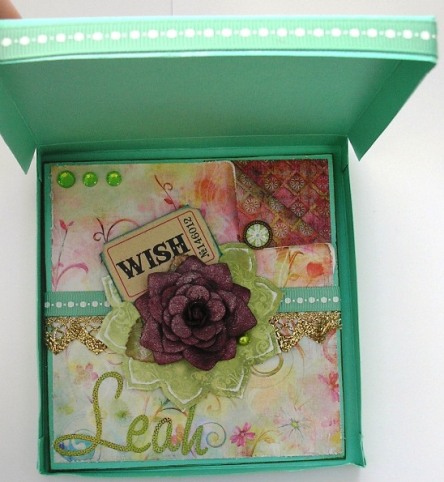
Now decorate your box: Stick a piece of ribbon around three sides of the lid. DON'T go around the back, if you do you wont be able to open it. Stick a piece of Bo Bunny Winter Joy patterned paper on top of the lid. Mine is approx 4.75" x 5". Cut a shape for the top in plain cardstock (I used a Nestabilities die to cut mine). I embossed the edge of the shape and then lightly sanded the edge to bring out the raised edge. Top with a cut-out from the Bo Bunny Winter Joy Cut-Outs sheet. Each of the Bo Bunny ranges contain a cut-out sheet which is invaluable for sentiments; on the reverse of the sheet you have four decorated squares too which are perfect for card making! Wrap a length of ribbon around the topper then adhere to the top of the box on foam pads to raise it from the surface. Finish off with three pearls and a beautiful Bo Bunny Winter Joy fabric rose. When you give the card you can add the recipient name to the front.
Making the card Front:
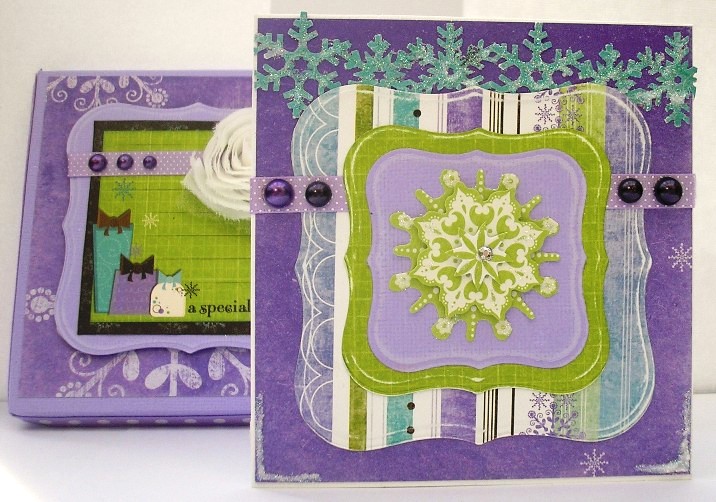
Cut a piece of cardstock and fold into a card sized: 5" x 4.75". Cut a row of snowflakes using a Martha Stewart Deep Edger Snowflake punch. Stick it on the top of the card. Cut and emboss another Nestabilites shape, using the larger version of the one you used for the front. Cut and emboss a smaller one in coordinating paper to sit on top - again this is Winter Joy paper. Cut yet another shape to sit on top of the other two, this time I used plain cardstock. Lightly sand edges on ball three shapes to show the embossed edge. Stick the largest shape to the front of the card. Stick a piece of ribbon across the front (see picture for guidance). Stick the other two shapes on top. Finish the centre off with a Winter Joy Layered Accent in the middle Using a glue pen add Glamour Dust, or other fine glitter, to two corners and the snowflakes. In other words draw the corners first with the glue pen then add the glitter.
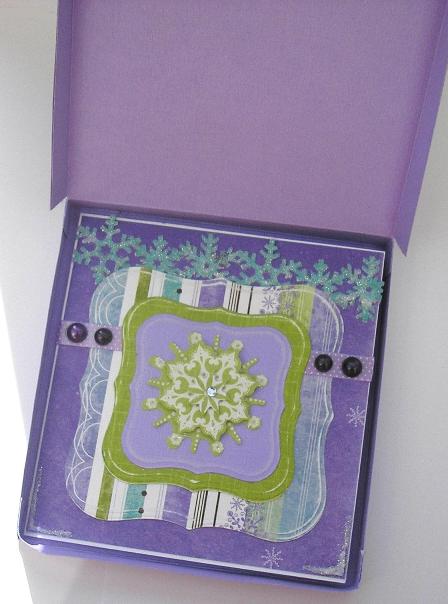
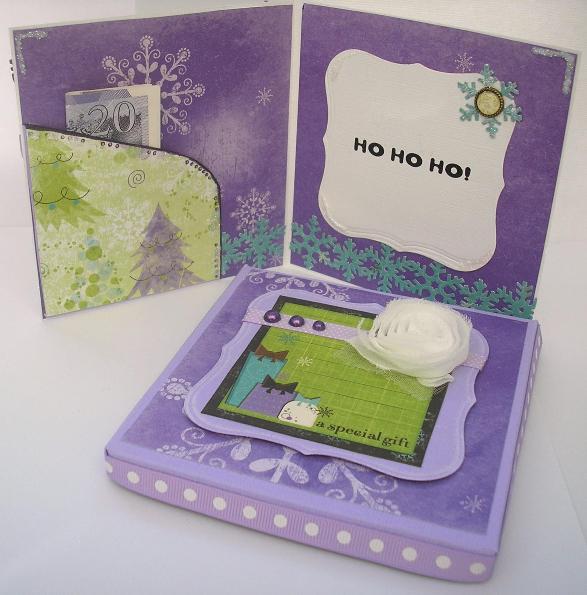
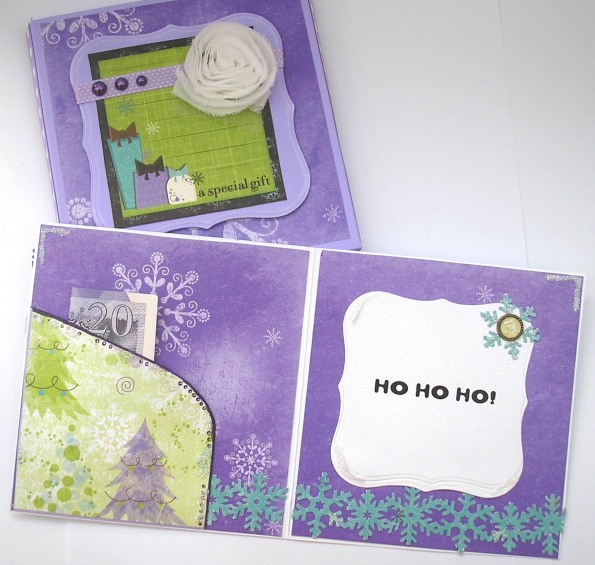
Inside:
Cut two pieces of the patterned paper you used for the front of the card and box to fit inside the card. Punch two snowflake borders and glue to the bottom. Put one snowflake aside. Cut a pocket shape from plain cardstock. Cut a slightly smaller one in patterned paper and stick on top. Adhere to the left-hand page corner using double-sided tape so that only the edges are stuck down and the top and middle is ready for the gift. Decorate by adding dots with markers pens and glitter on the edge of the pocket. Cut a Nestabilites shape and stick on the right-hand page. Add the snowflake you put aside earlier and top with a glazed brad (I used a Basic Grey Jovial Glazed Brad).
Add Crystal Glamour Dust (or other fine glitter) to the two top corners, snowflake, and corners of the greeting mat. Add a greeting.
Score cut and fold as before
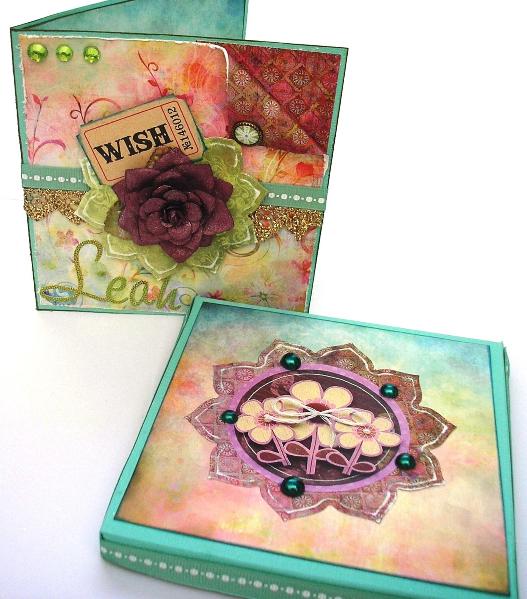
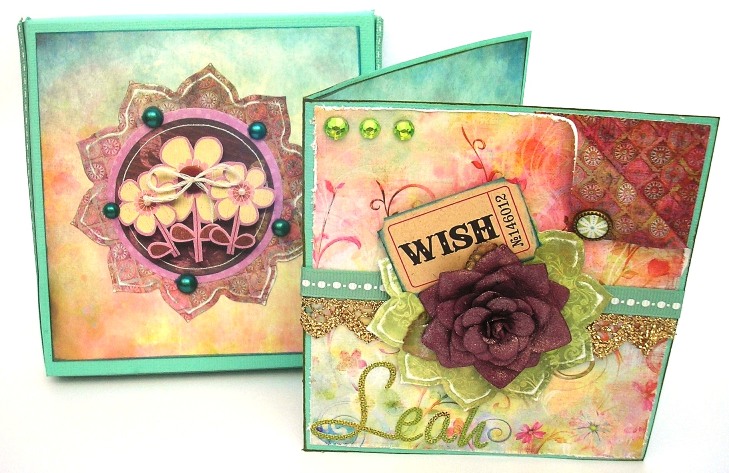
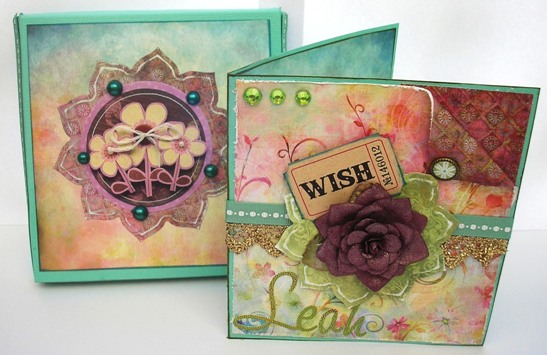
Decorate the box using Prima Fairy Flora paper (I used paper from the 6x6 pad as the designs are smaller and perfect for card making). Prior to sticking the paper down I inked the edges with Tim Holtz Distress Ink. Once again I used a Nestabilites die for the shape on the front. Sand the embossed edge again to show the raised edging Add a Bo Bunny SJazmyne sticker to the middle and top with a few pearls. Stick a ribbon around the top of the box (remember: not on the back).
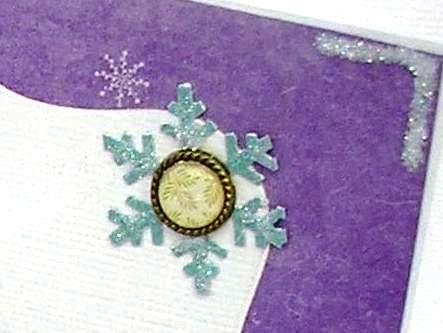
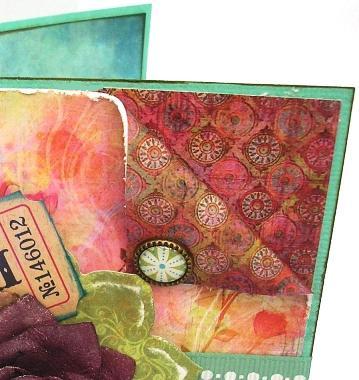
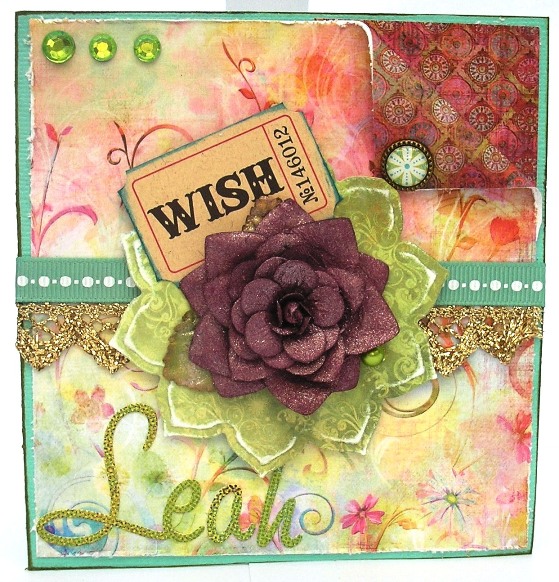
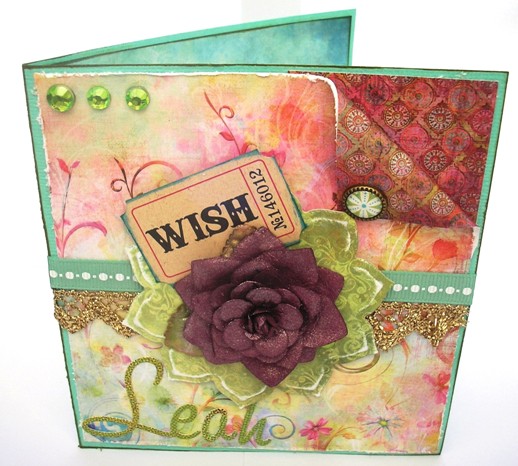
Making the card Cut a piece of Prima Fairy Flora patterned paper to fit the front with a margin all around and distress the edges with a distresser. If you haven't got one then just rough up the edges with your finger nail. Cut two small squares of a coordinating piece of patterned paper. Stick one piece to the reverse side of the sheet you cut earlier top right-hand corner. Glue the other square to the main card top right-hand corner. Stick the piece of paper down leaving the modified corner unglued. Adhere a brad to inside of the corner (I used a Basic Grey Jovial Glazed brad), turn down the corner and adhere to card. If you are planning to decorate the inside you can push the brad through the main card and that will make it secure. I am only decorating one side of the inside so I don't want anything poking through inside. Here is a close-up of the finished corner for guidance:
At this point do the inside of the card. I am doing it now because I want to take my ribbon from the front and carry it right round inside the card without cutting it. Again cut a piece of Fairy Flora paper and ink edges as before. Go back to the front before you do the ribbon and shape inside.
Back to the front: Wrap the ribbon from the front right round both pages inside as above picture. Add a length of gold lace below the ribbon on the front only. Cut two Nestabilites shapes, one white for the inside and one patterned for the front of the card. Here's a tip. If you sand down the embossed edges first on the patterned paper then sand down the embossed edges on the white shape afterwards, you will have a very faint colour from the patterned paper. You can see that in the picture above. Don't overdo the rubbing on the patterned paper or it will break up, a gentle little rub is perfect. Add a large Prima rose to the centre on the front. I have sprayed mine with some Glimmer Mist spray. Add a Tim Holtz ticket. I edged with distress ink again before tucking it under the flower. Add the recipients name, I used Basic Grey Alphabet stickers, a few crystals and a pearl (again Prima).
We hope you enjoyed the class.
All projects copyright ® Charmed Cards & Crafts. All rights reserved.
[Back to Top] [Back to Classes]
|