|
|
Quick Guide:
Created and designed
by Karen |
|
|
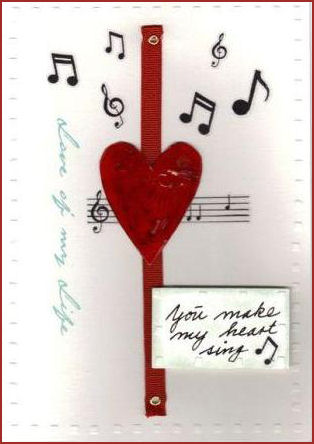
Quick guide:
- Dry emboss a border on the card
- Hand draw and cut out a heart on red
cardstock. Glaze with crackle glaze.
- Stick on the vertical musical note stickers
- Attach a length of red ribbon to card with
gold eyelets.
- Attach heart on top of notes and ribbon
- Rub-on a suitable sentiment, here "Love of
my life"
- Cut out a rectangle piece of white card.
Emboss edges then chalk in a colour that compliments the rub-on words.
Write your own words using a Gelly Roll Glaze pen then attach to card with
foam pads.
- Add additional musical notes.
|
|
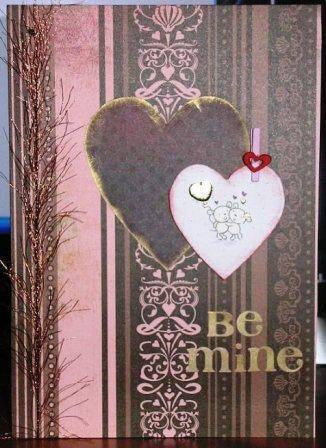 |
Quick Guide:
- Wrap a card in a paper of your choice
- Cut out two heart in coordinating paper.
Ink the edges of the large heart in gold and the edges of the smaller heart
in pink or red.
- Ink Basic Grey letters with gold.
- Attach a suitable image and gold padded
hearts in the smaller heart.
- Attach a small pink peg topped with a small
red Dress It Up button.
- Overlap the hearts on the card as shown
- Add fibre down one edge of the card.
|
|
|
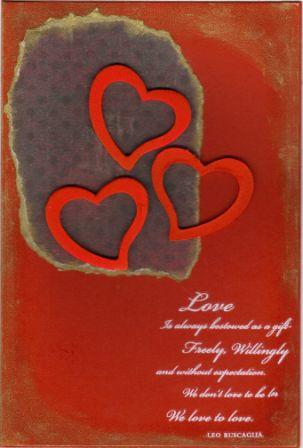
Quick Guide:
- Wrap a card in red paper or use a red card.
- Ink with gold on the edges and down from
the corners.
- Hand tear a piece of contrasting paper and
ink the white edges in gold.
- Rub on a suitable white poem or sentiment
- Embellish with red hearts
|
|
|
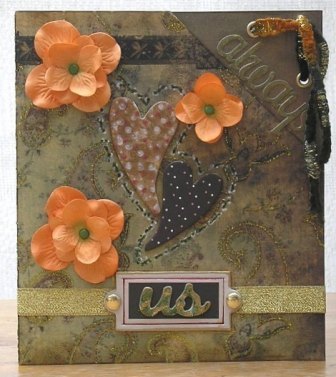
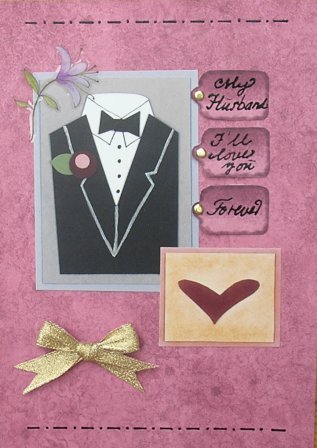
Anniversary/New Husband
Card
Show your new husband how much you love
him.
Card size: A5
- Wrap the card in paper from
HOTP Jewel Creative Pack. Cut out three tags from the same
pack. Write your sentiment in Black Sakura Gelly Roll Glaze pen
and set aside to dry.
- Add a stippled top and bottom
border using a ruler and a Black Sakura Gelly Roll pen.
- Add Page Accents from All My
Memories "A Night To Remember"
- Stick on a flower in the top
corner. These particular stickers are great as they leave no
white edges.
- Add a gold brad to each of the
tags you made earlier and attach to the top page accent using
glue dots so the 3D effect is maintained.
- Finally attach a large metallic
Bow.
|
|
|
|
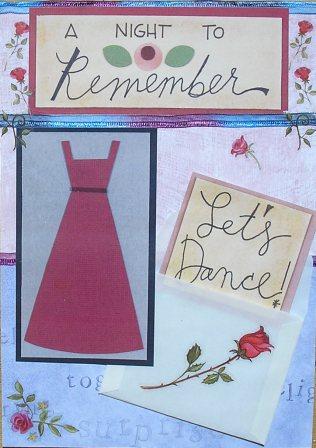
Picture the scene: It's your anniversary and you
thought your husband had forgotten. He pulls out this card with a sheepish grin
and inside you find tickets to a fancy place uptown. Sounds good doesn't it?

Card
size: A5
- Wrap the card in paper from HOTP Icy
Rainbow
Creative Pack (I used a pink paper with musical notes). Glue a coordinating
paper to the bottom third of the paper (I used a lovely paper with words
like "Surprise" and "Together")
- Glue on a strip of ribbon from the
HOTP Jewel Ribbon pack on the join.. Add strips of the same ribbon on the
top as shown.
- Using a vellum envelope from the Jewel
Creative pack attach the "Let's Dance" sticker from All My Memories "A Night
To Remember" Page Accents sheet. Stick the dress page accent on top as
shown.
- Add roses as shown.
|
|
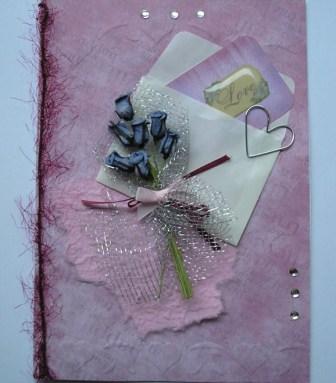 |
A sophisticated and
elegant card which is great when you don't want to use the
traditional red Valentine colour scheme.
-
I embossed a
border of hearts at the top and bottom.of HOTP Cardmakers
paper and covered the front and back of the card with the paper.
-
Next a length of
coordinating fibre was stuck to the spine of the card as was a
piece of randomly torn pink Mulberry paper. I left the edges of
the mulberry slightly loose to create a 3D effect.
-
A small envelope
was stuck on the front with a padded "Love" sticker on a chalked
piece of cardstock slightly tucked into the envelope. A silver
heart clip completed the envelope.
-
Using silver
mesh fabric I wrapped several blue roses into a bouquet and tied
them with ribbon and a pink satin bow.
-
To complete the
card 6 crystal gems were glued onto the card in two rows of
three.
|
|
 |
As a variation of card 1 this one is
great as an anniversary or Valentine card to the one you love.
- HOTP cardmakers paper was glued
on to cover the front and back of the card.
- I chalked a plain tag and stuck
round crystal gems all around the edges. The initials of the
"loving couple" were placed in the middle with a silver heart
peel-off
topped with a crystal gem between them. A length of Funky Fibre
was attached to the tag and glued to the top corner of the card,
and the tag itself was stuck down so that the ribbon was
slightly loose.
- Next coordinating fibres were
attached to the spine, covering the top of the ribbon.
- Red and white roses were tied
in silver mesh fabric and attached to the card. A pink satin bow
completed the bouquet.
- Finally a large Ornare Crystal
heart was glued to the top corner of the card.
|
| |
|
|
|
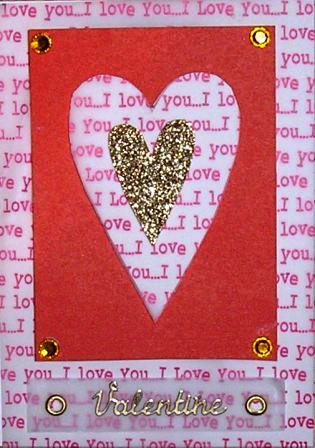
Valentine card.
Although it looks as though the
centre has been cut out on the picture, the heart actually sits on a
piece of red cardstock.
- Cover the card with "I Love
You" vellum using Invisi Dots to stick it down. Invisi Dots
ensure no glue will be visible through the transparent vellum
- Cut out a heart shape and a
smaller identical heart shape. Smother the smaller one in gold
Stickles Glitter glue and leave to dry. Cover the larger heart
in the "I Love You" vellum, using Invisi Dots. Place the small
heart in the centre of the larger heart on foam pads, and
position on red cardstock using foam pads again to lift it of
the paper. Place four gold crystal gems in each corner and stick
the finished piece onto the top half of the card.
- Cut out a rectangle piece of
white vellum and attach two gold eyelets to each end. Place
"Valentine" peel-off wording on the banner and stick onto card.
|
|
|
|
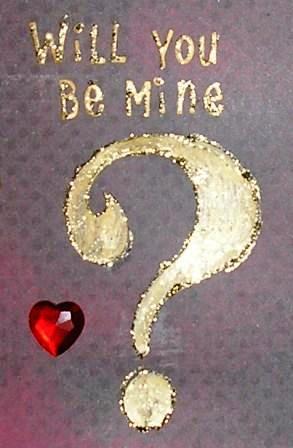
A cool Valentine card in lovely warm
hues. Simple to make and very cost effective.
- Cover the card in Junkitz "Romance
Glitter" paper.
- Colour a "?" from one of the
Basic Grey Monogram Sets in a rich gold - you could of course
draw it freehand and cut it out.
- QuicKutz the words "Will you be
mine" from gold cardstock - Frankie Skinni Mini is used here.
- Glue on the letters and the
question mark. Pipe gold Stickles Glitter Glue on the words and
question mark. Gently rub some of the glitter onto the body of
the question mark.
- Finish with a large red heart
crystal.
|
| |
|
|
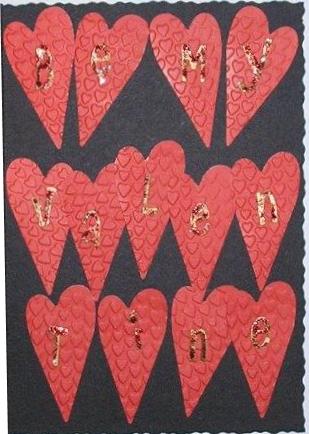 |
Hearts Galore!! Red and black makes a
stunning combination and this card uses this to full effect. Red
hearts amass, each embossed with more hearts, with the words "Be
My Valentine", on a black deckle-edged card .
- Cut out the words "Be My
Valentine" with QuicKutz Frankie Skinni Mini Alphabet.
- Cut out 13 red hearts and
emboss them with QuicKutz "Hearts" Goosebumpz.
- Stick the red hearts on the
card and top each with a letter to read "Be My Valentine". Pipe
Gold Stickles Glitter glue on each letter.
|
| |
|
| |
|

