|


Layered Paper Bag Album Class
In this tutorial our lovely Louise Brigden shows you how to create a beautiful layered Paper Bag Album
Products used for this project:
-
From PRIMA NATURE GARDEN collection
-
Prima Nature Garden 6x6 Paper Pad
-
Prima Nature Trinket Metal Charms (One on the front of the album)
-
Prima Nature Ribbon & Lace Trims
-
Prima Nature Garden Chipboard
-
Prima Nature Vinetta Flowers (One on the front of the album)
-
Creating the Album itself
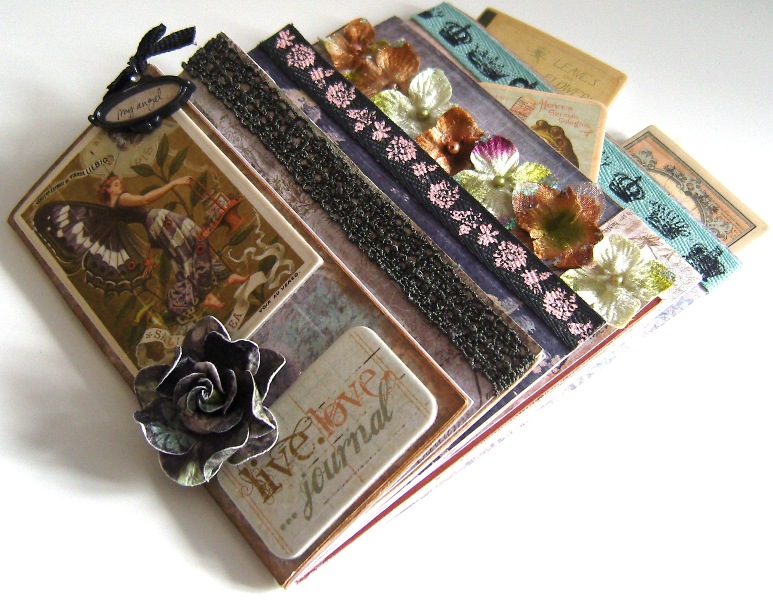
Here we have a tutorial showing you how to make something that in it’s final form looks very complex but which is in fact just three paper bags!

I’m not going to baffle you with measurements in this tutorial because you really don’t need them. Take three paper bags of your size choice they will look like this when you take them out of the packet.

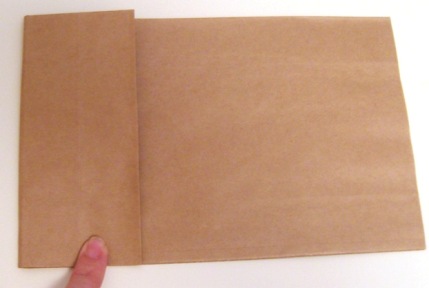
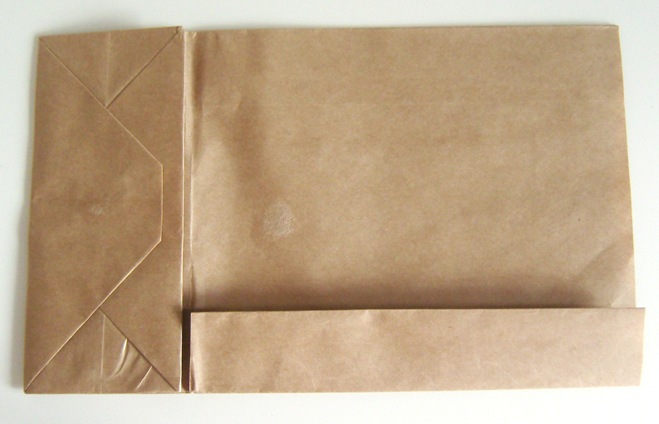
Take your first paper bag and fold the base in on itself along it’s natural fold line as shown above. Repeat with the next bag but make your fold about 2cm further to the right so your flap is larger. Repeat with the third bag, again adding 2cm. This is how they will look .....

Now slot them inside each other with the smallest flap (left bag in the photo) at the bottom of the pile. They will look like this........
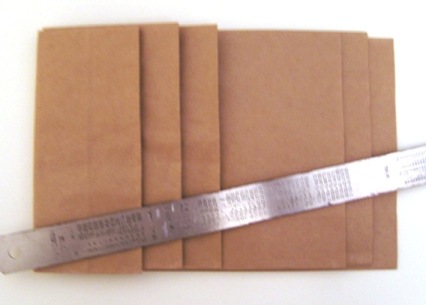
(I weighted it down with my ruler just so I could take the photo)
If you wished you could leave your pages like this and proceed to the last step but I like to have consistency in the layout of it and I trim the the open ends of the bag like this......
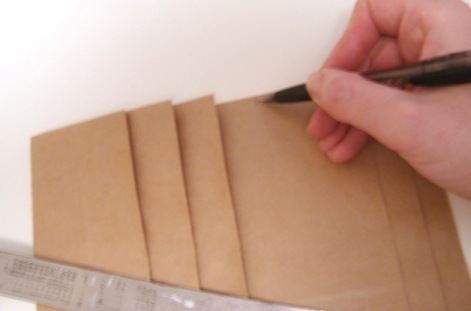
I mark with a pencil where I would like to cut the page. Measure by eye like I do or add 2cm space like you did before. Take out the page, cut it, put it back and repeat the process with the next page. Your album will now look like this......

The 4th, 5th and 6th flaps of the book are formed by the open ends of the bags. These form natural pockets/slots for tags, secret messages, photos etc. In addition to the end pockets you may wish to have flaps or pockets on the actual pages of the book. To form a hinge for your flap or pocket read on.....
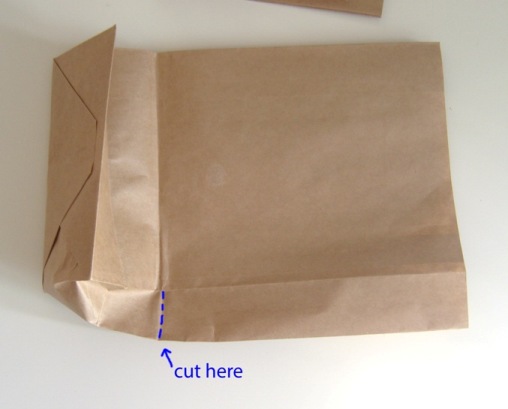
Take your page/bag and unfold the side seam as shown above, then snip adjacent to your fold (shown above).
Return the excess paper on the left of the cut line back inside the bag and fold the other part up to form a slot for tags (don’t stick it down at the side until you have decorated it!) Alternatively you can form this flap on the top of the page to form a hinge for a bigger paper flap to be added later.
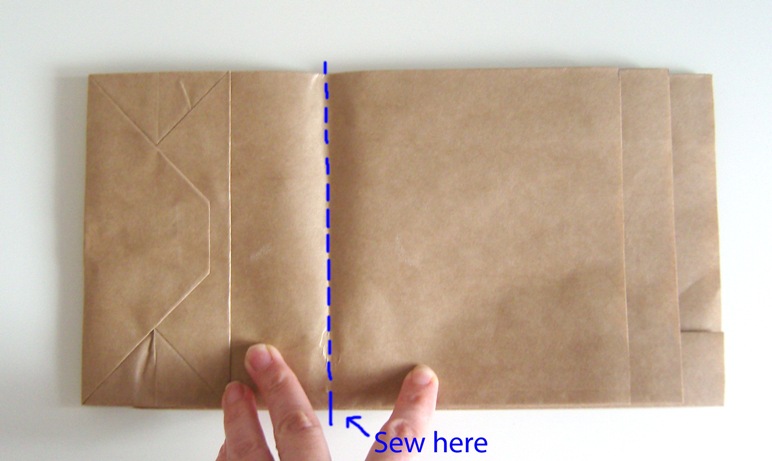
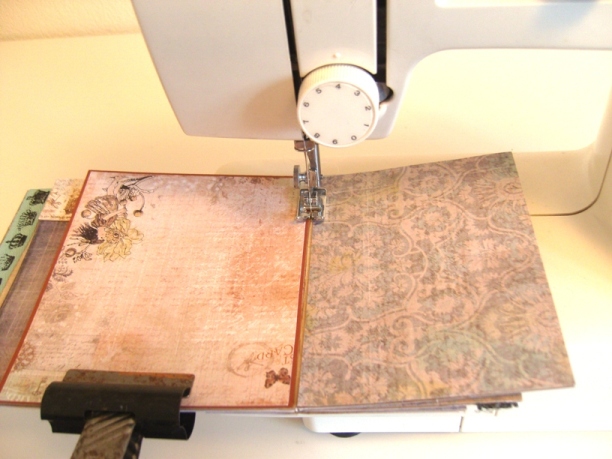
This is the final step of creating the ‘bones’ of your album but in actual fact I would leave this stage until I had decorated it. (which is why I’ve drawn instructions on the photo instead of actually sewing it.)
My favourite way to connect the pages together is to open up the book and sew along the fold/line shown on my sewing machine, it’s easiest and strongest. If you don’t have a sewing machine you will need to carefully apply a thin line of PVA glue along the book folds where they touch each other and clamp together with a clip until the glue has dried.
I used to following products to decorate my album:
-
From PRIMA NATURE GARDEN collection
-
Prima Nature Garden 6x6 Paper Pad
-
Prima Nature Trinket Metal Charms (One on the front of the album)
-
Prima Nature Ribbon & Lace Trims
-
Prima Nature Vinetta Flowers (One on the front of the album)
-
and you can get the paper bags HERE.
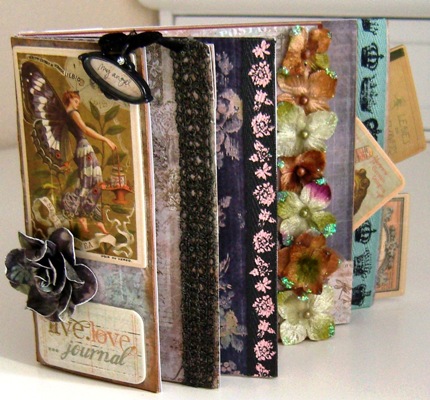
Here you will see what happened next after I finished the Paper Bag album tutorial.
My album is intended to be a photograph album for a friend to fill so it is only partially embellished, however your album could be a journal, a scrap book or anything else you set your creative minds to.
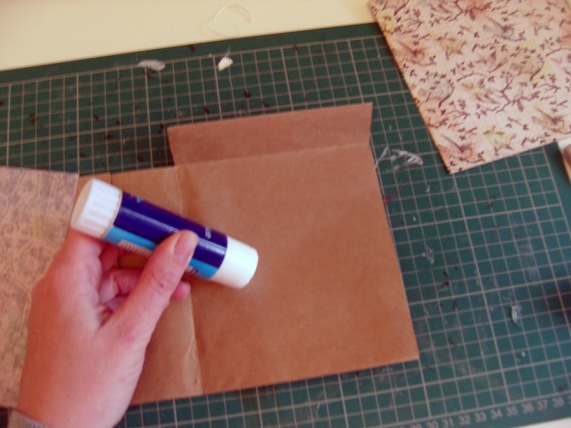
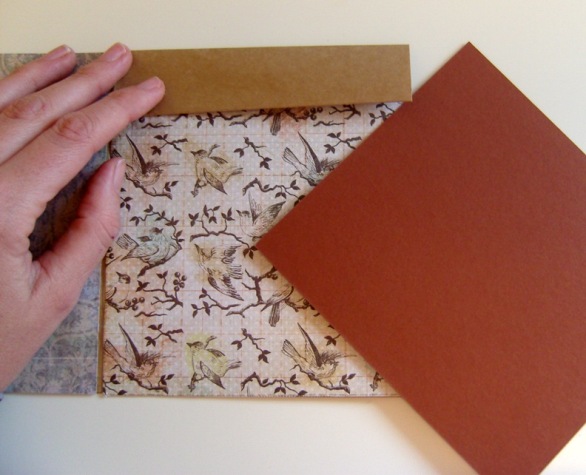
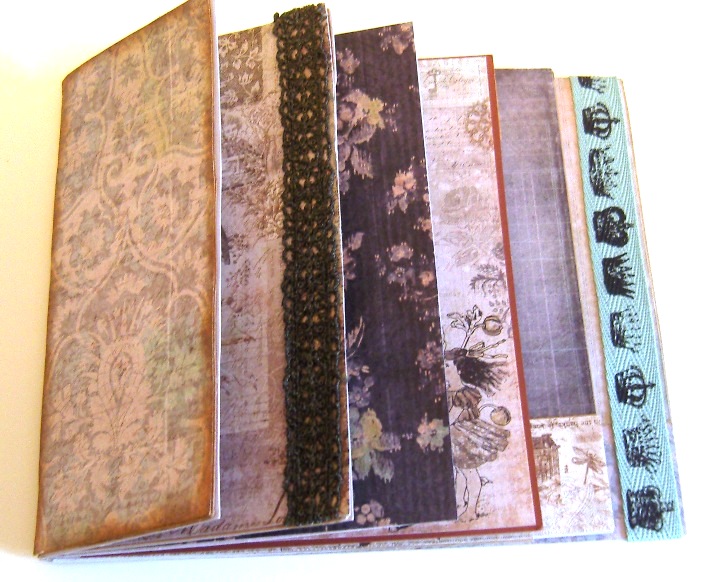
Cover your paper bag pages back and front with your Prima papers. The papers from the 6” x 6” book cover my paper bag height perfectly without the need to trim. I like to use glue stick because it is repositionable and it doesn’t saturate and wrinkle the paper like a wet glue would. Another alternative is to use your sewing machine to attached your background for a shabby chic effect.

If you made hinge flaps on any of your pages you will need to cut a cardstock flap to size, attach to the flap and cover with patterned paper.
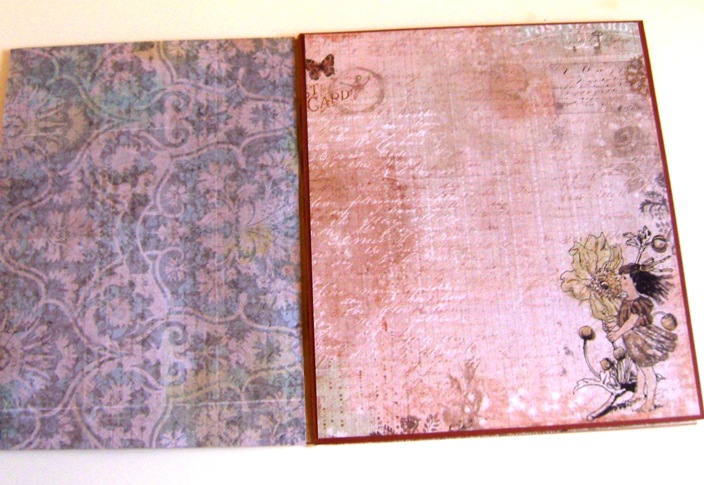
Continue to cover your pages until all are covered. TIP if you are attaching ribbon like I have done, wrap and adhere it to your patterned paper (securing at the back) before fixing your paper to your page.
If you have a sewing machine clip your pages together and sew along the fold line. If you prefer you can glue them together instead by applying a very fine line of PVA glue along each fold on the spine and clamping together whilst they dry.
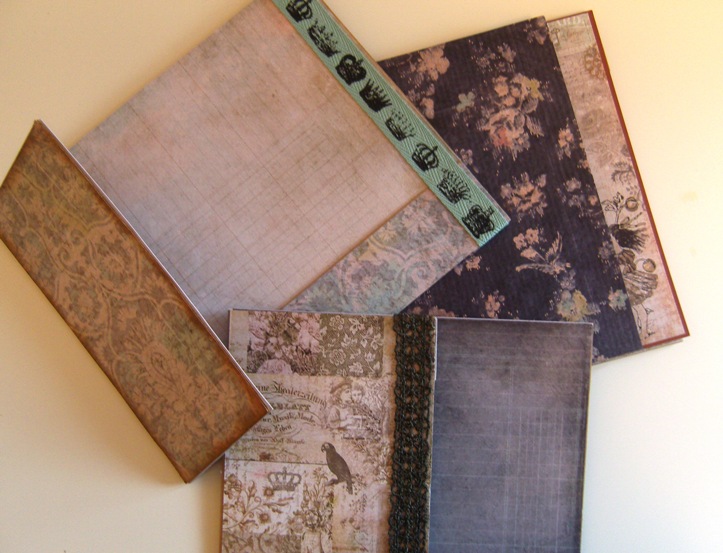
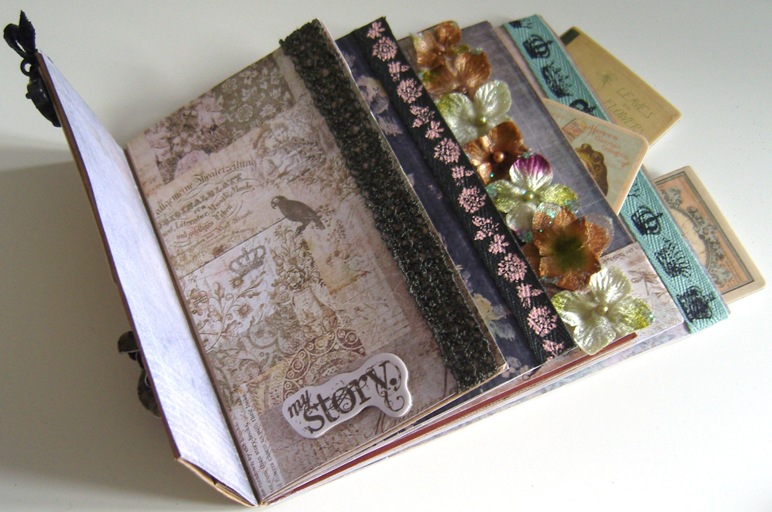
Your album is now ready for the fun part....EMBELLISHING!
Please see the list of products I used HERE.
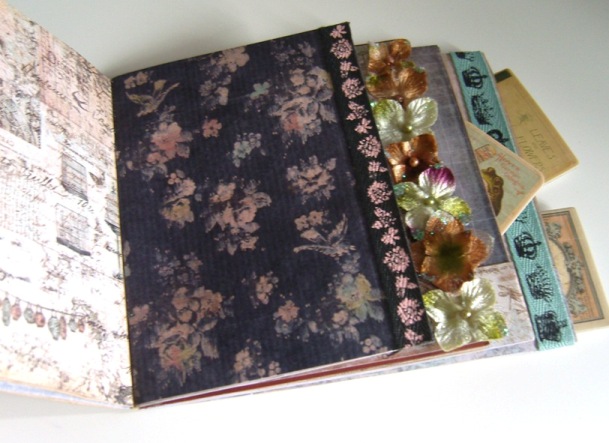
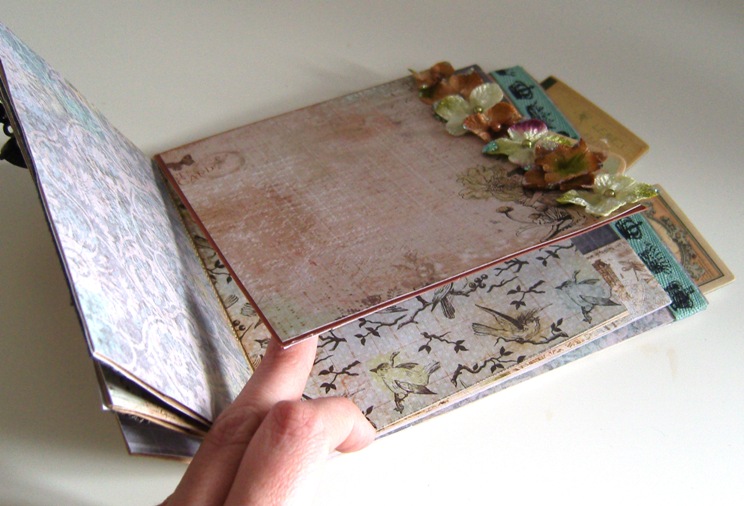
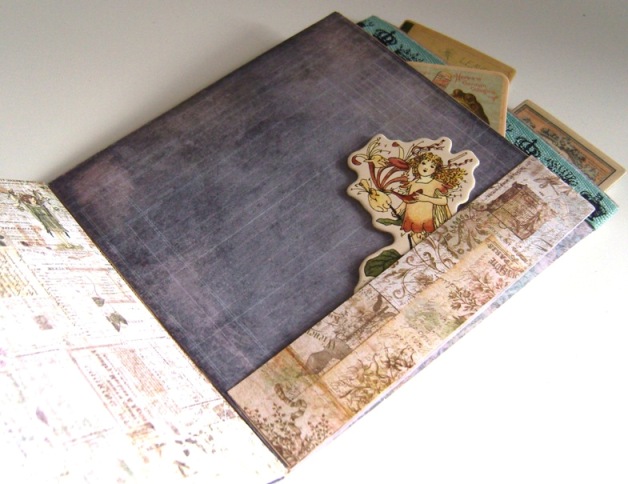
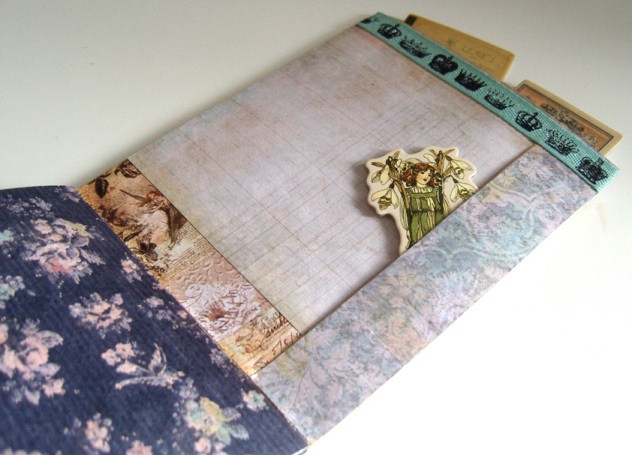
For the purpose of the photographs and because I was rushing I have used some extra Prima Nature Garden chipboard shapes and tags to demonstrate how you can fill the pockets, but you will probably use your imaginations and make glorious tags, secret messages and surprise photos for the recipient to discover with delight.