|
|
|

"Stall Card" Class
by Louise Brigden
Learn how to have some 3D fun and create a card to impress! Louise Brigden Shows you how.
|
Products used for this project:
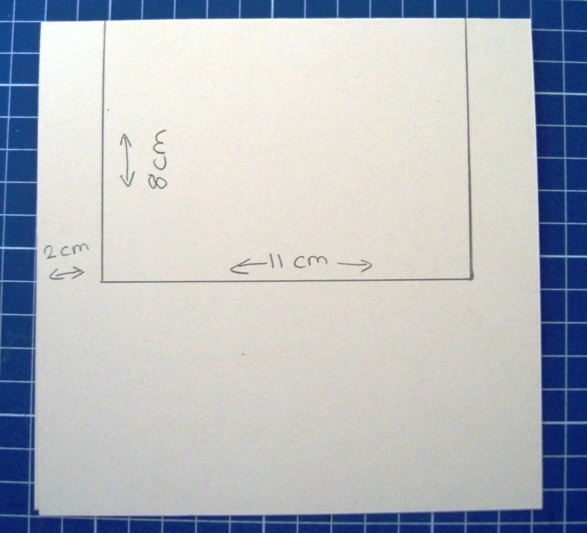
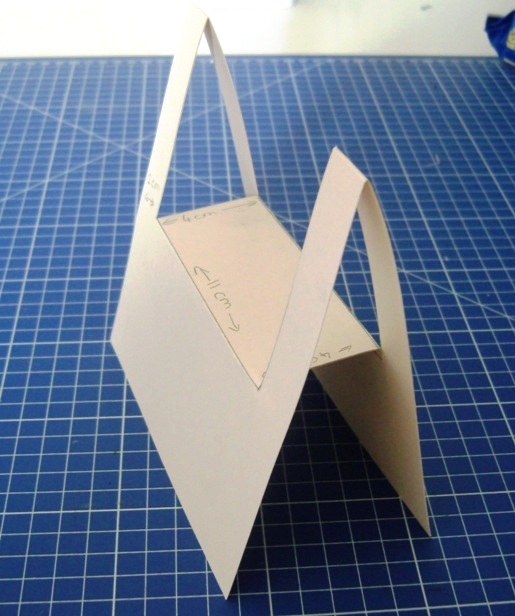
Set up your stall! Learn how to have some 3D fun and create a card to impress. I usually decide on the size of my card by the size of my envelope, it sounds like common sense but I would like £1 for all the times I have cut and made a card and then had to make an envelope to fit. Cut a card base measuring 29x15cm. Score and fold down the middle. With the card closed and the fold facing up measure and mark as indicated in the photo below.
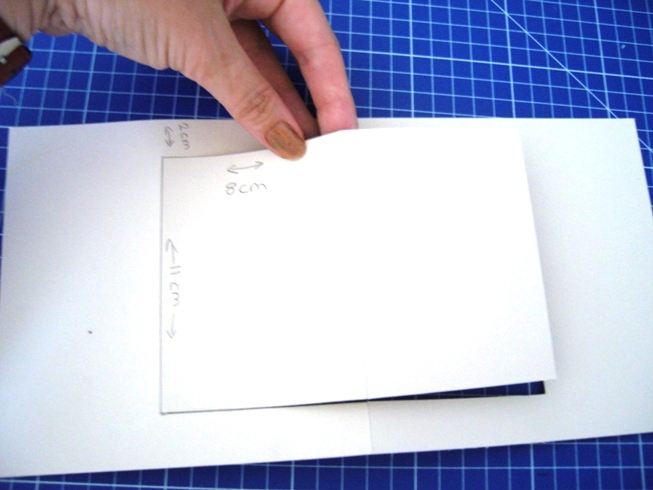
Keeping the card folded cut down the 8cm lines with a craft knife. Score the 11cm line Open the card out and this time, cut the other 11cm line.
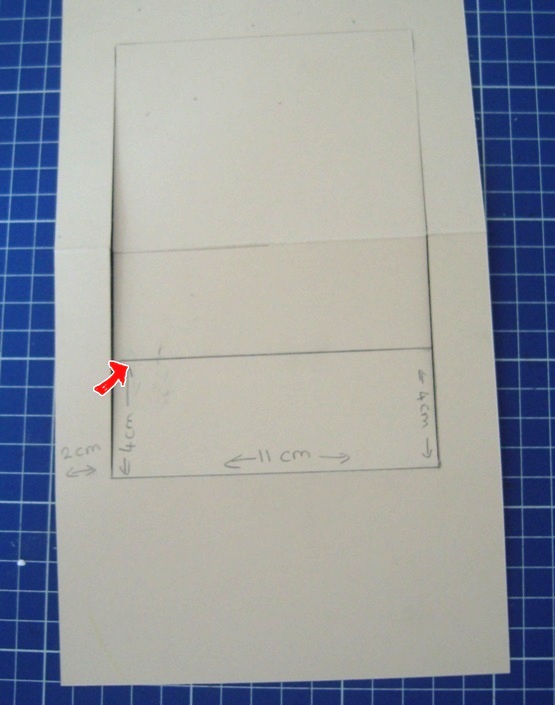
Lay the card open again, score and fold 4cm above your scored 11cm line
Now cut along the original centre fold line
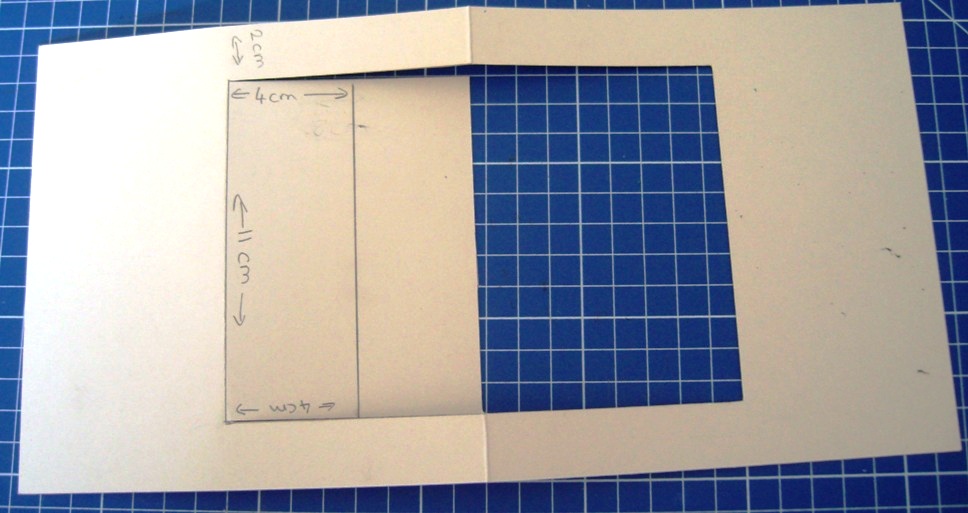
Now your card should look like this if you fold the scored lines and bend the flap over at the back.
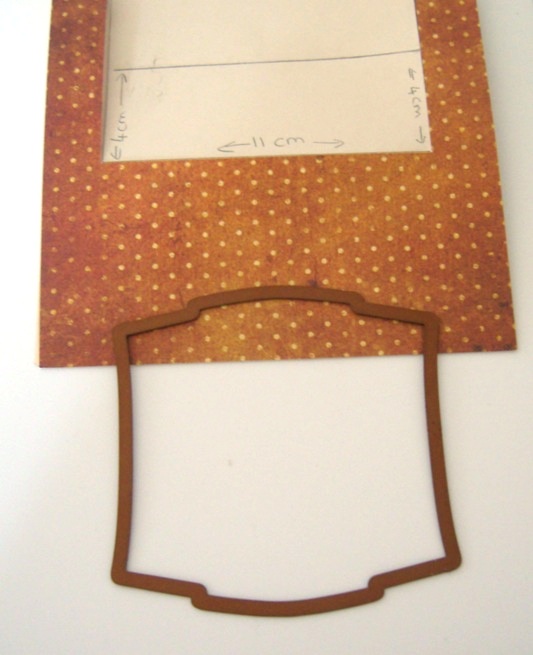
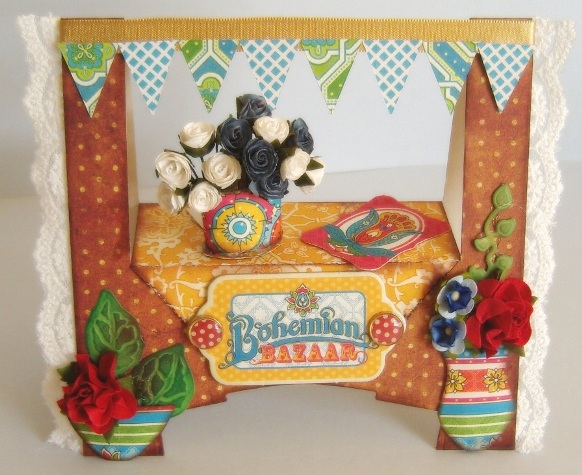
At this stage I covered mine with patterned paper (I have used a paper from a Bo Bunny Double Dot Paper Pad), but if you started out with a card base you like you don’t need to. I used white so my marks would show in the photo. If you have a die or some kind of template to have the desired effect use it to make the bottom of your stall a little more interesting as I have done below:
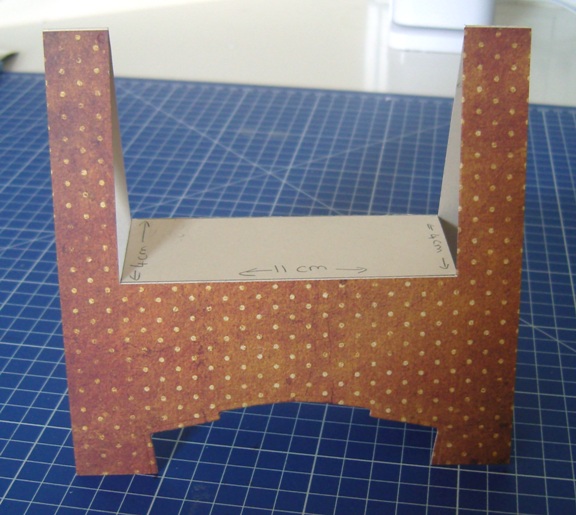
Your card should now look like this.
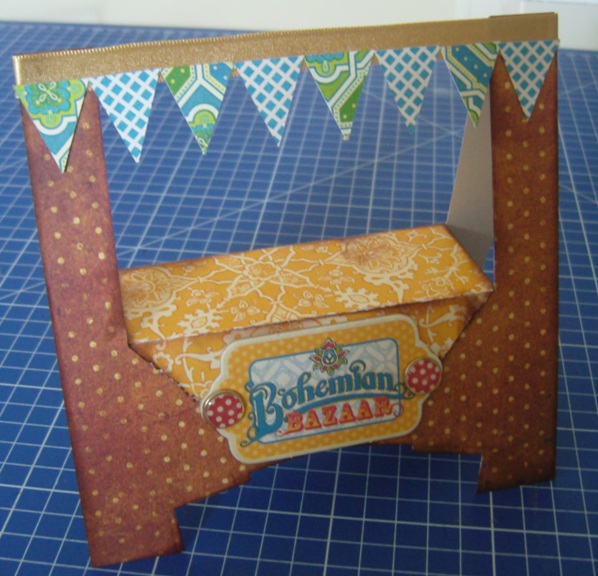
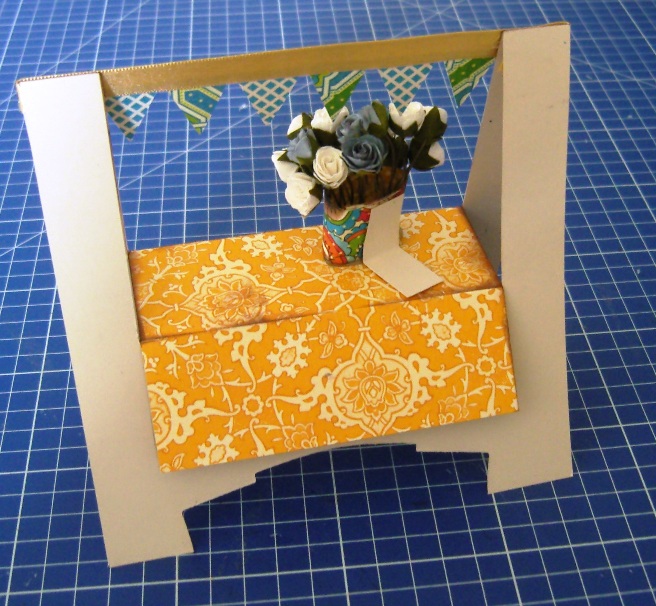
Cut a table cloth out of your chosen patterns paper (I have used papers from the Graphic 45 Bohemian Bazaar collection for my tablecloth, bunting and vases). It should measure 11cm wide x 11.4 cm deep. Score to fit the table top and back flap. Cut the front into a triangle and fix into place. I have added a Bohemian Bazaar chipboard embellishment to mine. For the bunting attach a strip of ribbon across the top as shown wrap ends around the back and fix securely. Attach a thin layer of double sided tape to the bottom edge of the ribbon and attach some triangles of patterned paper.
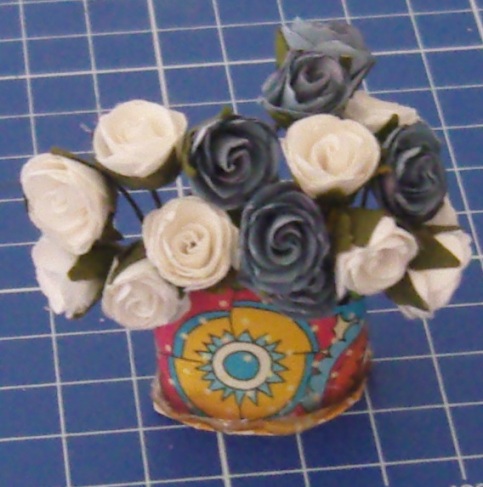
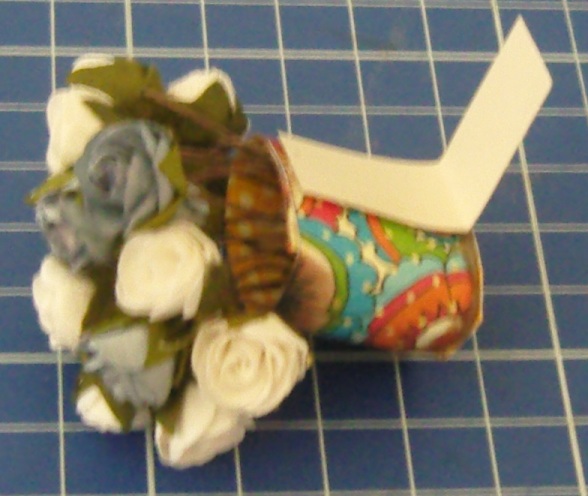
Now for the flowers; cut a strip of patterned paper 9x2cm. Bend around your fingers to form a cylinder and glue (ink edges if desired). Clip some mulberry flowers length and pop them into your vase (cylinder) hold in position, turn upside down and add plenty of glue from a hot melt glue gun. If you don’t have a glue gun you could fill your vase with blue-tac and poke your flowers into place.
Make a folder tag and attach to the back
Fix to your car by the tag only. The tag allows your vase to fold flat when the card is closed.
Tricky bits done, now decorate! I have made some little vases from the Bohemian Bazaar paper and stuck them on the front along with some paper flowers. I really wanted to put a string of pearls on the table top beside the vase but I didn’t have any. I felt there was something missing so I added some Marianne design vintage lace up the sides. Click on the image to see a larger version.
I hope you enjoyed our lesson. If you have a blog or Facebook please drop by our blog or Facebook page and leave a link to your card for us, we would love to see how your card turned out.
Copyright Notice: No part of this tutorial may be reproduced or used for commercial use in any way, shape or form, nor feature on any other website.
|